haWHYnXX
-
Posts
422 -
Joined
-
Last visited
Content Type
Profiles
Forums
Gallery
Events
Everything posted by haWHYnXX
-
Partzilla - always cheaper than dealer, Honda Directline, and Ron Ayers.
-
You sanded down, cleaned, and greased BOTH sliders right? I'm always checking to make sure the caliper and bracket can slide apart easily when I separate them. Usually one slider is okay, but the other one gets gunked up a little more and trends to stick.
-
When I worked on mine awhile ago, any stud that came out with the nut attached went to the wire wheel, then some PB Blast, sat for about 20 mins, and finally into the vise for nut removal. Then ran a tap through each nut and a die down each stud - including the studs that remained in the head. Amazing how much cleaner the studs look after that. Finally anti-seize during reassembly. Worked like a charm. When I pulled them off again a few months ago, nuts came off easily. I made sure to repeat the process.
-
Haha - that's some phenomenal problem solving skills right there!!!
-
Damn, 99Bird (Gary) just bought one that arrived last Thursday....
-
Partzilla has been cheaper for EVERY Blackbird part I ever looked up. 72250-MAT-A30ZB. $380.50 And usually when you look up by year, it lists only your part numbers and not all numbers for every year.
-
Blink code.....next time FI light comes on, pull over, put bike in neutral, and put kickstand down. Then count the FI light blinks. There will be a series of long and short blinks - each long blink is 5, and short blinks are single. (Ex: long short short is 7). Then look up what fault that code is. That being said, it is a 2000. Have you done the loom fix yet?
-
Mine is a Datel voltmeter mounted on the dash. I used to have it mounted in the side panel, but found that, while blingy and cool, it wasn't convenient to monitor (always having to look down) - much easier where it is now. Very old pic of the side panel mount (need to enlarge - it's the only one I could find)
-
Unfortunately, he's actually partially correct here. On my 97 and 2000, I installed a switch to turn on my fan at will. There's a thermo switch in the side of the radiator for the 2000 and older Birds which completes ground when temp reaches whatever preset it is and turns the fan on (hot lead already supplied to fan motor on a separate line). I tapped into that line and complete the ground with my manual switch (thermo switch still works too). My wife's 2001 does not have that same thermo switch in the side and the microfiche confirms different part numbers for older vs newer rads. I gather since you have actual temp readouts, you have a 2001 or newer with digital dash and sensor/switch set-up will be different than the older ones - which I must also assume Zero has or he really is talking out of his ass.
-
 I'll take #13.
 -
Yes, I did it this weekend. You are correct, it's a metal reinforced seal, but came out pretty easy with a screwdriver pressed along the edge. It did end up all bent to hell, but I was replacing it anyway.Put the new one in by positioning it and pressing it in as far as I could with my fingers, then tapping it in with a 17mm socket. Nice, good to know. But since we both just changed it with over 100K, we prob won't be doing it again!
-
Rich, Did you ever do this? I just replaced mine like maybe three weeks ago when I had the case apart. IIRC, I don't think you're gonna be able to replace from the outside. I just threw my old one away but seem to think it was metal reinforced and won't bend.
-
The single biggest breakthrough for me was to spread the caliper/pads before re-assembly. Getting everything lined up was always a pain. Haven't had any trouble putting the rear on since I started that practice. A little grease on the spacers to hold them in place, put the chain on the sprocket, and she just lifts right into place if those pads have plenty of room for the rotor to slot into. Good luck...
-
Hub width should be the same but I know for a fact that the width between rotors is the same. I'm able to swap wheels from my '97 to the '00 with no rotor fitment issues. As Bird said, only thing that has to happen is that the entire axle/spacer assy has to go with the wheel. Meaning 97 axle, spacers, and wheel (with stock 97 rotors mounted in stock 97 position) fits in 2000 forks. Hub width should be the same but I know for a fact that the width between rotors is the same. I'm able to swap wheels from my '97 to the '00 with no rotor fitment issues. As Joe said, only thing that has to happen is that the entire axle/spacer assy has to go with the wheel. Meaning 97 axle, spacers, and wheel (with stock 97 rotors mounted in stock 97 position) fits in 2000 forks.
-
WTB - Mototek Innovations Undertail
haWHYnXX replied to TurboJoe's topic in The Sales Floor -- For Sale/Wanted
I got both, but drilled a couple of holes in the front of the undertail and snugged them up to the battery box with zip ties. Works like a charm!!! -
Several jackets and pants.
haWHYnXX replied to RichardCranium's topic in The Sales Floor -- For Sale/Wanted
PM sent. I'll take the Phantom. -
There is a small hole in the side of the primary drive gear that you put a small screwdriver into (I use an awl). When you look into that hole you will see the sub-gear behind it a very tiny bit unaligned. Just put a little pressure between those holes with the awl and it lines up the primary drive gear teeth with the sub-gear teeth (which are spring loaded to provide pressure) allowing the basket to slide right in. Hard part is finding the hole. I turn the motor over slowly with a socket and breaker bar on the ignition pulse generator rotor bolt while looking at the primary drive gear behind the ignition pulse generator rotor with a flashlight. As the drive gear turns you will see a bunch of holes go by, but you're looking for one that is only 2-3mm in diameter. It is the only one that small, you'll know when you see it. Had a hell of a time figuring this out the first time I took mine apart too. Happy to explain over phone to anyone who pulls their clutch apart in the future. Just send a PM.
-
Blackbird parts for sale....LAST CALL!
haWHYnXX replied to HANKSXXX's topic in The Sales Floor -- For Sale/Wanted
PM sent -
Same here. I wore them in the summer when my leathers were just too much. I wear shorts at work, so I can just slip these on over them and go. If you stand up on the pegs at highway speeds you can get a cheap thrill too. Sweet - always up for a cheap thrill!!!! Nice to hear the great review.
-
PM sent. I'm in for the pants.
-
Neutral switch - dash light dims till finally quits.
haWHYnXX replied to LowFlyerXX's topic in The Garage
Maybe the "circuit board" back of the instrument cluster where the bulb socket spins on and off. Could be the circuit part flattens out with the heat and doesn't make good contact. I had that happen on the '97 where the bulb would not light in one socket, but would in another. Bent the tabs on the socket a little for better contact and poof it worked again. Easy check at least... -
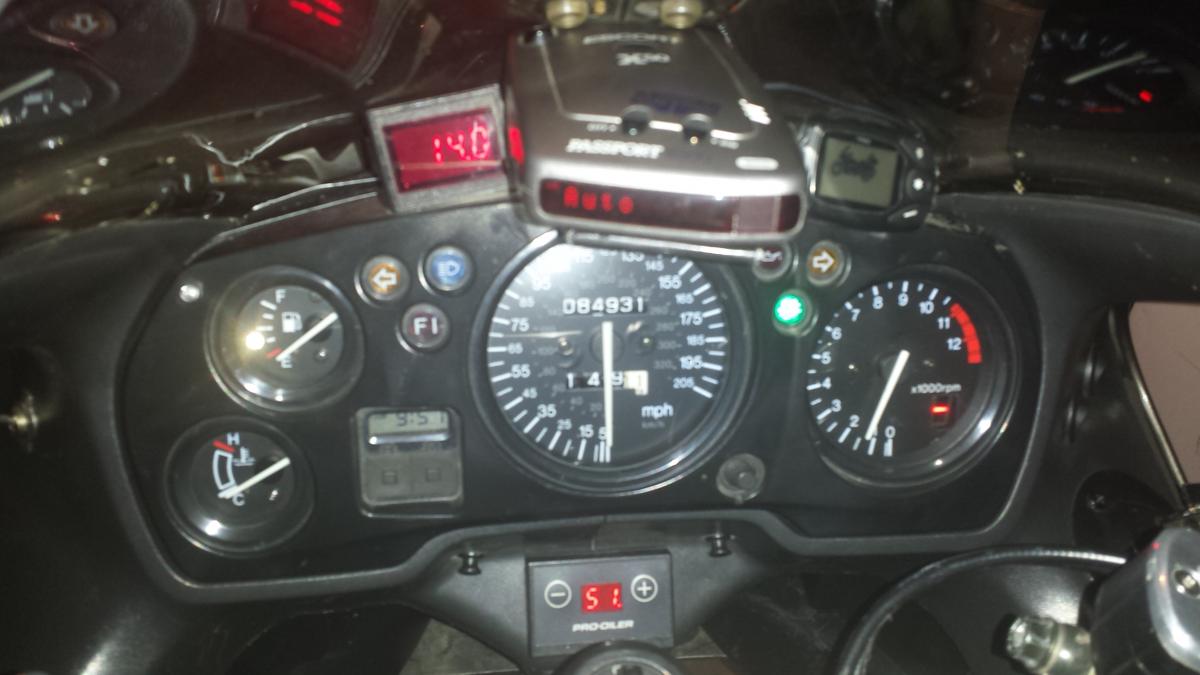
It's for the chain oiler. Nice bike BTW.
-
Like this? (different cans but still 2 Bros):
-
Personally I think for your weight and the way you're going to ride the 'Bird, 1.0 springs are not right for you. I would look into maybe .975 and 5wt oil. You're not going to be at the track and the extra stiffness won't be needed. Plus the slightly softer springs should soak up some of the bumps you'll encounter on your roads. Just my 2 cents. Oh, and a good rear shock will perfectly compliment your new front end. I agree with Redbird that the Ohlins are a little overpriced for your application, but the Penske will do just fine.
-
When mine broke, I drilled two small holes into the broken bracket on both sides (the part still attached to the oil pan, and the broken part in my hand). Then I JB Welded the pieces together while JB Welding cut pieces of finishing nails in the holes I drilled. Worked like a charm - been in place over two years.