
Zero Knievel
-
Posts
25,252 -
Joined
-
Days Won
34
Content Type
Profiles
Forums
Gallery
Events
Everything posted by Zero Knievel
-
I've never bothered with anything sans cleaning the calipers before installing new pads. Both on bikes and pretty much every vehicle I've ever worked on.
-
I'm in to saving a buck like everyone else, but Colgate? Just spend the $20 for the kit. If you do it right, you'll easily be able to use it on 2-3 vehicles or save it for when it needs to be done again.
-
My guess (and memory) says that when air is trapped in a system, it will vigorously seek the fastest way out. If you open a port and coolant shoots out, it's because air is trapped behind it.
-
3M makes a headlight kit for under $20. Most auto parts stores should have it. Works very well (used it on my pickup a month or so ago). My 2 cents is that you take your time on the lowest grit and make sure you do a good job. The more time on the lowest grit yields better results, and stop frequently to brush away the "dust" that generates...both on the lens and the sanding disc. It improves the life of it. Do it right and by time you get to the polishing stage it'll look like new. All you need is a power drill and a spray bottle for water.
-

SOLD SOLD SOLD SOLD SOLD SOLD
Zero Knievel replied to DaveK's topic in The Sales Floor -- For Sale/Wanted
If I knew someone who needed a netbook, I'd have been first. I'm surprised you find an iPhone sufficent to compete with a netbook. -
SOLD SOLD SOLD SOLD SOLD SOLD
Zero Knievel replied to DaveK's topic in The Sales Floor -- For Sale/Wanted
Upgrading already? Tempting, but I've already spent $$$ on a new PC and brake lines for the XX. -
Well, I'm going to order my brake lines and clutch line today from HEL Performance. Their web page was buggy and didn't have photos showing what my color options would look like, and I asked in an e-mail about a discount for buying both kits at one time. Here is their reply.... I responded.... I'll let you know what the total comes out to since they supposedly are running a deal. *EDIT* 1-10 line kit for a 1999 Honda CBR1100XX CARBO lines/ with BLACK ends 1-clutch line for a 1999 Honda CBR1100XX CARBO lines/ with BLACK ends free shipping to VA. $485.10 total. Not bad.
-
FAQ - How to Install the Datel Volt Meter
Zero Knievel replied to ActionStarCBRxx's topic in The Garage
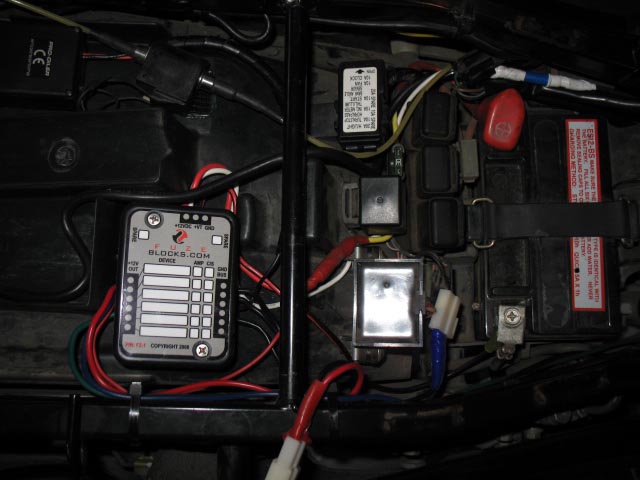
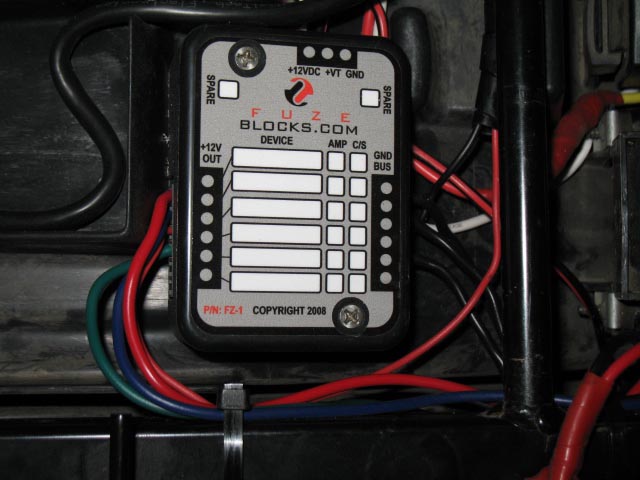
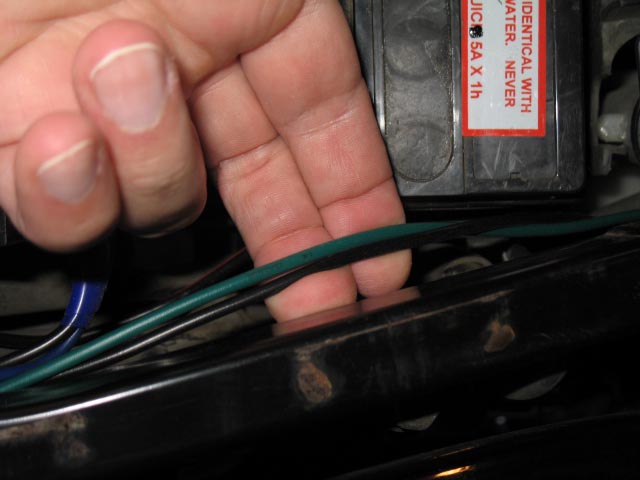
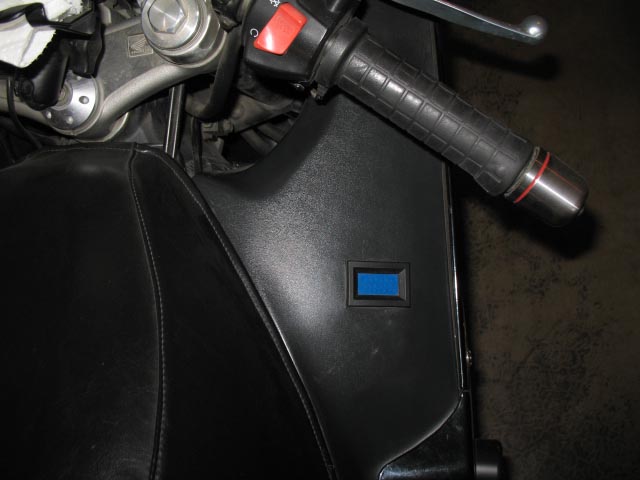
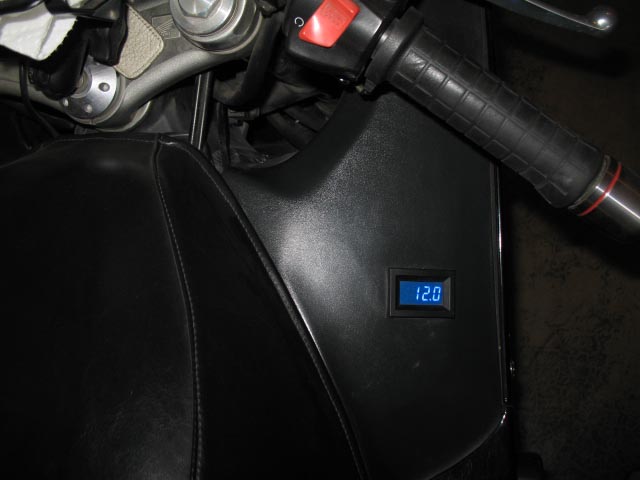
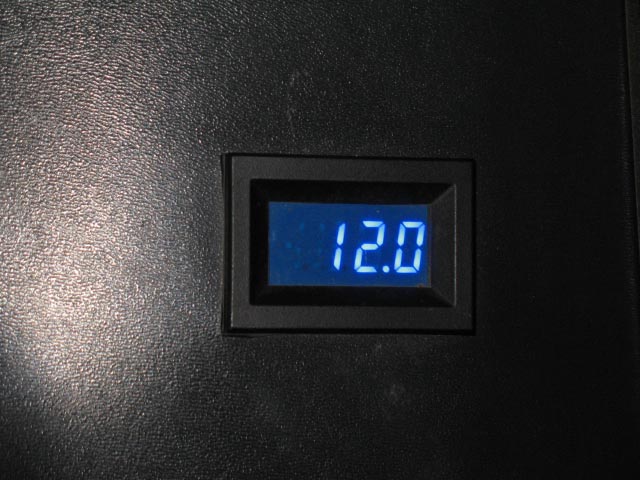
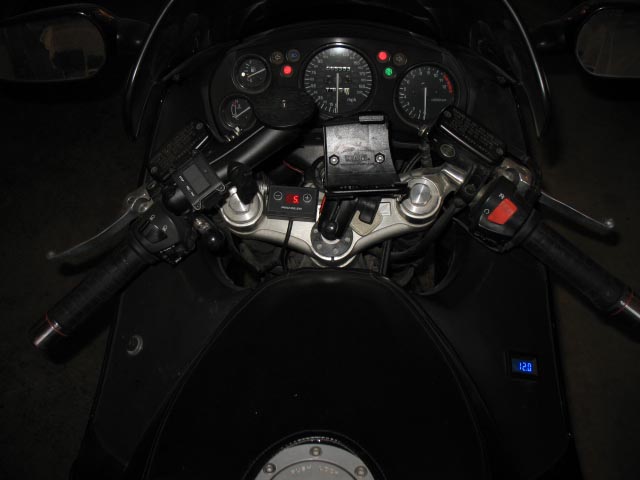
Okay. Sorry I took so long to do this, but so you can see what I did with my Datel.... For all the ways to hook it in, I ultimately went with the FZ-1 from Fuseblocks.com. It was $80, but since I had several electrical devices I wanted switched power for, this was a smarter move over splicing into the wiring harness wherever I found a place to do so. I spent the money on several spools of colored wire, and for the Datel I used Green for hot and Black for ground. The feed for the Datel comes right off the battery through the FZ-1. The unit hooks directly to the battery, and the wire you connect to a switched circuit serves only to toggle the relay that closes the circuit for switched power accessories. I also bought special connectors from Vintage Connectors (or something spelled like that [verify]). I used one of their two-wire unlatched connectors to be a "break away" point for the connection to the FZ-1 (done behind the right cowling). This makes it easier to remove the trim panel the Datel is mounted to as I don't mess with detaching wires from the Datel each time. This also helps to protect the wiring should an accident make the panel fly off. The unlatched connectors hold tight enough that they won't work loose, while allowing a sufficient force will pull the connection apart rather than rip the wires out. While the Datel looks good in the picture, you should know that it is somewhere from 1/4" to 1/2" too high up (it should be more towards the aft of the bike). I measured but either marked the trim panel wrong or didn't compensate for its curved surface properly. Once the Datel was on, the trim panel couldn't go back on without the Datel hitting the duct feeding the airbox. I had no choice but to carve out a notch from the duct until the panel could go back on easily. Then, I sealed the hole in the duct with aluminum tape. It works fine, but I wish I got it right the first time. This is one of those, measure 5 times and cut once situations. As far as placement goes, this is the best I could do with the stock surfaces on the XX. It's not a great location if you want to watch your voltage all the time or at easy glance, but you really don't need to watch voltage that closely. I liked the blue more than the red, but it is BRIGHT at night, so if you want to place your Datel somewhere more in your line of sight, be advised. I can move my forearm or just momentarily release the throttle to glance at the meter. At worst, when the sun's at a unfavorable angle, I have to shade the display to read it.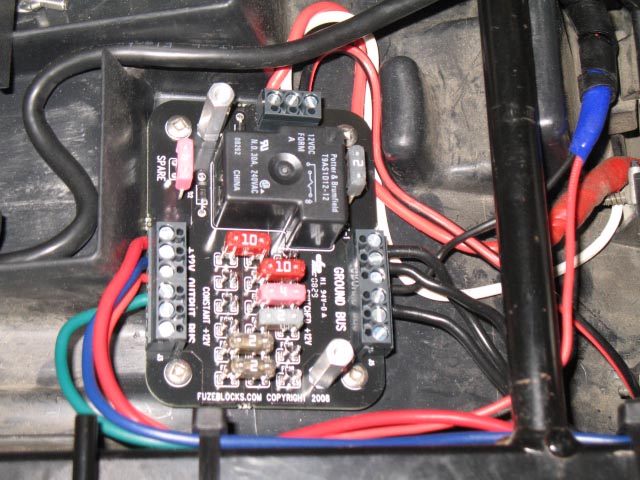
-
Thanks! I thought there should be spacers during the install, but last time I did something like this was on my old Kawasaki, and I don't remember how I did that job (nor did I save the paperwork from that kit).
-
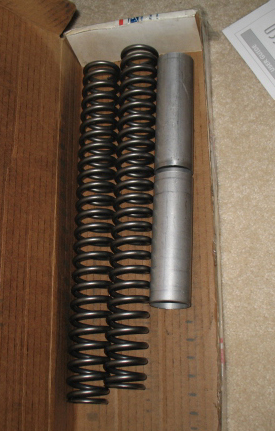
Here are pics of what I have. No instructions. The "washers" in the pic have the 6 of one size on top, the two slightly larger ones on the bottom. I know the springs go in first with the tubes on top, but I don't know what to do with the washers. The seller believes they all go in on top of the tubes, but that there are two odd-sized ones make me wonder if order of installation is important or not.

-
A kit I bought from another member comes with 8 "washers" (I'll call them spacers), the two springs and the two metal cylinders. Of the 8 spacers two are darker and slightly larger, both in interior and exterior diameters. Is there any particular order these are supposed to be used during the installation?
-
FAQ - How to Install the Datel Volt Meter
Zero Knievel replied to ActionStarCBRxx's topic in The Garage
I should remember to snap some pics of mine and post them. -
The all powerful Google says linkie no workie: Sorry, we couldn't find http://www.vintageconnectors.com/. Here are some related websites: Did you mean http://www.vintageconnections.com ? Well, harpoon me for trying to do something from memory. :icon_snooty:
-
In the alternative, go to www.vintageconnectors.com. If you have the wires on each side and just no way to connect them as a group, this site has many types of latching and non-latching connectors for 1 through 5-wire connections.
-
WTB FI Blackbird in Black
Zero Knievel replied to aksaz's topic in The Sales Floor -- For Sale/Wanted
I'd almost consider selling mine for that price. -
1999 Honda CBR1100XX Blackbird
Zero Knievel replied to JuXXtin's topic in The Sales Floor -- For Sale/Wanted
SOLD! Be at my place at 6 pm with a leather thong and a smile. -
Pablo finally got back to me. Turns out he shipped to an old address (which is now an abandoned building). Odd since the correct address was listed on the PayPal payment.
-
Well, with the recent cold front....nothing. It just stopped working, but it hadn't been working great the last couple of weeks. Serviced it in Jan '08. Most "stop leak" agents in the 134a only works on hoses and o-rings. I added stuff that seals leaks in metal, and I know the leak is in the evaporator coil. If it keeps leaking after this, I have no choice but to pull it out of the firewall. Indian summer is coming up. Not quite the end of the hot/humid weather yet.
-
Never mind. I decided to take one of the empty 12oz cans, attach it to the low pressure port, and let the system bleed out the excess pressure. Seemed to do the job. I'm not sure what 12 oz of gas equates to in capacity, but I can always top off the system properly on Monday.
-
I had a system leak, put in a leak sealant and more "freon." I suspect I might have put too much in. 1. Is there any harm likely to come from this? 2. How would you "bleed off" the excess? I have an empty refrigerant can with the connection hose and gauge if that helps. The system takes 1 lb 4 oz. I used a 3 oz can of sealant and at least two 12 oz cans of R-134a.
-
Ordered some stuff to fix some damage to my Pro-Oiler. Bike's been waiting a month for the stuff to arrive. Ordered it on 8/13....paid PayPay. Pablo got the money. He had a delay and told me on 9/3 that the items were shipped on 8/28 and 8/31. 9/16...nothing came yet. E-mail Pablo to check on when I should expect delivery from his part of the world. 9/25...still nothing...no word from Pablo. Is there anything going on?
-
1999 Honda CBR1100XX Blackbird
Zero Knievel replied to JuXXtin's topic in The Sales Floor -- For Sale/Wanted
With the economy, perhaps you should hold onto her? -
You're kidding me? A chip with two wires attached?
-
I doubt it's worth the investment (not that prices were listed). A quality O-ring or X-ring chain tends to last as long as your sprockets. That's why you replace them at the same time. My last sprocket/chain set was the sprockets I had on the bike when I bought it used (likely OEM when it was made) and the DID X-ring chain I got for a sprocket replacement, but because the shop sent me an aluminum rear sprocket and not a steel one, my new sprockets were chewed up after a cross-country trip. I put back on my old sprockets and stuck with the chain. THEN, I installed a ProOiler. IIRC, I got over 40K on that chain/sprocket set before I had to replace it. Had everything been new, Pablo thinks I should have gone farther. If the chain goes that far, at some point you likely will have to replace the sprockets....meaning you put a worn chain on a new set of sprockets....prematurely shortening their life. *** My 2 cents. The ProOiler did more than anything else to extend the life of chain and sprockets. By keeping the "o-rings" moist and lubed at ALL times, you reduce what really kills the sprockets and chain....premature wearout of the o-ring that then lets the sealed grease out and dirt in. This kills the chain early, and a worn chain kills your sprockets. From all I can tell, they basically are using the toughest o-rings available to prevent wearout, but the whole wearout problem is the result of them going dry from friction, not because the current o-rings are "defective" or otherwise insufficient to do the job. Keep your chain constantly lubed so the friction doesn't dry out the o-rings and your chain will go 3-5 times its normal life by traditional cleaning and lubing. I SUPPOSE that IF you don't want to buy a Pro-Oiler (which pays for itself in no time), but want longer life from your sprockets when doing traditional cleaning and lubing, this could be your best alternative. Never clean and lube your chain and I doubt you'd get much longer life out of this new product.
-
SOLD Aftermarket Fork Springs for the XX
Zero Knievel replied to JB4XX's topic in The Sales Floor -- For Sale/Wanted
PM sent too.