

Toynut
-
Posts
1,669 -
Joined
-
Last visited
Content Type
Profiles
Forums
Gallery
Events
Everything posted by Toynut
-
Mobil One oil Filter # M1-110 or M1-108 (shorter OEM length). Pure One synthetic media filters are also excellent (and cheaper). Both are made by Champion Labs. BTW, the Saturn Vue V6 is a Honda engine, FYI. http://people.msoe.edu/~yoderw/oilfilterst...oilfilters.html
-
You know.........., It's really not bad looking....................... .............................for a Pinata!! http://www.wikihow.com/Make-a-Pi%C3%B1ata Seriously though, having worked a bit with fiberglass mat, coremat, and gelcoat on some pet projects in the distant past, you certainly have undertaken one tough and aggravating project to get perfect, for sure.
-
Costco has a 2 part epoxy (with the paint chips) system for $59.95.
-
You can go to the hardware store and buy a few replacement garden hose washers for a few cents. 1 or 2 of them placed on the back of the bulb between the base and the retaining clip will do the trick. The DDM site I referred to warranties the HID ballasts and the bulbs for life! All DDM HID kits come standard with a FREE lifetime warranty. This is an important consideration. Many retailers charge extra for this. Also, Apexcone has been in business since 2001. So you can be assured that we will be there for service if you ever need it.
-
You might want to put a layer of tape or heat shrink tubing around the left grip to keep it from using the bar as a heat sink (the right side has the throttle tube as the insulator). This will help keep the temps of both grips about the same. On occasion, you may want to warm up your grips a bit before trying to install them (hair dryer/heat gun, hot water). This will allow you a bit more stretch to fit them on easier. I don't recommend any spray lubricant inside the grips as it may dissolve the adhesive on the elements.
-
Where to order longer/custom brake and clutch lines?
Toynut replied to Hank.SD's topic in The Garage
You can get them here: http://www.spieglerusa.com/ If you need longer throttle cable sets : http://www.motionpro.com/ BTW, You might want to look at an LSL tubular bar conversion from Spiegler, which will include everything you need: http://www.spieglerusa.com/cfm/sbk.cfm -
Read this thread: http://www.cbr1100xx.org/forums/index.php?showtopic=60817 And buy your 55 watt kit from these guys: https://www.ddmtuning.com/index.php?pcsid=4...ent=61&pg=1 'Nuff said! :icon_thumbsup:
-
Bulb life is shortened considerably by voltage fluctuations in your bikes charging system, particularly from excessively high voltage from a bad regulator. It is also shortened by vibration, so if your front suspension is in need of a tune up or you are driving on poor roadways the filaments will take a physical beating. Certain "Extra Bright" aftermarket bulbs are actually designed to be "overdriven" by a typical running voltage. The bulbs are actually designed to run on 12 volts (or less) and will produce a brighter light on the 13.4-14.2 volts that your bikes typical charging system puts out, at the expense of bulb life. In 13,000 miles, your bulbs probably ran 300-400 hours (on typical city cycle riding), which is considerably shorter than typical halogen bulb life.
-
The Corbin will be somewhat lower than the stock seat and a bit narrower at the front. You can lower an fjr without too much trouble in the rear as well as a bit at the front. The suspension settings will remain the same, but total travel will be reduced before contacting the bottom of the fender in the rear, or the top of your front fender may contact some bits under the fairing if you are on the heavy side (or ride two up). You will then need to firm up your preload from your current settings (very easily done) to compensate. Pulling the bike on the centerstand will take a bit more effort with the lowered bike as well. Check with the FJRForum.com members for additional tips.
-
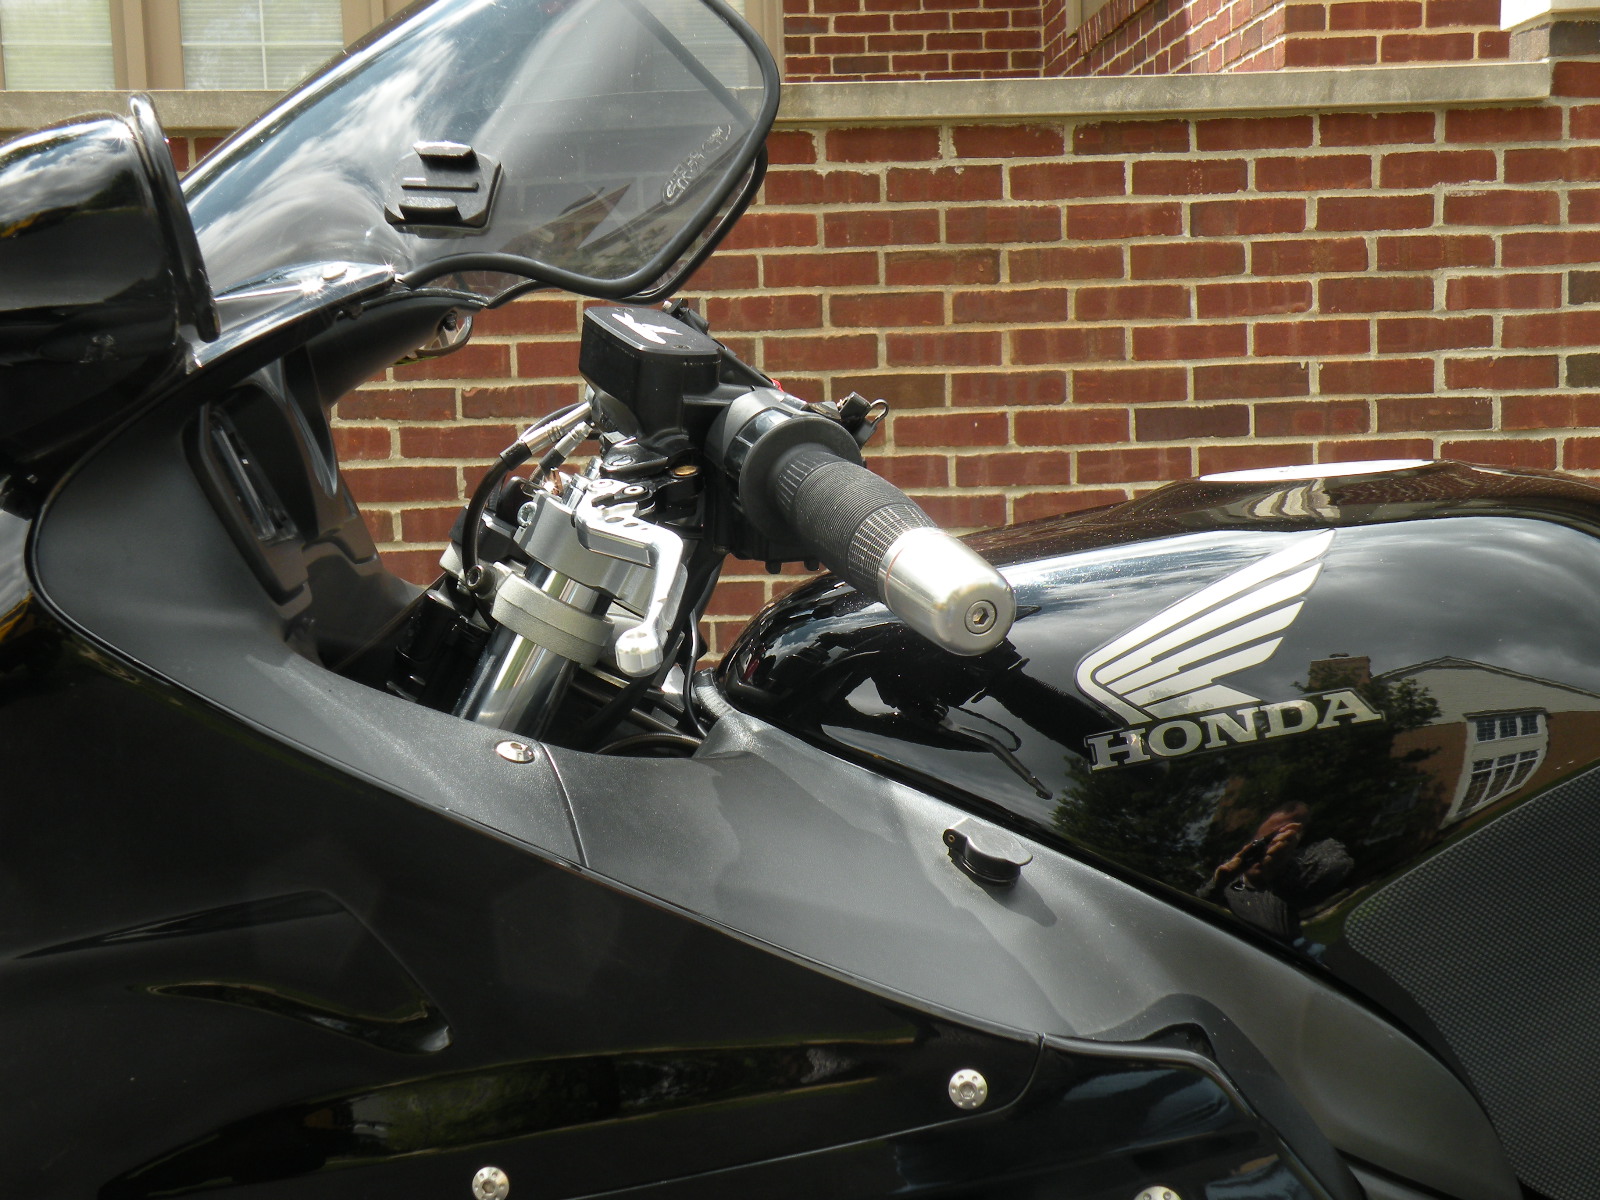
Yep, no clearance problems at all with the Givi touring screen. I have not installed a stock screen to check for clearance, though.
-
Here are some installed pics: I do have my fork tubes raised a bit, but the Helis are currently raised to a point where they would be on a normal bird for comparison purposes. The Traxxion front end was set up a bit too firm and the adjusters don't allow me to set my front sag correctly while keep the right suspension geometry for quicker steering. I did have to add a longer set of Spiegler brake lines (I ordered +4, but, I think +3 would have worked out nicely), the clutch length (which is already +2inches from the speigler GB) seems to be okay, but I may install the new clutch line (+4) anyway. The stock throttle cables are a bit tight, but the engine rpms are still steady at full lock. If I can't reroute them a bit, I will install the +2 longer ones I got from Motion Pro. In summary; The overall install is very similar to the final control position of the LSL bar conversion while still retaining the look of clip ons.
-
Wow! You've got like $1200 in clip ons and handle bars! Not including lines or cables. Let me know if ya wanna get rid of any of those cheap... :icon_doh: Sure.......................... Right after my wife reads your posting!!
-
There was recently a national recall of a huge batch of valve stems that were in use. It may be a stretch but it could be possible that you had one installed by a shop on your rim at a prior tire change. Now that you have new valve stems on the bird, you can always use the soapy water trick on the tire, rim area, and valve stem area just to give yourself some peace of mind.
-
I am using Jaws bar risers,vtec bars and light switch with existing cables. Stock windscreen or aftermarket? Brake/clutch lines and cables, stock length? Did you have any interference issues with the bottom of the windscreen?
-
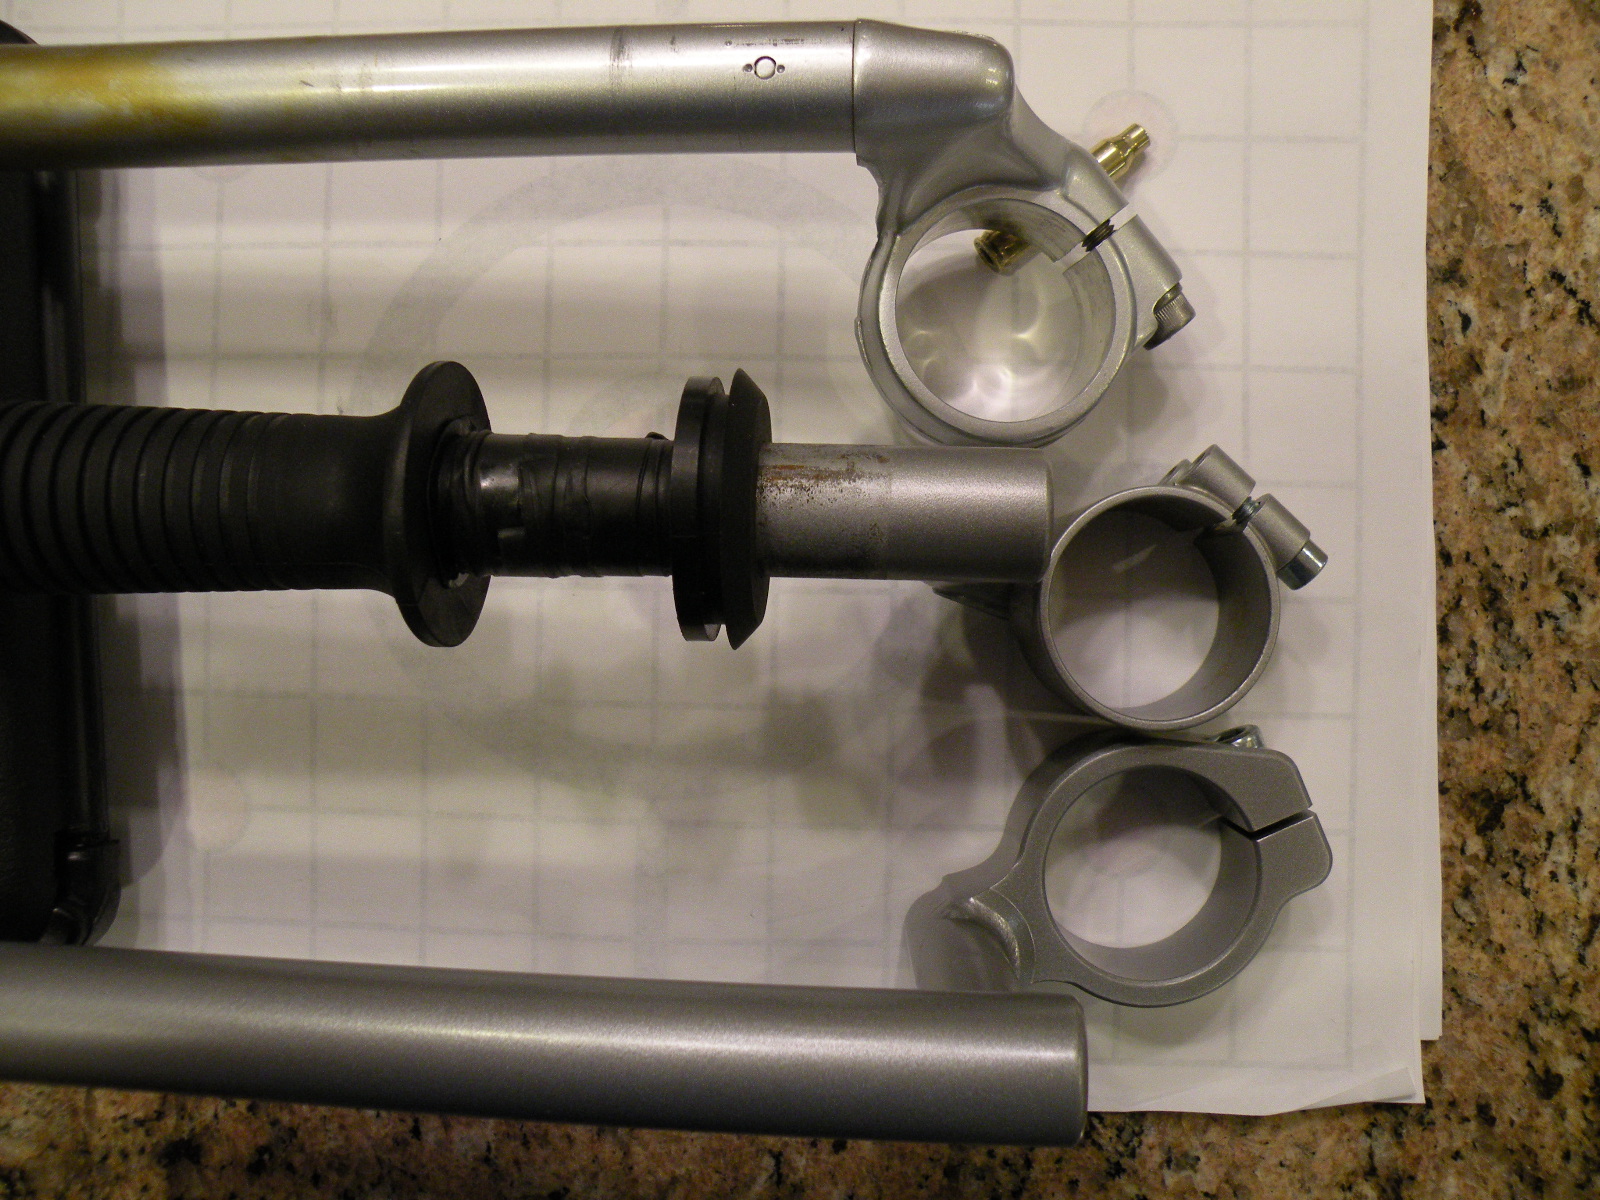
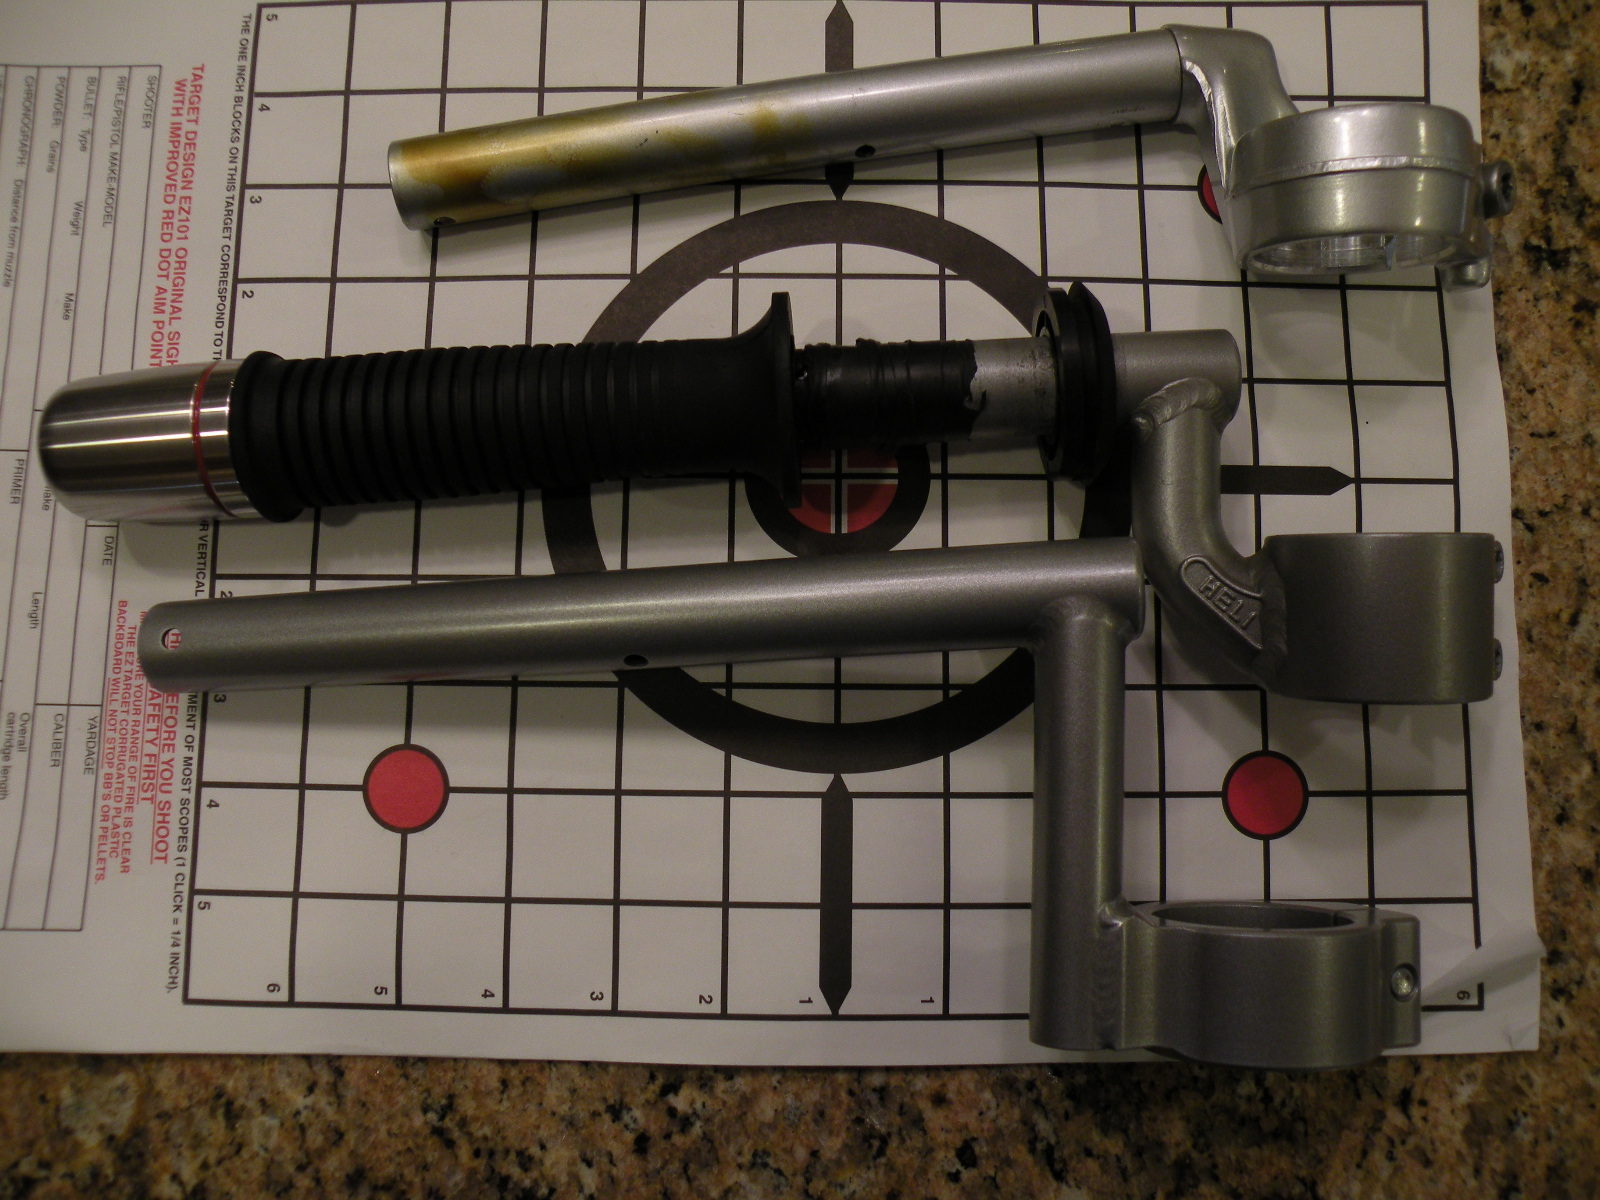
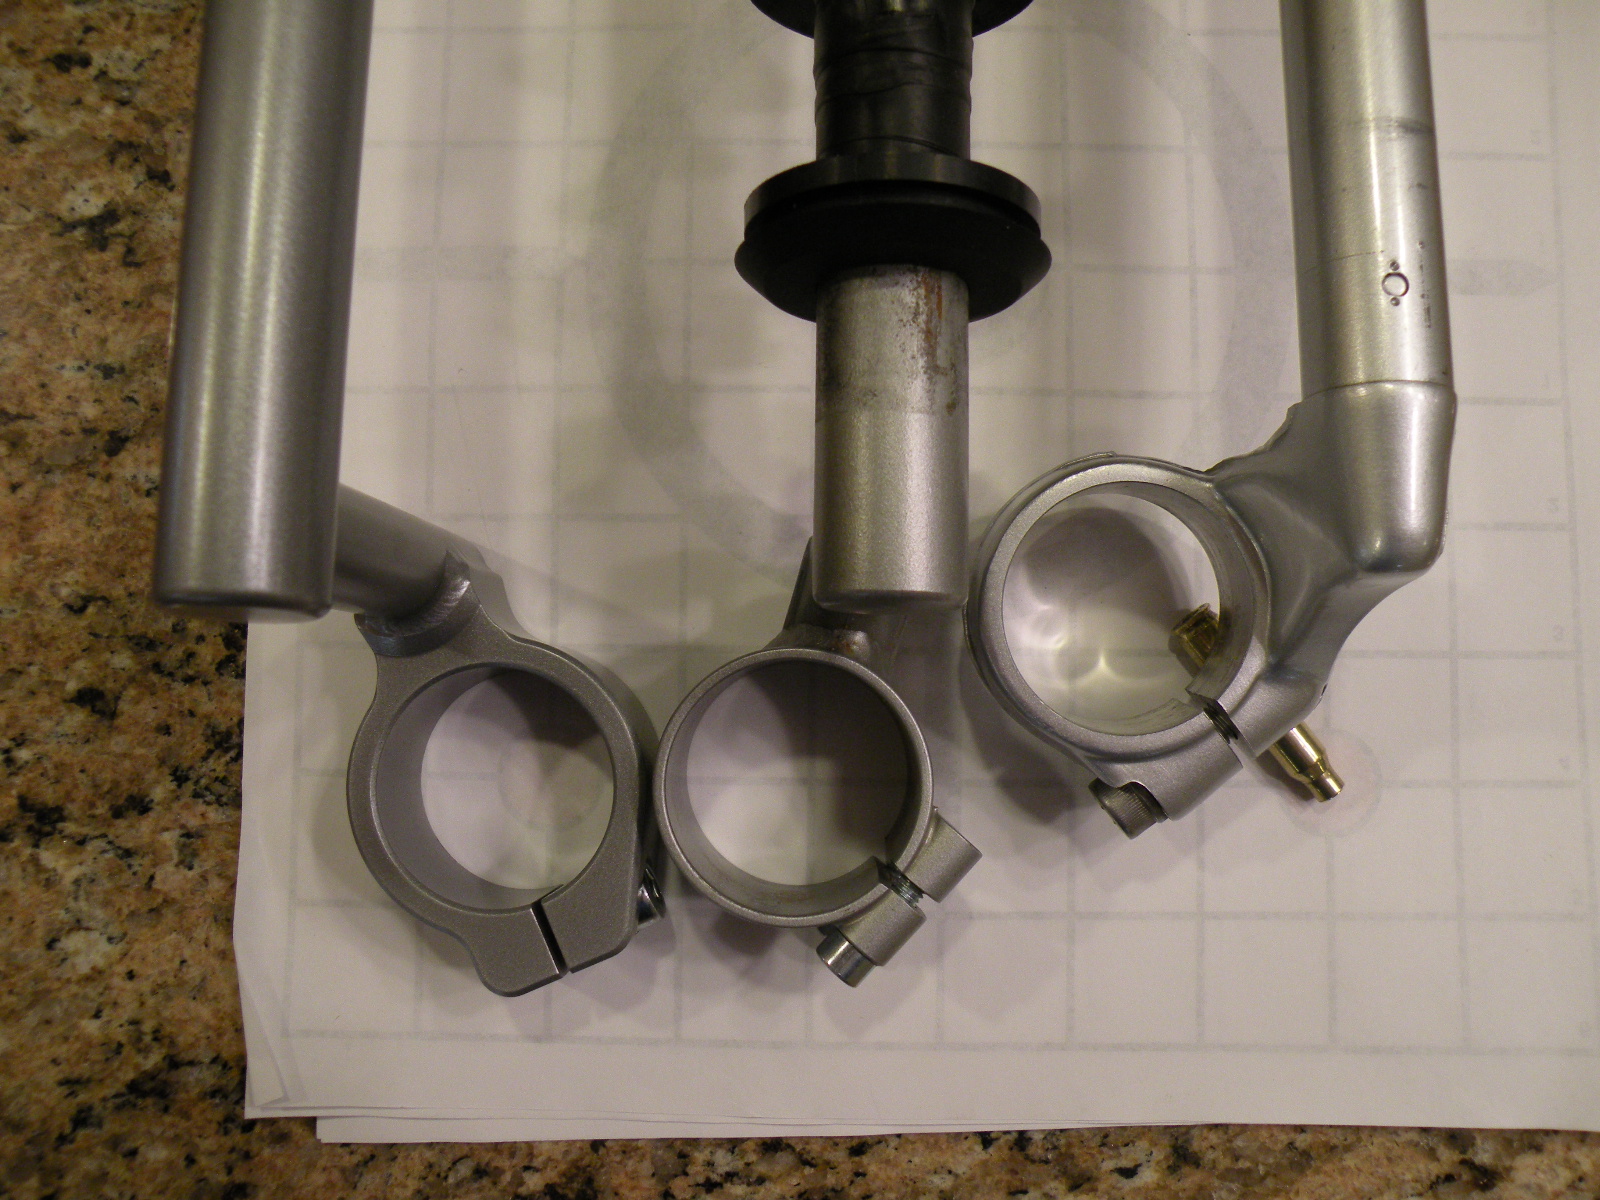
Recently I asked if anyone has installed the VFR spec Helis on their Bird yet. I spoke to Heli on the availability of the XX-spec Helis and they said that they are currently in the process of changing the tooling and design of their bars and will make a new improved version available in the near future. I ordered a set of VFR spec units to try to see the improvement in comfort over the XX spec bars I already have installed on the bike. I also have a set of LSL kit that I never installed along with a set of Convertibars. I figured the Helis may be aesthetically more correct (I do like the Gilles Variobar kits, however). Anyway, I had already installed a complete set of +2 inch longer lines on the bike when I installed a Galfer kit a couple of years ago. I also had Motion pro make me a 2 inch longer set of throttle cables that are still in the package as I did not need them with the XX-spec Helis. I received the bars today and have a picture of them along with the XX spec Helis and stock bars for comparison. The VFR bars seem to have about an inchh more setback than the XX spec bars looking down at them from the top in relationship to the center of the fork tube bore (at least at the base of the bars), and about two inches more setback than the stock clip ons. The stock bars measured from the top of the tube nearest the bore line and the top of the clamp ring surface is approximately 1.410 inches. The XX-spec Helis, measured the same way rise approximately 1.910 inches. The VFR-spec Helis are even taller, and measure 3.275 inches. They appear to be of the newer design which is to be applied to the future version of the XX bars and appear to be substantially more robust. The collar uses a single set screw and is shorter in height the XX-spec Helis. The pictures were set up to show the bars relatively parallel on the top view and the bases were basically on the same plane in the horizontal photo. As you can see the VFR bars appear to have a bit more downward bend (acute angle) in the tubes (similar to the stock clip ons), than the XX-spec Helis. I believe that the throttle cables will have to be changed for this application. I currently have a GIVI touring screen on the bike and will have to watch the clearance to the "wings" on the screen for hand and control clearance. Here are some pictures for comparison:
-
I am in the process of trying a set of VFR spec Helis on my Bird. Check my post on the project.
-
Only the best for my forum compadres! :icon_hump: BTW, I will try to post a side by side comparison pic for you ASAP.
-
I purchased a couple of 55 watt HID kits from these guys. They are considerably brighter than the typical 35 watt units! Try to stay under 5,000 degrees Kelvin to get a more useful light output. http://www.ddmtuning.com/index.php?pcsid=m...ent=61&pg=1
-
Check all of your ground connections at both ends for corrosion. A bad R/R frequently toasts the connector and last few inches of wire harness leading to it. Just plugging in afresh regulator will not do the trick. It might be a good idea for you to consider a fresh battery at the same time, too. I believe that a later style (2002 and up) regulators were constructed differently and have a better cooling fins and hold up much better than the first generation versions, too. Here is an excellent link from the other forum: http://www.cbrxx.com/honda-cbr-xx-resource...-about-die.html
-
You can install the plug port in one of the lower dash surround halves between the two push pins with the socket facing straight up. This should clear just about all straight power plugs going towards the control mounted farkles. The best routing of power supply cables for permanently mounted electronics would follow a path up underneath the tank along one of the frame rails, then up by the center fork tube, towards the bars. This would minimize the stretching/twisting/pinching of your power cables by offering the least amount of radial movement of the electrical wires. Just make sure you allow enough slack to account for full lock travel in both directions prior to wire tying the power leads down.
-
The powerlet socket fits beautifully in the plastic panels between the small open area between the frame and the tank. You can also install one in the area where the lower dash surrounds halves meet at the bottom of the dash. The left side of the tank location is excellent if you are plugging in an electric vest, as it keeps the cord out of the airstream and keeps it from flopping around in the wind and rubbing against the tanks finish. I can post some pics too, if it helps. The socket snugs up nicely against the standoff that is molded into the plastic panels.
-
What if shock remote reservoir is just place non secure under seat?
Toynut replied to Aurora's topic in The Garage
You can probably get a couple of u-shaped rubber saddle mounts for the gas reservoir from a Penske distributor like Traxxion Dynamics. They will cradle the reservoir against any flat surface (i.e. the subframe), and you can then use a couple of hose clamps to lock them securely in place. -
Posi Locks work great. They have tremendous connection strength are are pretty goof proof. You can buy marine versions for extremely wet applications, but, even the traditional ones do a very good job of keeping connections clean, especially if you put a touch of silicone on the ends. I have convinced a couple of my major fuel pump manufacturers to include them with the wire harness repair kits instead of the traditional butt splicers to greatly reduce comebacks due to poor connections. They also make add on fuse holders that come in very handy.
-
WTB: Fuel pump for FI 'bird ('02)
Toynut replied to Skull's topic in The Sales Floor -- For Sale/Wanted
I have a couple of extra ones that I can loan you. PM me your shipping address. -
Wanted ......pair of suspension forks
Toynut replied to Toynut's topic in The Sales Floor -- For Sale/Wanted
PM sent.