testrider
-
Posts
479 -
Joined
-
Last visited
Content Type
Profiles
Forums
Gallery
Events
Everything posted by testrider
-
Is this a reputable company? They have good price on pilot road that I like to order a set. Thanks.
-
What kind of weight was the Ohlin set up for?
-
2003 BB, 2,300 miles, Mint, Mint, mint
testrider replied to 150Fuelie's topic in The Sales Floor -- For Sale/Wanted
Where are you? -
- Did you need a longer throttle cable when you use the Vario bars? My Helibars are lower than your 4.5" Vario and my stock throttle cables are stretched to the max already :-) - Does it come with bar end weights? If not, does it have the female threads inside the bars to screw on the bar ends? Thanks again.
-
Got some pics of the Vario bars? How tall is it measuring from the top of triple clamp to the center of handle bars? Thanks. -mike-
-
Since you said you're in Vietnam, I wonder why you bother to get it over 190 km/h? There is no road in Vietnam that you can run with speed over 190 km/h anyway... :-) (there are probably only a few that you can run 100km/h in the whole country for more than a few seconds...) (yes, I've been there...)
-
Right. If it has never done over 190 km/h before, check your sprocket gearing. How many teeth in your front and rear sprockets? May be it was a stunt bike that has a 60-tooth rear sprocket.
-
Me too. I have been using just the notches on all my bikes to align the wheel.
-
I use this... :-) :-)
-
This is what you need :-)
-
x
-
I replaced my valve stem every tire change. The valve rubber can deteriorate by heat and ozone that it may crack over time causing sudden deflation if you reuse them again and again. Valve stems are cheap at $1 a piece. To remove it, I just use a pair of pliers pull it slightly out then used a cutter to cut it off. The valve stem tool can be bought from any autopart store for a few bucks. It's just a long rod which threads onto the valve stem then pull it straight through by leverage. Without it, you run the risk of deforming the new valve's threads (the metal part) when you grasp it with a pair of pliers.
-
Cool tips, LogoMan, Rick's stator is also $140: http://www.ricksmotorsportelectrics.com/results.php
-
This stator is $135. Is it any good? http://www.regulatorrectifier.com/catalog/...tor-p-2336.html and Electrosport is $139: http://www.electrosport.com/products/product-detail-456.php
-
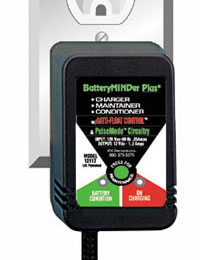
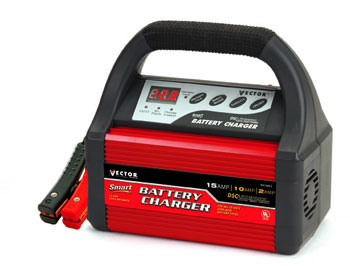
Yes, I did. I have the Vector for a couple of years. I have run the desulfation cycle several 24-hour back-to-back but the best it could was to bring the battery to around 12.6-12.7V. I just received my BatteryMinder 2 days ago and I have only ran 1 24-hour cycle day before yesterday on my XX battery and it's still measured 12.83V this morning. I like it so far :-) I'm running a desulfation on my DR-350SE right now. -mike- PS: The battery on my XX is a 4-year old Yuasa.
-
I just want to share my recent experience on battery chargers. - I bought a Vector 1089A battery charger/desulfator a while ago to maintain the batteries of my 2 bikes: the XX and a Suzuki DR-350. It was about $80. The 'desulfator' function is supposed to use high frequency pulses to shake loose and disolve the sulphate collected inside the battery to restore the performance. The way it works was to attach to the battery, start the 'desulfate' process by pushing a 'recondition' button and it runs for 24 hours before it turns itself off. After desulfation, the battery is recharged to full. It kind of works but not very well. Before desulfate-and-charge, my batteries were measured about 12.5V even after a full recharge. After desulfate-and-charge, they showed about 12.65V so there was a little improvement. A new battery fresh from the shelf was measured at 12.9V. - I then read about the BatteryMinder (batteryminders.com) so I ordered 1 from pacificbattery.com for $50 (after CA tax). I plugged it in, it desulfated and charged the battery automatically. After 24 hours, my batteries were measure at 12.83V (and this is after disconnected the charger and let them sitting over night). I would say that this is much better after only 1 desulfation cycle. The BatteryMinder is also a battery maintainer that you can leave it plugged in to the battery forever.
-
Now you can do motocross with your XX... :-)
-
I thought the original (OEM) battery was Yuasa? My 97 XX came with Yuasa and it lasted 7 years so I got another Yuasa.
-
Saw the best price here for a Yuasa YTX-12 BS for $59.95 and free shipping: http://www.tristatebattery.com/product_inf...products_id=731 I have no experience with this vendor.
-
snagged one for 30.00 today now the stator and gasket is in order. I guess the bike is giving me the hint to do a hell of a winter tear down and service. Thanks jimmy Where did you get one for $30? Is it new? I installed a 2001 R1 R/R on my 97 a while ago and I don't mind keeping 1 as spare if it's $30 :-)
-
New Motorcycle Wheel Alignment Tool
testrider replied to speedygeezer's topic in The Sales Floor -- For Sale/Wanted
How is it different than this? :-) -
Next time I'll probably try to find a way to relocate it too. It's just a single brake hose. I have the full Givi rack and it's a pain to have to remove everything before I could remove the cowl. Reinstalling the rack took even longer (to line up everything).
-
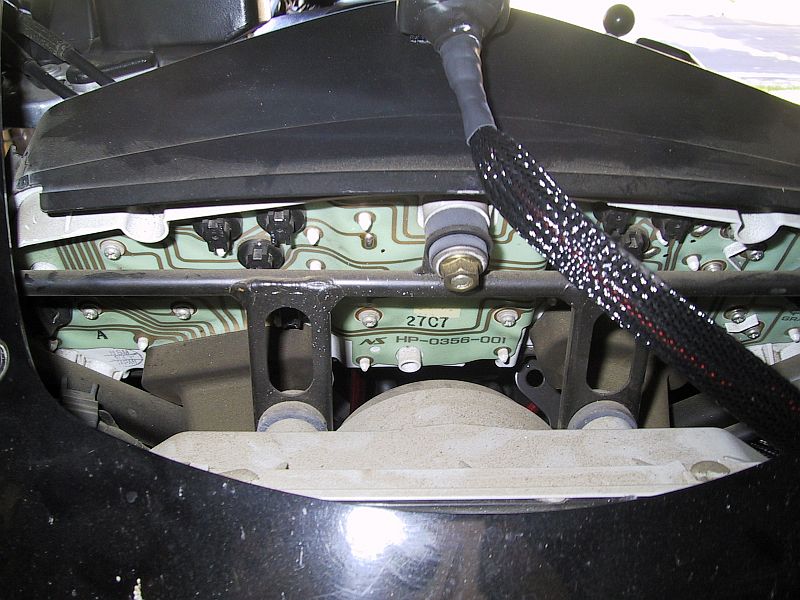
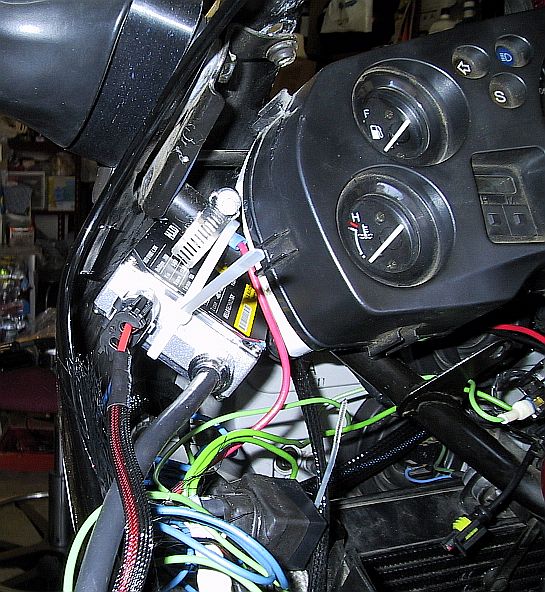
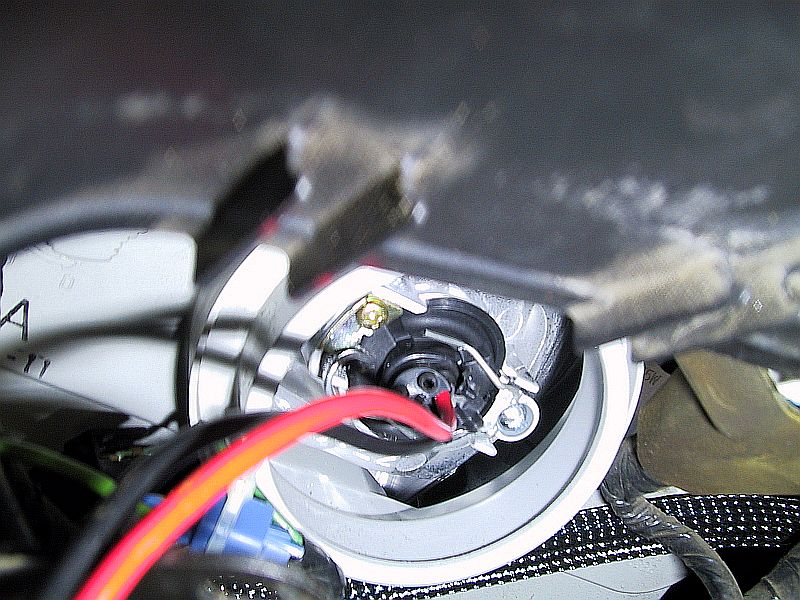
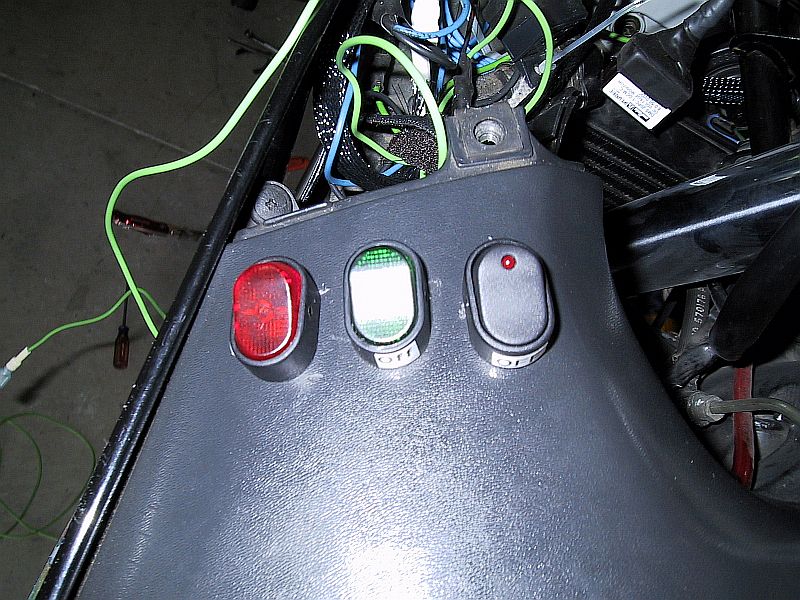
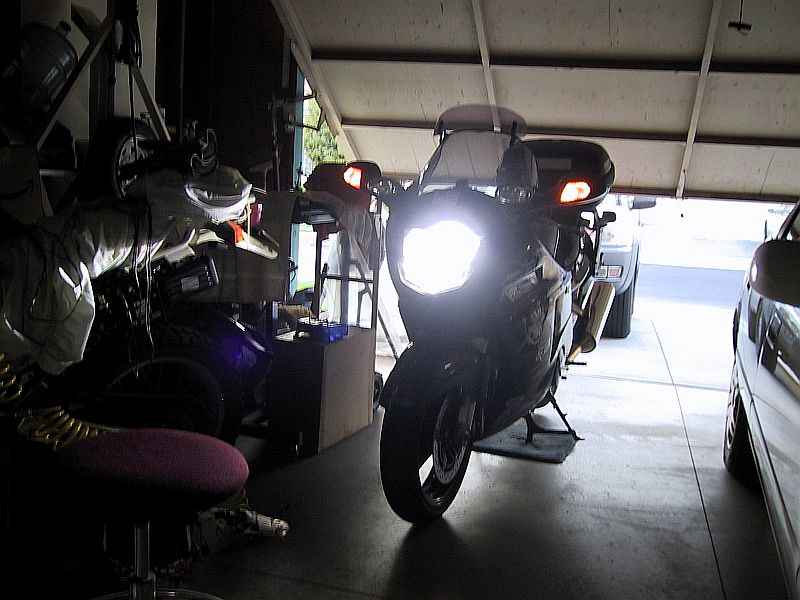
Thank you all, for your great help and support. I just finished installing the HID on my 97 XX. Here are some pics. Notes: - after removing the windshield, the 2 side covers under the dash, and removing 3 bolts that hold the dash, the whole dash can be lifted up and the back of the headlight was fully accessible. - while installing it, I also installed a switch on the positive power light so I can turn it ON/OFF manually. - I didn't use any washer. I push the rubber grommet of the HID all the way against the bulb and it was a perfect fit (see pic) - I also installed my 'emergency lights' mod. Just like those flashing emergency signal lights on the car. I wired it directly to the battery so I can leave it flashing with the ignition off. I bought 2 hazard flasher (model #552) from Autozone for $3 a piece. Then tapped onto the front left turn signal wire with 1 flasher, another flasher tapped to the right front signal wire. Power goes from the battery to a switch, then from this switch it goes to both flashers. You can do it with 1 flasher if you can find a DPST (dual pole single throw) switch. I couldn't find one so I use a SPST (single pole) and I had to use 2 flashers to keep the left and right side separate. Remember to get the #552 flasher, it's for variable loads. That means, it can flash from 1 to 6 bulbs. The signal flasher won't work because they usually were designed to flash 2 bulbs and when 1 bulb goes out, it stops flashing. - I zip-tie the ballast on the left side, behind the left front cover.

-
Thanks! Your pictures help a lot! - like Juxxtin, you pulled out the 2 power wires and connected them to the original OEM connector (that didn't show in the pic)? - Do the washers go **behind** the bulb? (I mean, between the back of the bulb and the rubber grommet? Or between the bulb and the headlight housing?) Thanks! -mike-
-
Thanks Justin, I appreciate it. So you didn't have to use a garden hose washers to shim the bulb base? Cool. One more question: did the OEM rubber cover everything up (bulb+rubber grommet+power wires) like before? I'm going to install it this weekend and will take some pics. -mike-