

JaBr
-
Posts
292 -
Joined
-
Last visited
-
Days Won
1
Content Type
Profiles
Forums
Gallery
Events
Posts posted by JaBr
-
-
3 hours ago, blackhawkxx said:
Are you getting a pair? If so, please give a review after you have a chance to try them out.
I will at some point, right now I need to get the bike back together. Been on that stand way too long.
-
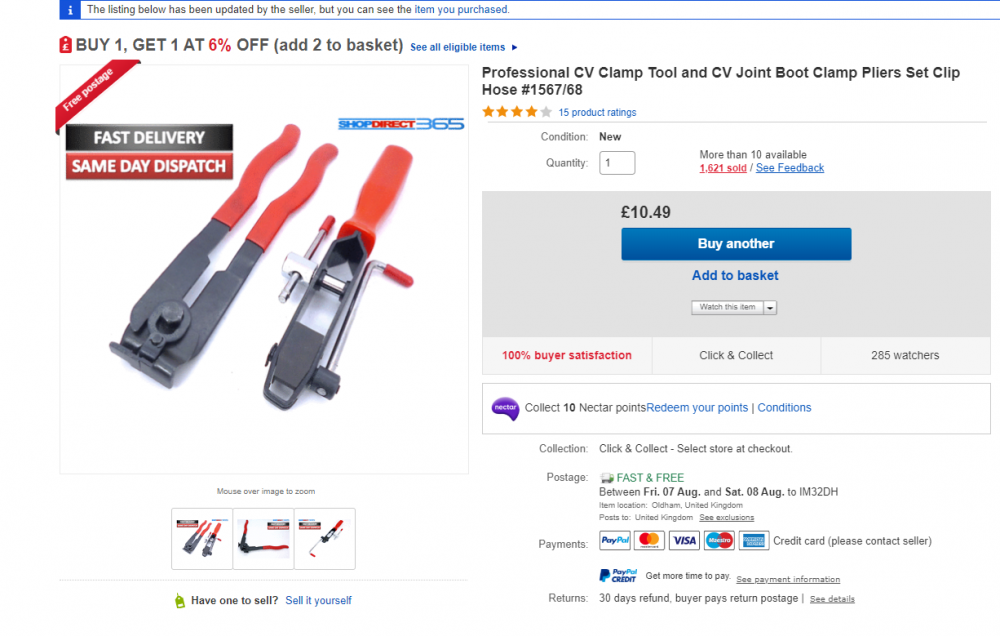
Just bought this set as my SO's car (Ford C-Max 🤮) needs a CV joint boot. We'll see how good it is in a few days I guess, until then she's using one of my Alfa's 😂.
-
It seems that Jaws Motorcycles now to preload adjusters to go on standard forks.
£94.95 + Delivery from the worlds favourite auction site.
https://www.ebay.co.uk/itm/Honda-Blackbird-CBR1100XX-97-07-Preload-Fork-Cap-Adjusters/392422748197
-
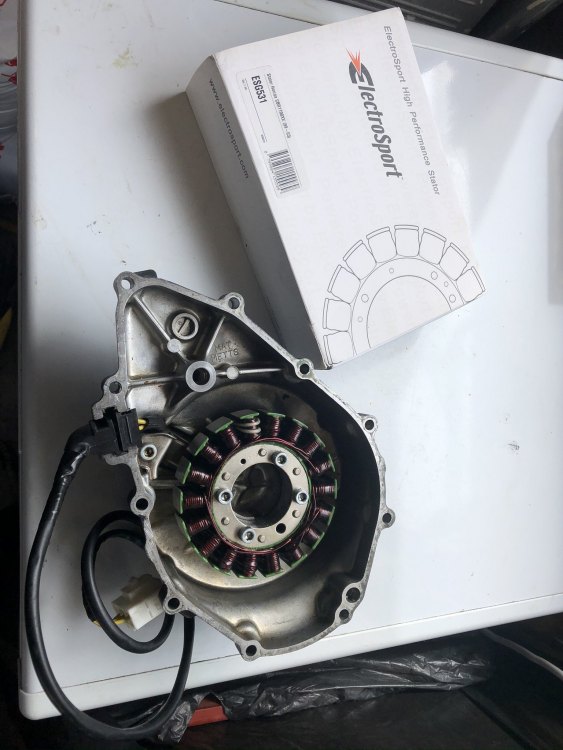
So apart from brake disks, the last big purchase of the project has now arrived...

That ladies and gents, is the shindengen mosfet reg rec. Coupled with the shiny new electrosport stator, it should keep me free of major electrical gremlins for some time.
-
I was asked on my project Blackbird thread about the Abba Skylift as I had dug deep and shelled out the necessary to buy one. Please see the below:
It's very strong and well made, the lift itself is completely stable and so far I can't see any way to make it fall over, there are three lower legs on castors that spread the load with a 4th castor on the upright, 2 of the castors are braked. There is a little movement of the bike possible if you push on the bike when the brakes are applied to the stand, I'm not sure that's something that could be designed out without much more expensive materials and bigger box sections. The hydraulic ram is rated for 3 tons, the lift itself has a stated SWL of 400KG so well within limits, once you've lifted the bike into position there's a locking pin that is used to hold the bike at height and the ram is released. I can push the bike around the garage safely on the lift, the only downside I have seen is that I can't lift the bike if it's already up on the centre stand as the central leg of the lift needs to be where the centre stand is. No issue with it being on the side stand.
In my case this skylift has paid for itself just by allowing me to do this build myself, had I not bought the lift then I would have spent way more than that on getting the work done at a garage. If I'd had the space I could have bought a table instead that would likely have been cheaper, but then I'd still have needed to do a whole load of additional work to allow me to secure the bike in a safe manner to remove the front wheel and forks. I've had the bike in the level position on the skylift and have plenty of room to completely strip the front end. If I needed more room around the front, I could put the bike in the wheelie position so the whole front is in the air. There is also the option of the stoppie position if you need additional access to the rear.
My biggest concern was whether there would be enough access to the left hand side of the bike while it was on the stand, I needn't have worried. There is plenty of room to get to everything on the left whilst the bike is on the stand. With all the additional bits I bought I spent £580 on the skylift, it's money well spent, I can also remove the swingarm if needed as I bought the footpeg kit to allow it. I'm seriously considering buying the technician kit that contains all of the additional fixings for other bikes so that if I change in the future I have the gear ready, it's £148, but once again, money well spent to futureproof I feel.
Finally, their customer service is excellent, I'm really happy with everything, especially the 3 year warranty they give (the ram is not included as they buy those in so it only gets 12 months), to me that shows a real commitment to the quality of their own products. I actually met a few of the guys many years ago at the bike show, it was the launch of the skylift and at the time they didn't have a fitting kit for my bike, even then though, they were really helpful even though they knew I wouldn't be buying at that point.
-
1 hour ago, blackhawkxx said:
So is the skylift very sturdy with no worries of tip over? Any negatives beside price?
I'ts very strong and well made, the lift itself is completely stable and so far I can't see any way to make it fall over, there are three lower legs on castors that spread the load with a 4th castor on the upright, 2 of the castors are braked. There is a little movement of the bike possible if you push on the bike when the brakes are applied to the stand, I'm not sure that's something that could be designed out without much more expensive materials and bigger box sections. The hydraulic ram is rated for 3 tons, the lift itself has a stated SWL of 400KG so well within limits, once you've lifted the bike into position there's a locking pin that is used to hold the bike at height and the ram is released. I can push the bike around the garage safely on the lift, the only downside I have seen is that I can't lift the bike if it's already up on the centre stand as the central leg of the lift needs to be where the centre stand is. No issue with it being on the side stand.
In my case this skylift has paid for itself just by allowing me to do this build myself, had I not bought the lift then I would have spent way more than that on getting the work done at a garage. If I'd had the space I could have bought a table instead that would likely have been cheaper, but then I'd still have needed to do a whole load of additional work to allow me to secure the bike in a safe manner to remove the front wheel and forks. I've had the bike in the level position on the skylift and have plenty of room to completely strip the front end. If I needed more room around the front, I could put the bike in the wheelie position so the whole front is in the air. There is also the option of the stoppie position if you need additional access to the rear.
My biggest concern was whether there would be enough access to the left hand side of the bike while it was on the stand, I needn't have worried. There is plenty of room to get to everything on the left whilst the bike is on the stand. With all the additional bits I bought I spent £580 on the skylift, it's money well spent, I can also remove the swingarm if needed as I bought the footpeg kit to allow it. I'm seriously cosidering buying the technician kit that contains all of the additional fixings for other bikes so that if I change in the future I have the gear ready, it's £148, but once again, money well spent to futureproof I feel.
Finally, their customer service is excellent, I'm really happy with everything, especially the 3 year warranty they give (the ram is not included as they buy those in so it only gets 12 months), to me that shows a real commitment to the quality of their own products. I actually met a few of the guys many years ago at the bike show, it was the launch of the skylift and at the time they didn't have a fitting kit for my bike, even then though, they were really helpful even though they knew I wouldn't be buying at that point.
-
 1
1
-
-
On 7/28/2020 at 9:32 PM, blackhawkxx said:
I'm guessing most here tried them years ago, maybe they have improved.
Quite possibly, I can only speak from the experience I've had. There are many, many forum posts online about them being rubbish to be fair but they mostly are older posts. If they don't work out then I'll swap them in the future, it's not a job that intimidates me any more having done it once and now owning the super duper skylift.
-
On 7/15/2020 at 4:56 PM, JaBr said:
Stumbled across this today, much cheaper than anywhere else I've seen them.
After 2 weeks no shipping so I would say avoid at all costs now. Raising a case with paypal...
-
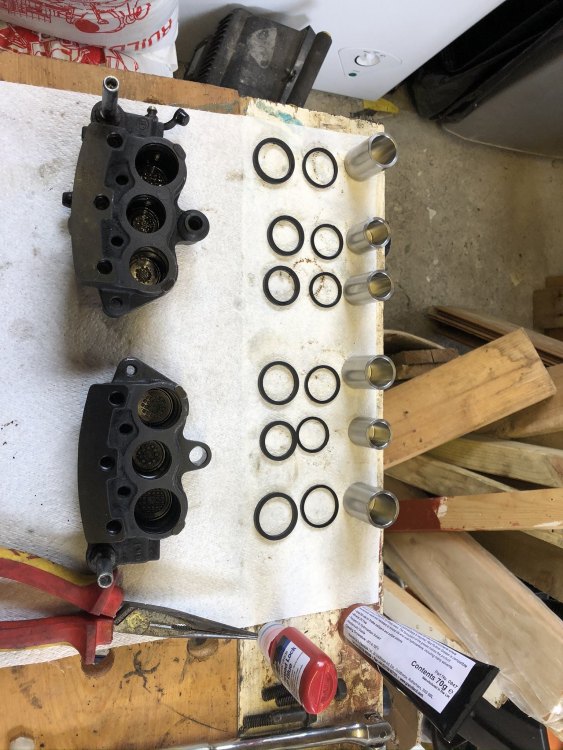
I recently purchased a set of full caliper service kits with stainless steel pistins from these guys. The quality of the parts is excellent, the people are very helpful.
Note: I did have an issue with my kit, one of the seals was the wrong size and the piston simply slipped out of the bore when it was fitted, once I had sent them the information and a video of the issue I was having they immediately dispatched a replacement seal and got it to me the following working day. If you live on the Isle of Man like I do and the item is posted from the UK that's some achievement. They also have now quarantined all of their Blackbird seal kits and are checking them for correct sized seals as a result of this.
From a technical perspective, these are squared seals so can be fitted either way up unlike the usual tapered seals you get for calipers, they also look too big to fit prior to fitting, approx 1/2 a millimeter bigger inside diameter before fitting than the outside diameter of the piston. Once fitted the seals are slightly proud of the inner bore making for a good snug fit.
This uniqueness did cause a small issue when I reported the seal was incorrect as it turns out that a lot of people who buy the kits don't read the instructions and call them before attempting to fit the seal saying the seals are too large, hence why I sent a video of the problem to them so they could see the piston fall from the bore with the seal fitted.
-
1
-
-
I've had a few parts from Jaws including my HEL kit, R&G rad guard, and my Electrosprt Stator, Karen is always very helpful. Definitely a thumbs up from me.
-
15 hours ago, tomek said:
VRs for Yamaha r1 are mosfet types, good units can be found for couple bucks on eBay,
Useful to know, I'll be looking to upgrade the one on my VFR soon, if I can save a bit on the Mosfet all the better.
-
On 7/25/2020 at 2:32 AM, tomek said:
Nice job but All Balls bearing kits are of criminal quality . They use the ultra cheap Chinese bearings in their kits.
Been there, never again.
That's interesting, I didn't know that. Have used them many times in the past and found them to be good. My VFR has a lot of All-Balls bearings on it and has had zero issues, must have got lucky I guess.
-
1 hour ago, redxxrdr said:
What tool did you use to pull / seat the wheel bearings? Hammer and drift, motion pro bearing tool? Or something else.
There is one issue with this build. It is so nice that it will be a shame to ride it. But it HAS to be ridden.
Thanks for posting.
So this is where it gets interesting, I don't own drifts or a bearing tool. All of the bearings coming out are getting disposed of.
On the sprocket carrier I removed the old seal by prising it out with a screwdriver, I then turned the carrier face down and used the screwdriver to gently tap it out from behind. To fit the new bearing I added a smear of LM2 around the edge of the bearing and used the old bearing as a drift. Gentle triangular tapping motions to seat it correctly, same screwdriver to lift the old bearing out using the chamfered inner edge of the old bearing as a prising point, then use the old bearing again to gently seat the outer seal.
The bearings on both the front and rear wheels follow a similar procedure, there is a metal tube between the inner and outer bearings that you should be able to move slightly with your finger. I had an old extra long 1/2 inch extension bar that had been damaged many years ago, I used that in place of the screwdriver to pop each bearing from the opposite side. Refit the bearings in the same way as the sprocket carrier remembering to insert the metal tube before replacing the second bearing. Be careful not to trap the tube tightly, it should move with a light finger push.
All techniques were shamelessly stole from Delboys Garage on YouTube.
Delboys Garage: Changing motorcycle wheel bearings
I've used his videos for a few of the jobs, headstock bearings being another one. My bike ('97) had the original bearings still in place, very notchy they were too

It will be ridden, I don't own any Garage Queens
") Closest to that is my Merc SL280, but that's a daily 6 months of the year whilst my Alfa GT has a rest.
Closest to that is my Merc SL280, but that's a daily 6 months of the year whilst my Alfa GT has a rest.
-
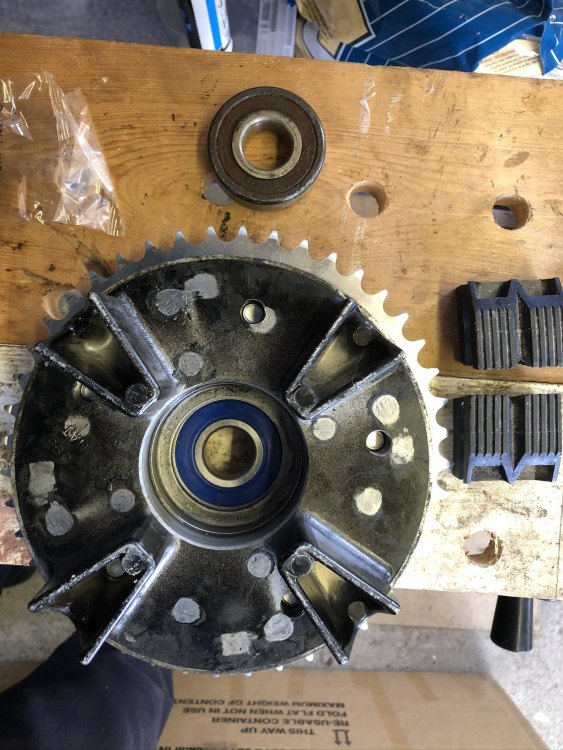
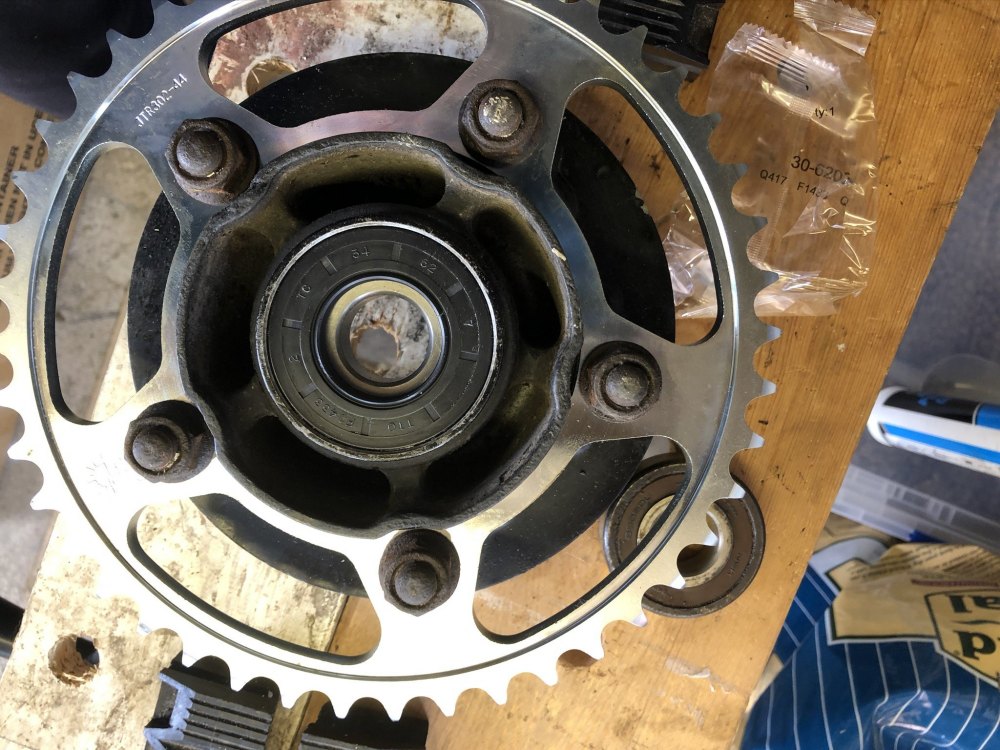
A few more pics from the work so far...
Front and rear wheel bearings done, this is the rear sprocket carrier bearing and new seal
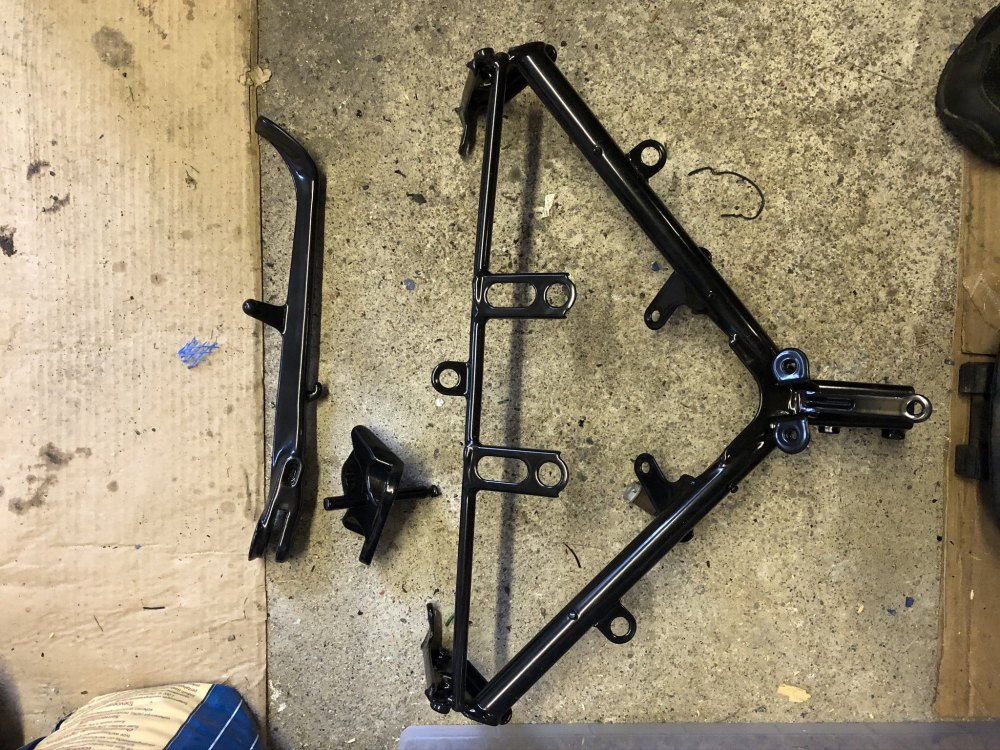
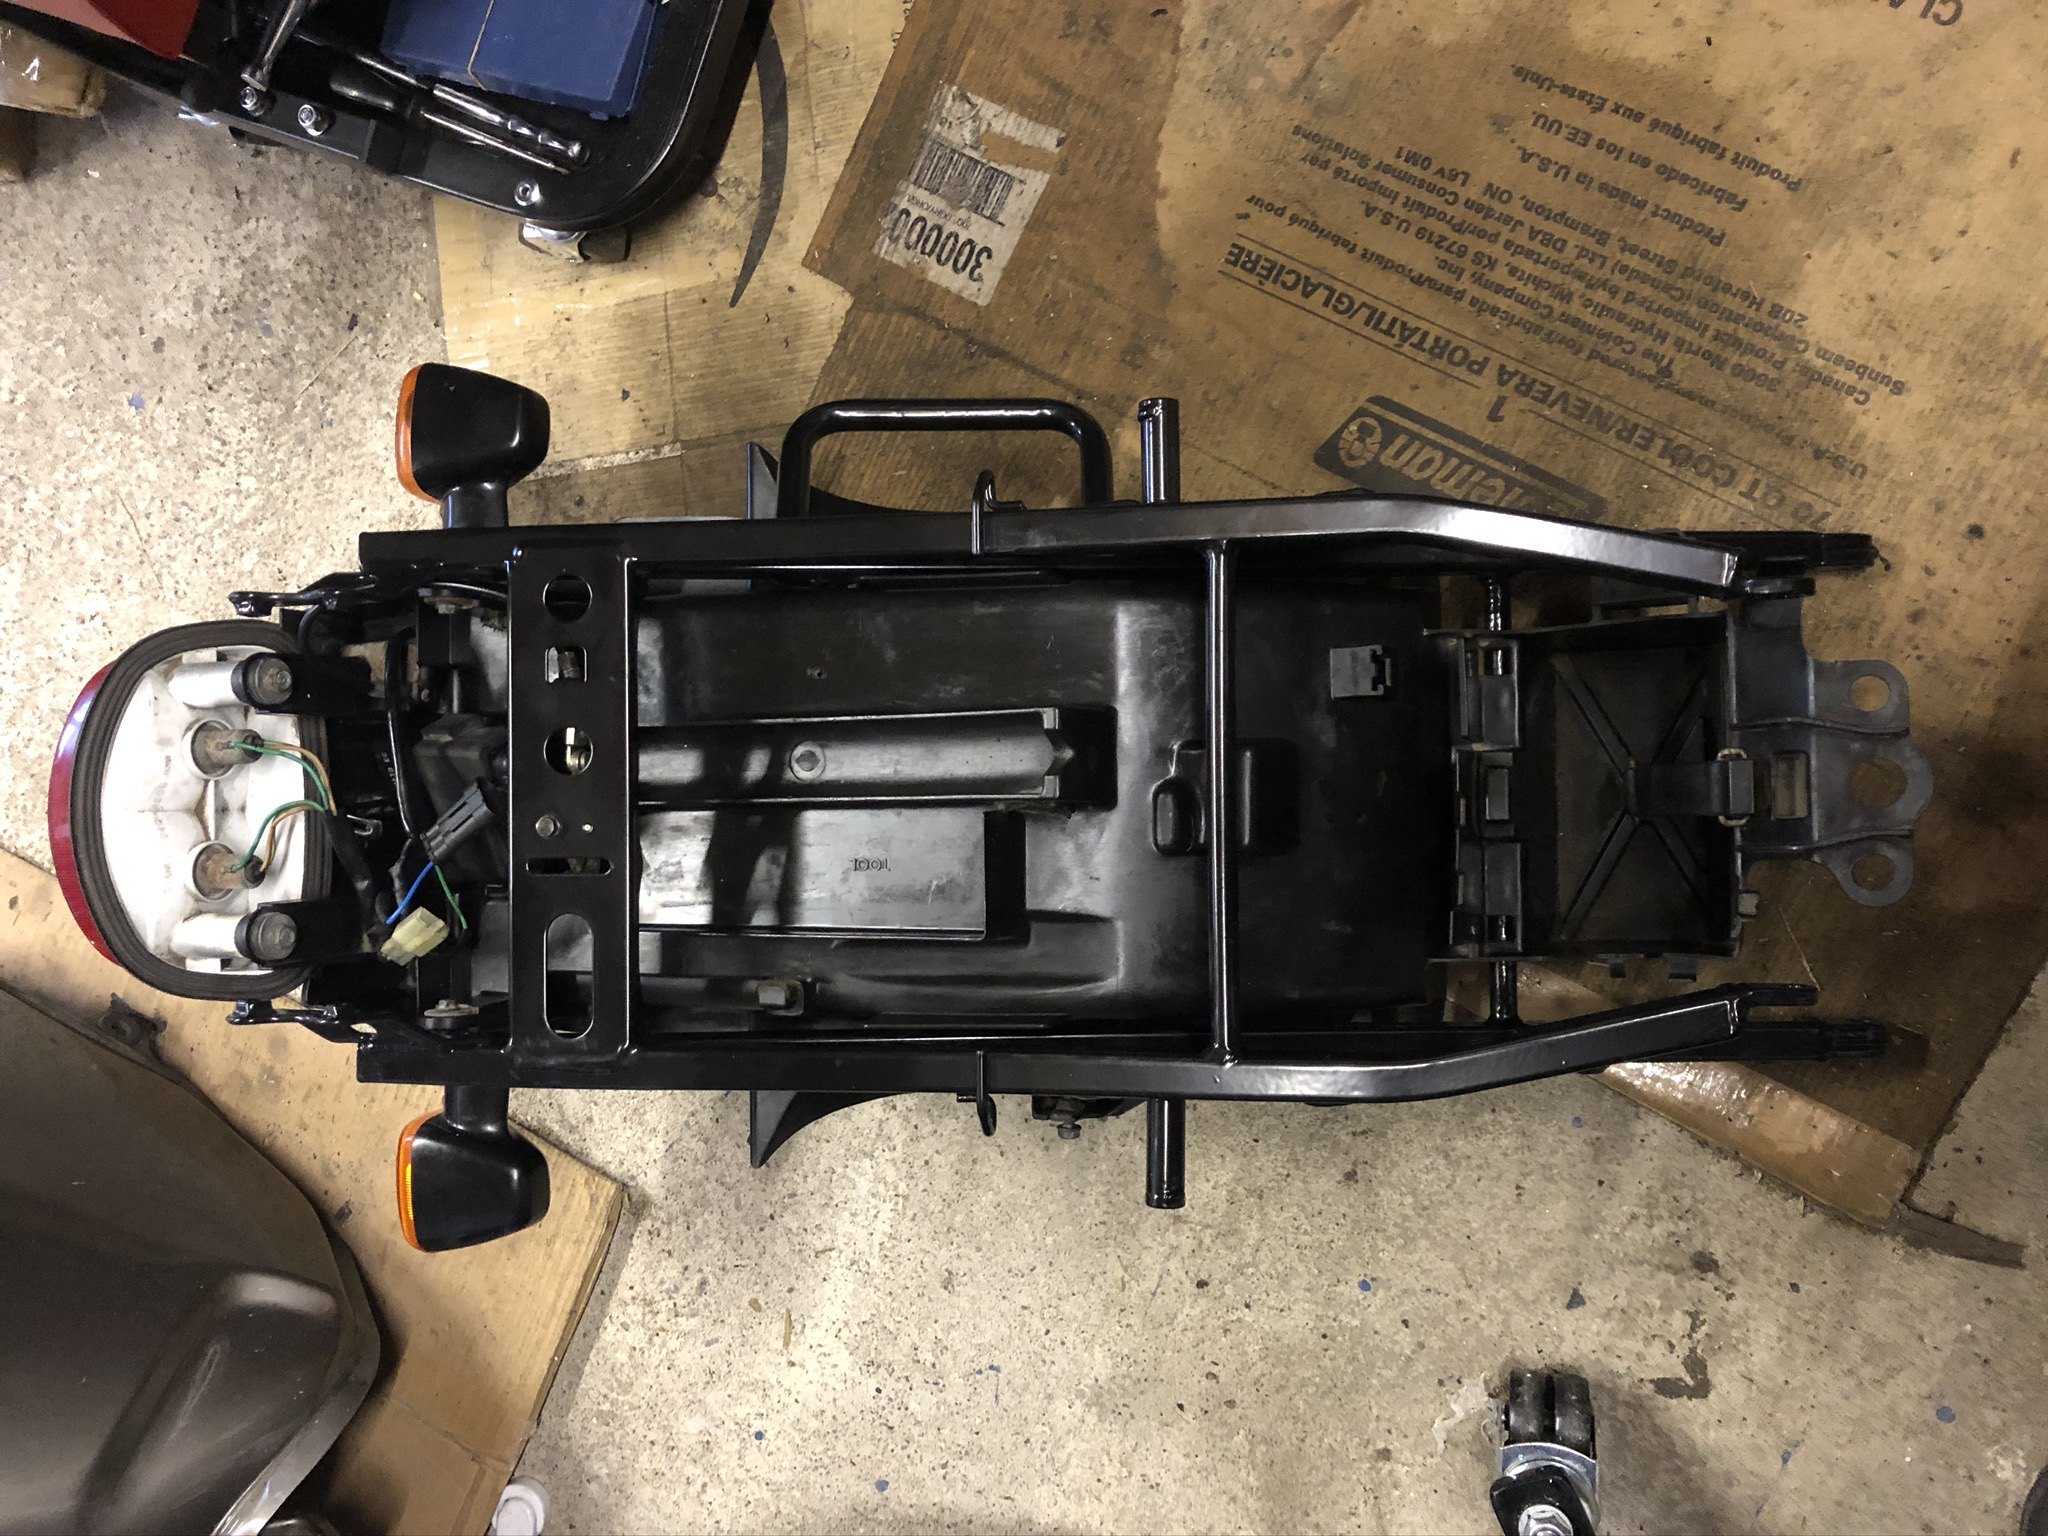
Newly powder coated rear subframe with cleaned plastics

Powder coated sidestand and upper cowl stay
Electrosport stator
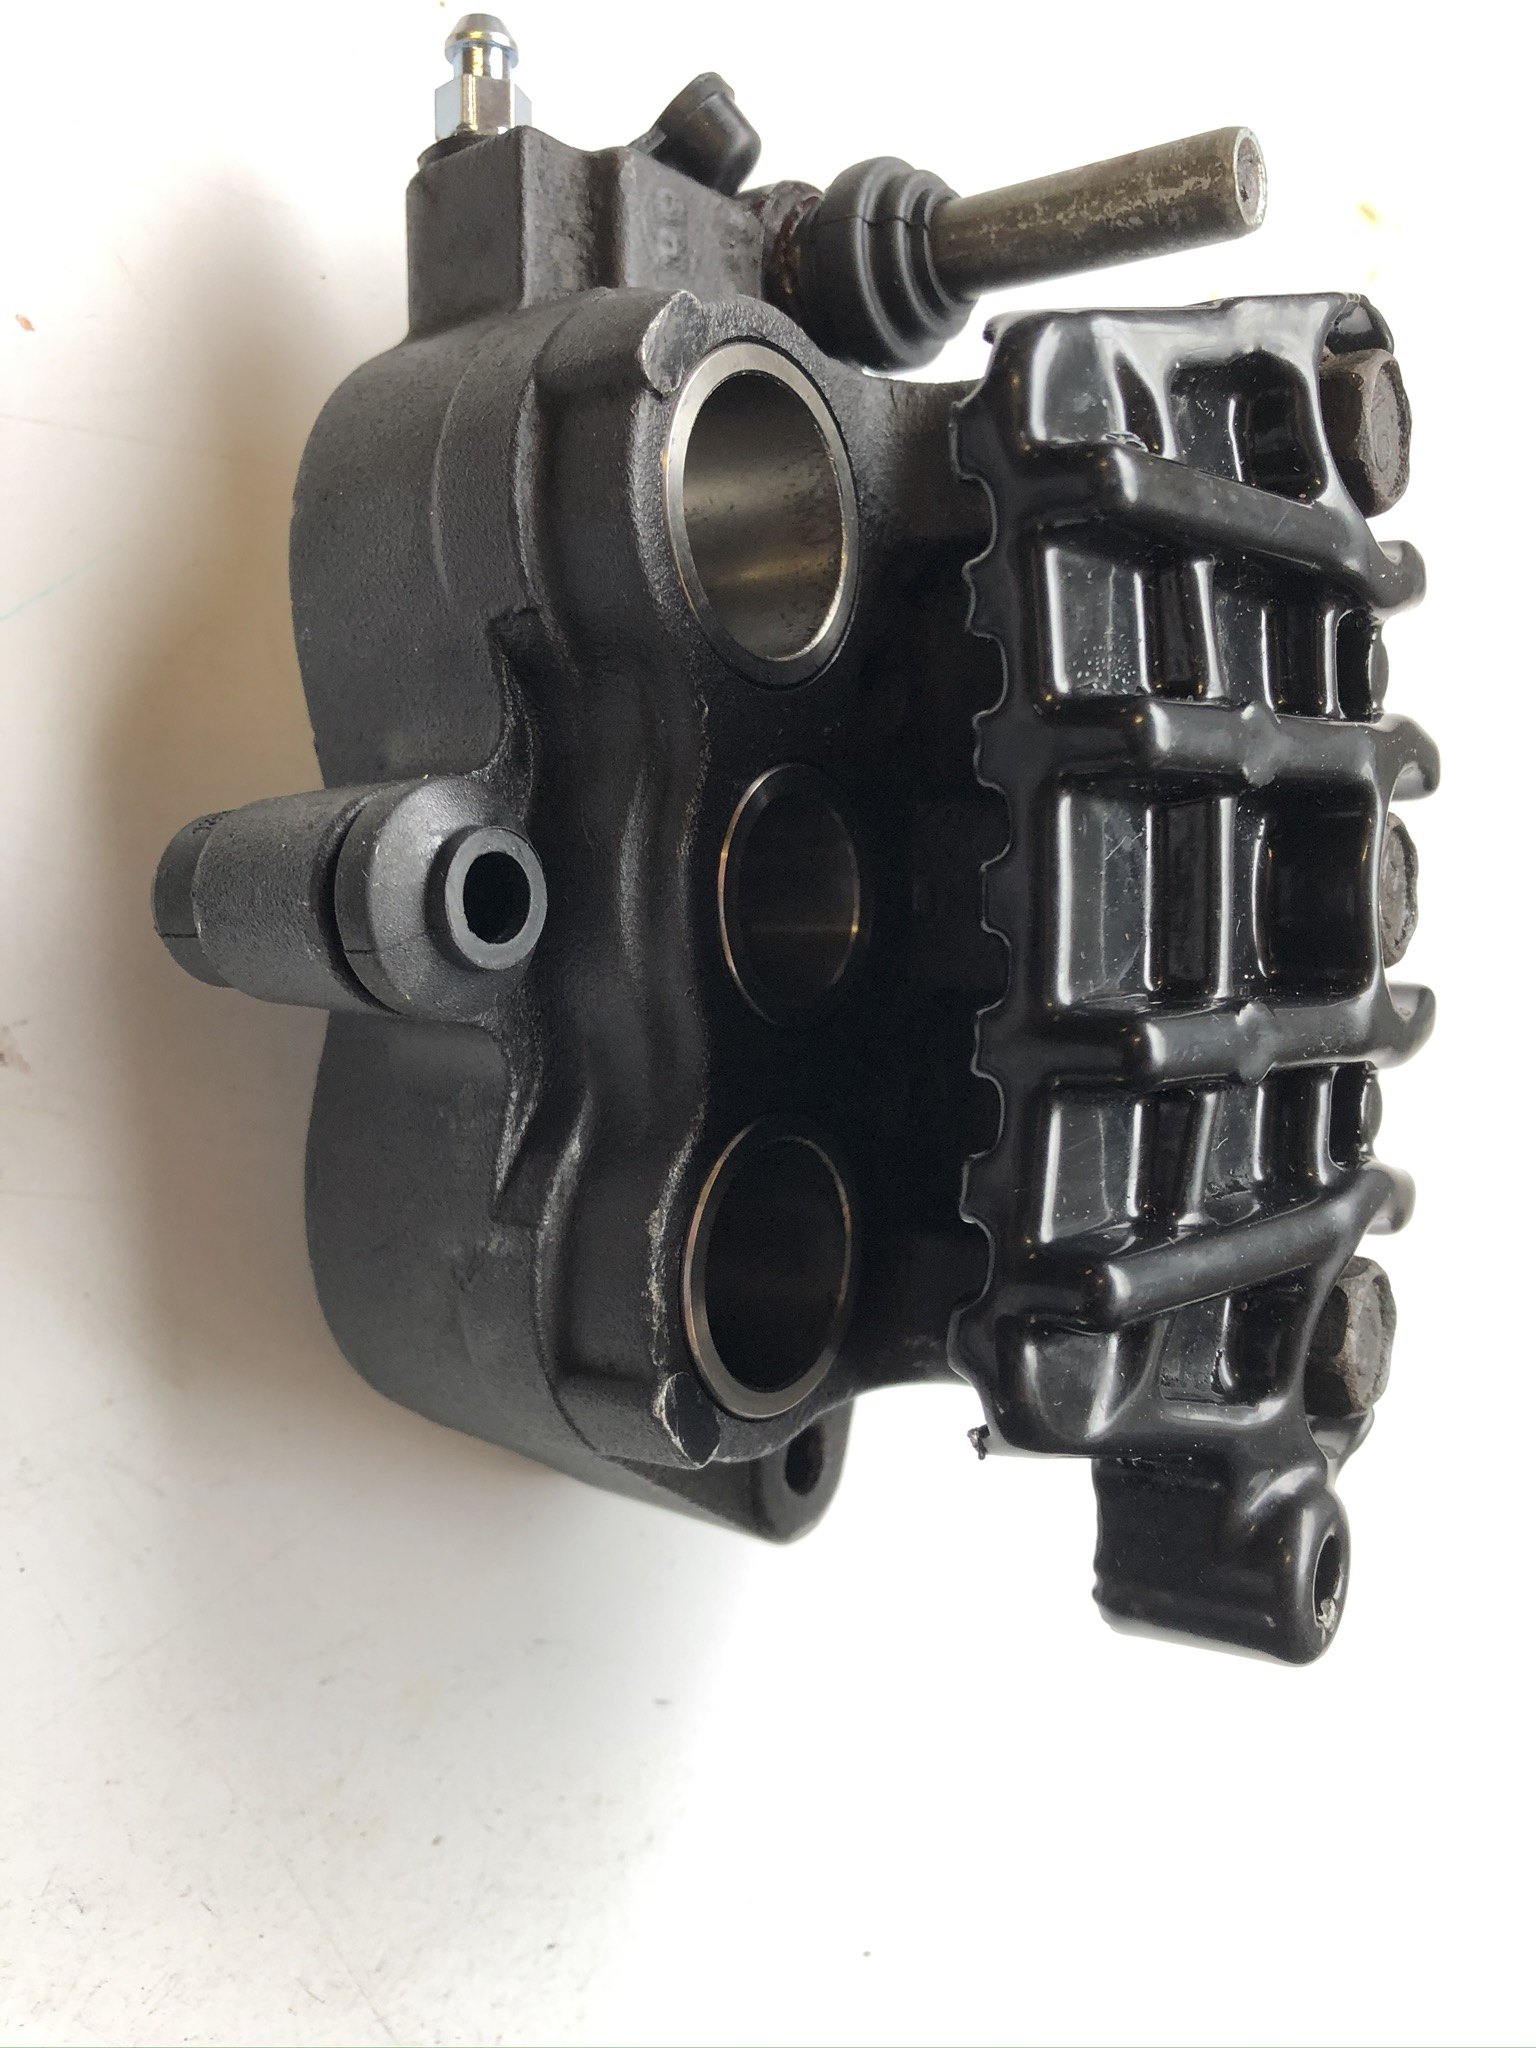
Calipers awaiting new seals and pistons
-
1
-
-
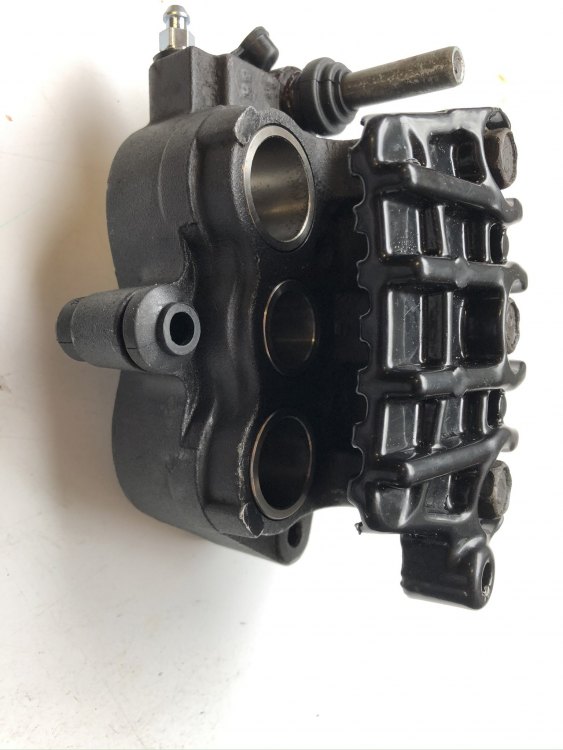
So I had some powder coating done on some brake fittings.
These are a textured matt black, all three caliper mounts done in this.

Next up, the flat half of the calipers
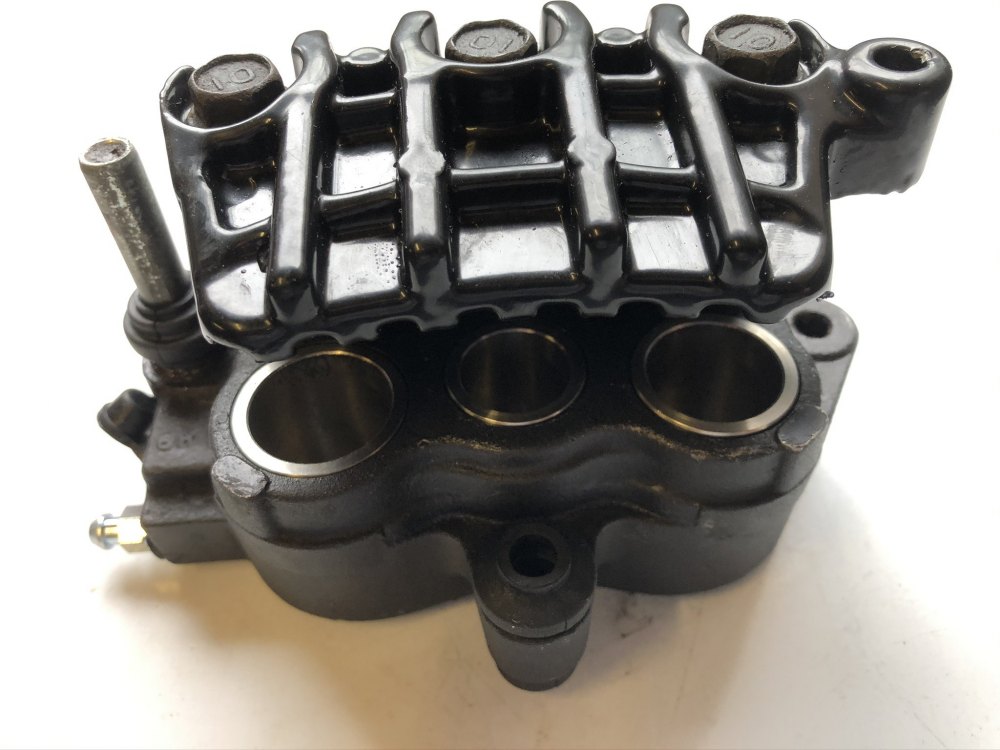
And finally another view, showing the stainless steel pistons I have installed
-
1
-
-
24 minutes ago, blackhawkxx said:
This seems strange, it is in the United States but they will not ship to the United States.
Joplin, Missouri, United StatesAs I understand it, it's this guy
-
So I thought I'd give an update of what remains, in no particular order...
1. Fit new Mosfet R/R
2. Fit new accessory fusebox
3. Remove sheared bolt in block
4. Tighten rear subframe
5. Refit calipers and mounting pieces / bleed brakes / fit fancy CBR1100xx fluid lid to brake master cylinder
6. Fit replacement forks
7. Fit wheels / chain / sprockets
8. Refit cans and footpegs
9. Repair RH panel bracket where it fits to v-panel
10. Fit subair filter
11. Oil and filter change
12. Refit body panels
13. Refit radiator and fan, fit radiator guard, fill with coolant.
14. Refit upper cowl stay and clocks
15. More engine cleaning
16. Cameras
17. Buy and fit front disks
Still a way to go, but better than a week ago
-
On 7/21/2020 at 10:04 PM, SwampNut said:
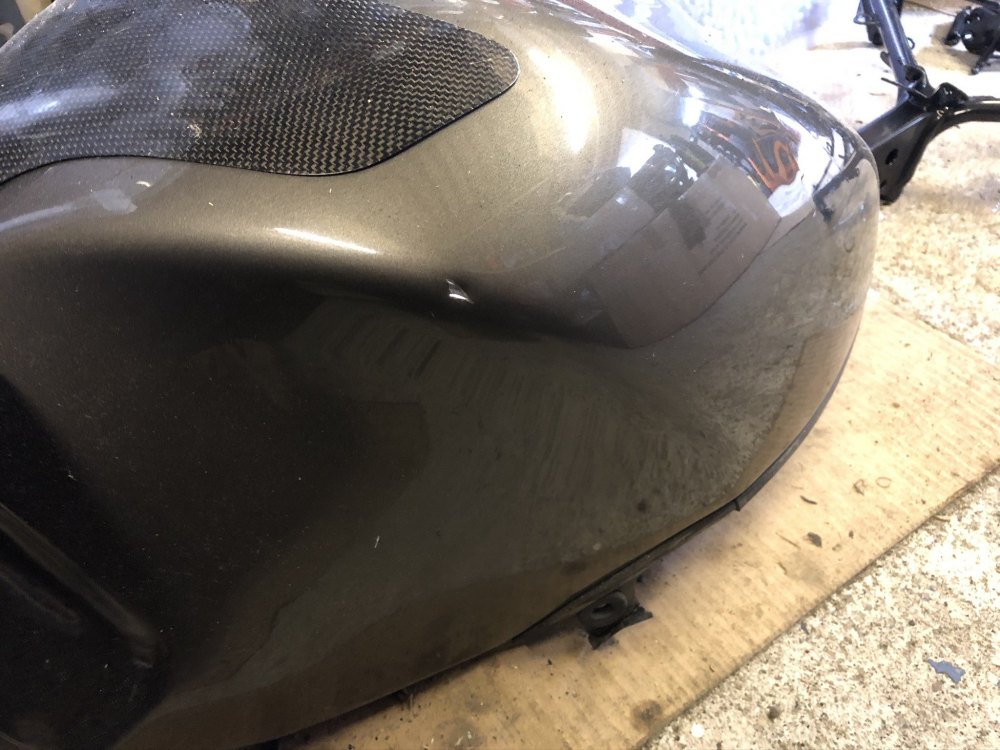
Damn. How bad is the tank?
Have a dram...
So just a small chunk, but enough to annoy me
-
19 hours ago, superhawk996 said:
More power being shunted off by the regulator making it run hotter, unless extra accessories are always being used, or it has a series regulator.
I have the Shindengen Mosfet FH020AA on order that should take care of the issue I believe, once I found the stator needed changing it was logical to do both and remove the weak link that is the standard bumwarmer, aka R/R
-
Have a couple of items to list for sale, going on eBay shortly, bear in mind I'm Isle of Man based if you fancy them when accounting for shipping.
1. 2 x brand new Budget front disks for injection models - £100 + Shipping the pair
2. Powder coated subframe from later injection model - £90 + shipping
3. Hugger, carbon fibre effect, not in the best condition, has rubbed a tyre in the past - £45 + shipping
-
On 7/21/2020 at 10:04 PM, SwampNut said:
Damn. How bad is the tank?
Have a dram...
Why thank you sir, don't mind if I do
The tank could be worse but it's the combined annoyance I guess. I'll put some pics up next week when I'm on the other computer.
So, the last couple of days have been a bit of a slower pace...
Rear subframe is now on, starting to look a bit more like a motorcycle now
2/3 calipers rebuilt, remember those annoyances I mentioned, one of the seals for the largest piston on one of the front calipers was undersized
Have contacted company but need to measure offending piston to confirm sizing tomorrow. New stainless steel pistons are in.
New electrosport stator has arrived and been fitted, it's an injection model version so should kick out plenty of juice for the planned accessory fusebox.
Shindengen R/R has been ordered but likely to be another week at least due to it coming from the USA
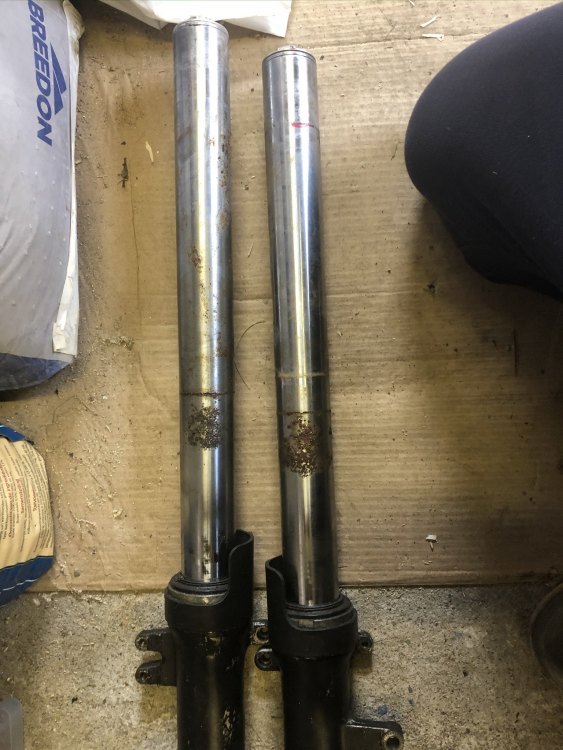
Replacement fork legs have arrived and apart from a couple of minor pits in the chrome look pretty good so they're going on. Will remove and rebuild if needed, have kits and oil
Headstock bearings replaced with All-Balls racing taper bearings, surprisingly straightforward to do, nice smooth lock to lock steering now. Was very notch before.
Tail section under plastic had a good clean before refitting, looks nice now.
Disks I bought last year turned out to be for the injection model so don't fit, seller not interested as I bought them nearly a year ago. Ah well, eBay here I come.
Radiator bottom bracket screw sheared when removing bracket for clean / paint, what's another sheared bolt between friends eh?
I know I've extolled the virtues of the Abba skyline before, but I really do think it's an excellent piece of kit, it's made this whole project far simpler than it would otherwise have been. I know many would rather use a lifting table but for me the skylift is definitely more useable, it also takes up very little room in my already limited garage space.
Hard to believe but my list of jobs at last appears to be shrinking, there have been some setbacks along the way, and additional expenses as documented but all in all I'm starting to be grateful for the chance to get to know this beastie better. I'm maybe not the most accomplished motorcycle mechanic but this has been a major step forward for me, I've done a fair bit with cars so I guess that helps. I'm very glad I took the decision to do this rather than pay someone a fortune to do it for me. I've taken on several jobs that I would have been nervous of and found they're actually not as scary as I thought.
-
So today has been a bittersweet one. Both front and rear wheel bearing sets have now been changed, the dodgy jointing of the wires has been sorted, and I've ordered the replacement fork legs, an electro sport stator and a shindengen mosfet R/R kit. I've had cheaper days.
Unfortunately as I put down the rear wheel with the new bearings in the sprocket caught the tank that is currently stored on the floor in front of the bike and took a chunk out of it. Then I went to fit the new brake disks, only to find they were the wrong ones, the bolt holes don't line up and the centre hole is too big. I've emailed the seller but as I bought them in August last year I don't hold out much hope for a positive response.
On the plus side, I pick up my newly powder coated upper stay and subframe tomorrow, so I can start doing some of the rear end work after I finish rebuilding the calipers.
-
3 hours ago, jon haney said:
If that is actual rust on the steel legs, they will need to be replaced.
It is actual rust, and replacements have been ordered
Don't take chances with bikes, have enough to contend with in terms of other road users
-
 1
1
-
-
And as for the fork legs, well, that's just poor maintenance


Givi Y158 Fitting kit for Wingrack
in Useful Product Links & Vendor Reviews
Posted
Paypal case found in my favour. Refunded today.