

Hooplehead
-
Posts
1,806 -
Joined
-
Last visited
-
Days Won
1
Content Type
Profiles
Forums
Gallery
Events
Everything posted by Hooplehead
-
It was the right side. I don't feel any pulsing, but more a vibration. Sounds like I need to clean and grease before I spend any money. Thanks for the advice Tim Typically rotors won't warp unless they see extreme heat (at the track, stuck slides, or too thin to dissapate. If they are warped, look for blueing in the metal, and a little bit of pulse when gently applying the front brake at speed. Never hurts to use brake grease whenever you have the wheels off. I re-grease my slides quite often, it makes me feel better. You can also lift the front wheel and spin it, while it rotates, put a pencil near the rotor and watch to visibly see if it is warped. If you use a reference point, a good eye can see as little as .020" of run-out. Look at EBC rotors. I use Bikebandit, but it's expensive no matter where you go. My left front rotor was straight, but the lbs actuating caused the rotor pins to get slack. You could hear a tick when applying. I bought a used one and wish I had just bought 2 new. Next year baby, I'm going wavy. . .bling bling. Wave rotors are very expensive, and if you have to ask, you don't need them. . .except for the bling value. The wavy rotors shed heat faster. My 10cents.
-
Bumpity bump. yes, a shameless self bump! :icon_hump:
-

Any interest in a pair of SS Blue Flames???
Hooplehead replied to 150Fuelie's topic in The Sales Floor -- For Sale/Wanted
I think you are crazy. I'll send you $60 cash! -
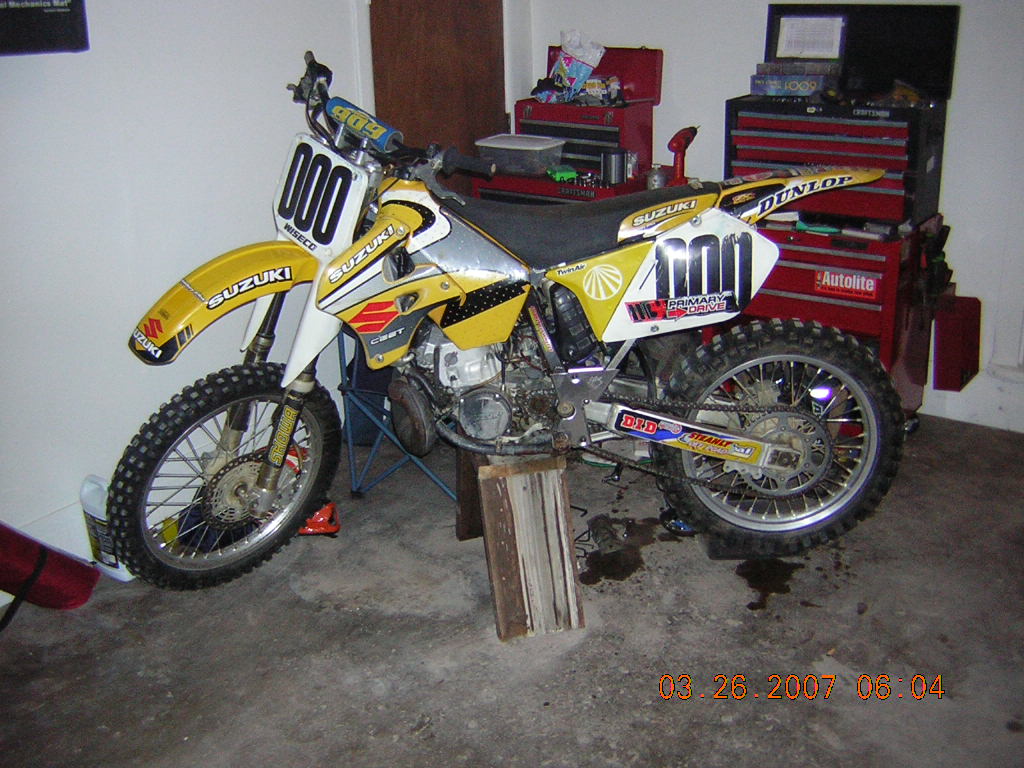
I am wanting to buy another bike, so this one has to go. I have had this Suzuki for about 3 seasons now. It has had new piston and rings, and the carb redone a million times. Basically, this is a nearly stock 98 rm250 w/average amount of getting the shit kicked out of it. The damn thing flies! I put a new rear tire on it last season, pirelli i think, and the front is good. As with all my vehicles, the oil gets changed regular, and the fork seals are fairly fresh. It doesn't leak oil or water, and I installed a flywheel weight to it. Got a new chain and sprocket and some new bars I bent after 1 hour! Put a shorty pipe on it, polished the head and did the bearing maintenance it needed. I gotta have at least 1000$ out of her, or I will keep it to ride another season. here's a pic
-
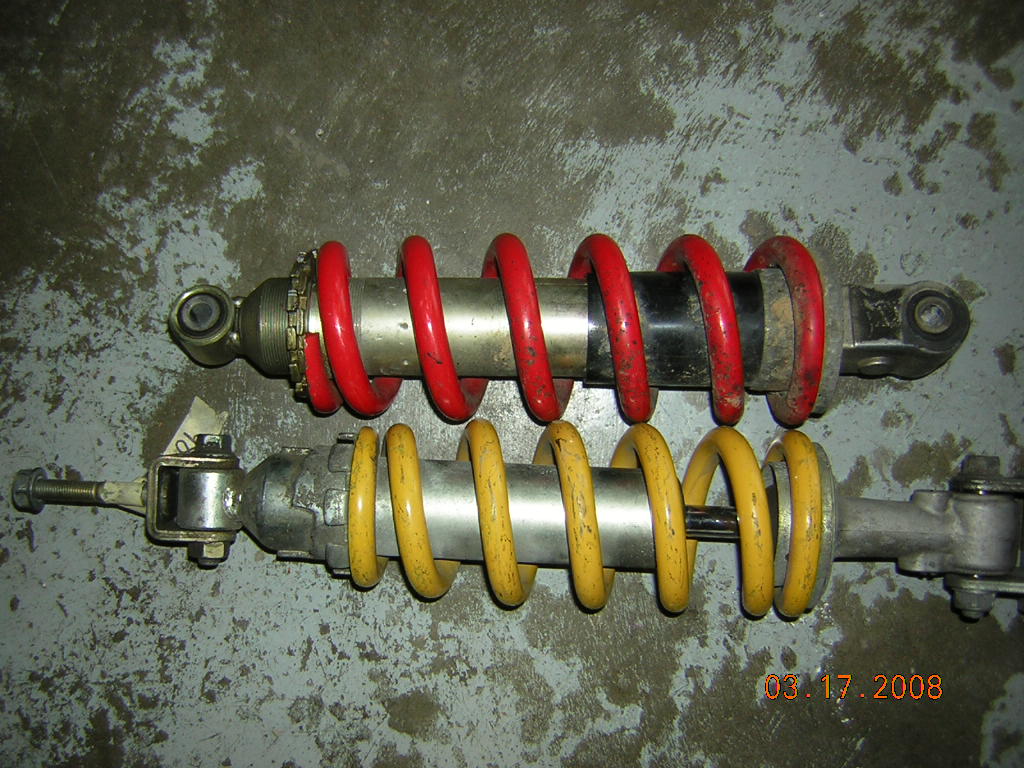
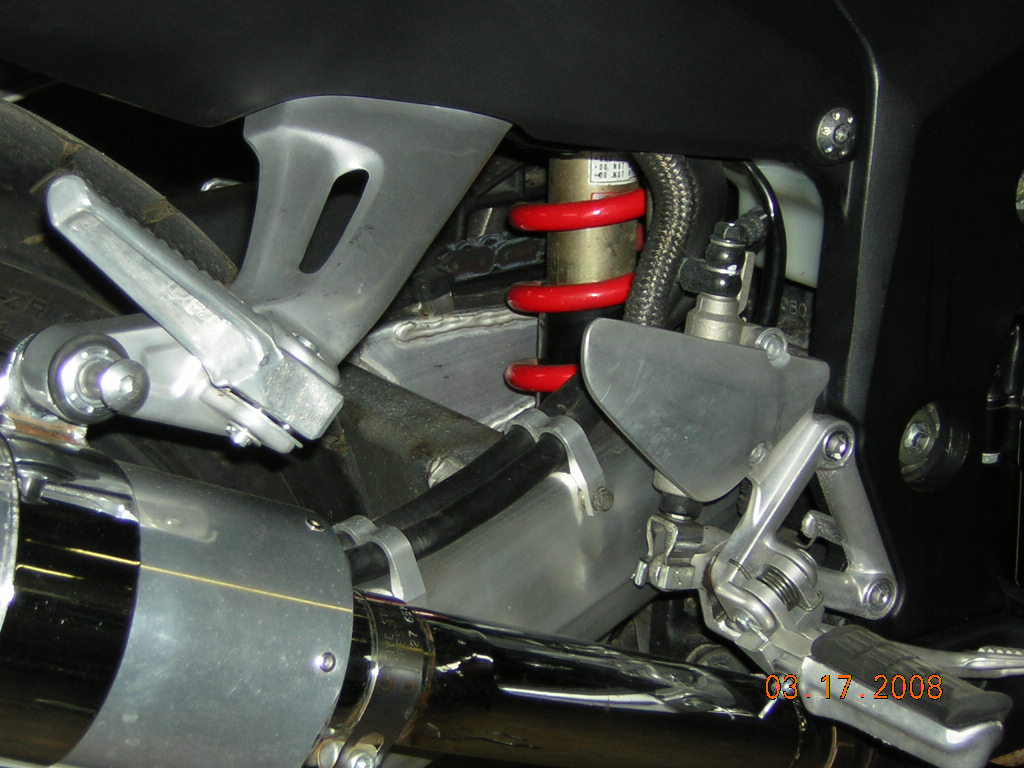
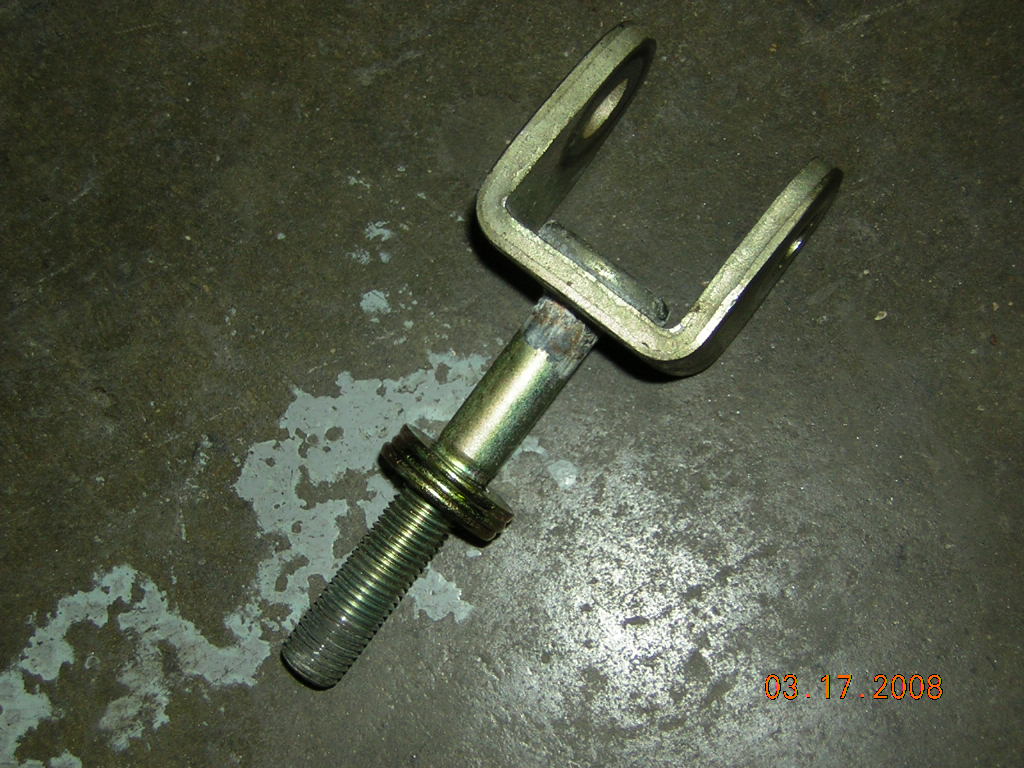
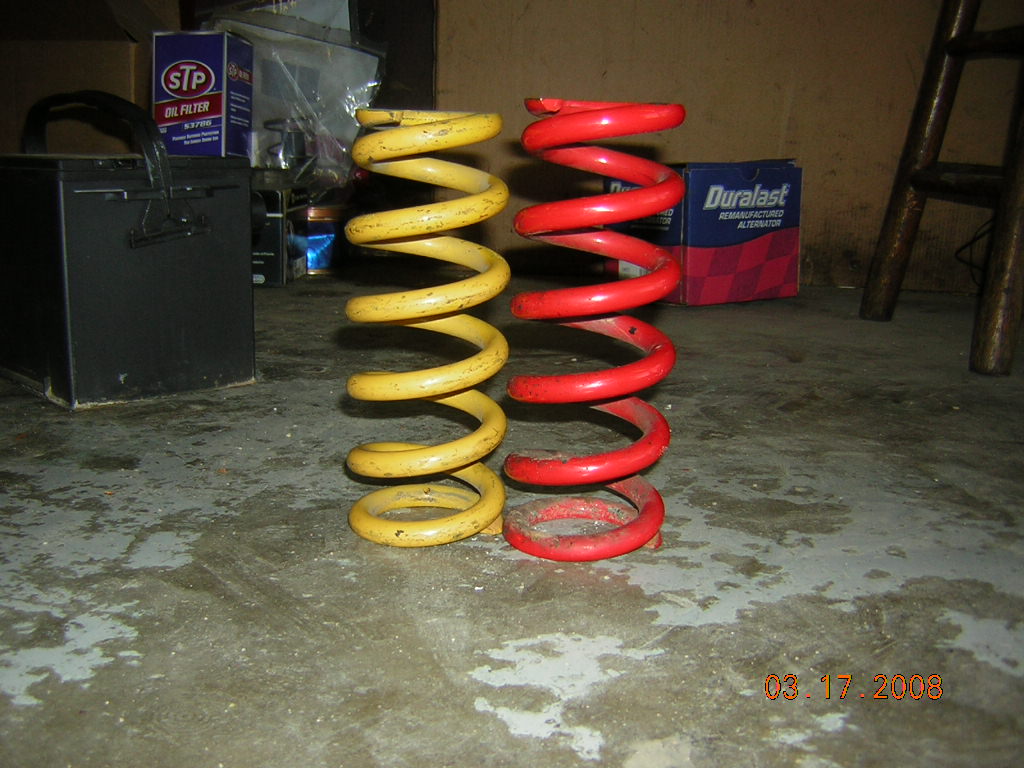
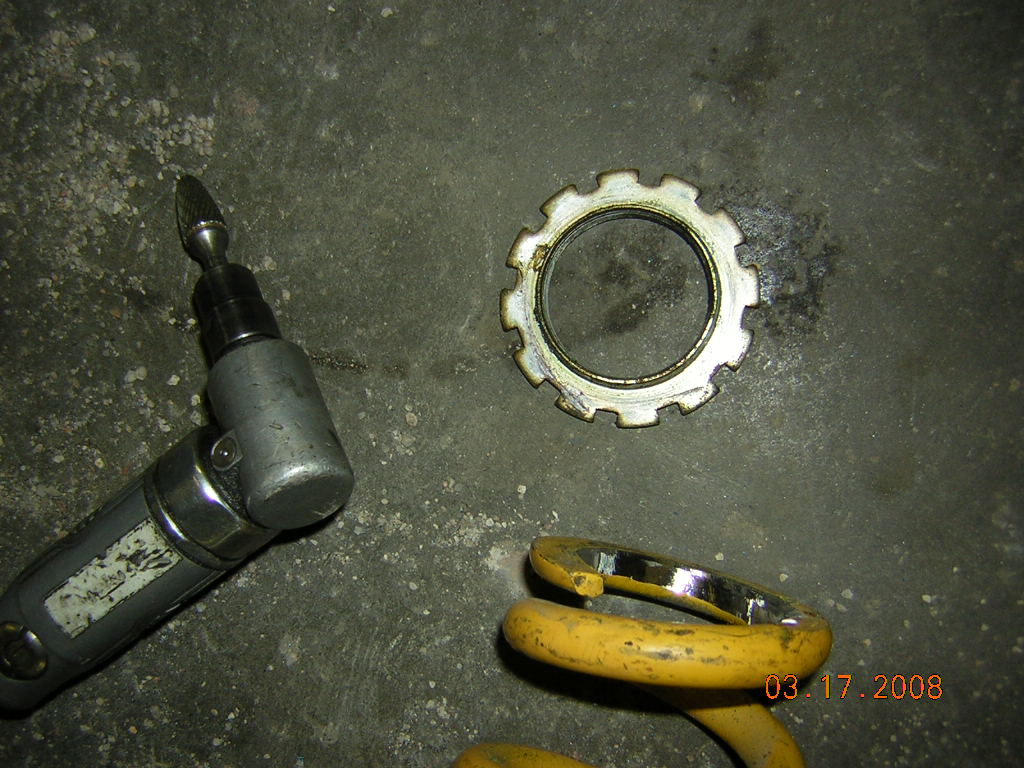
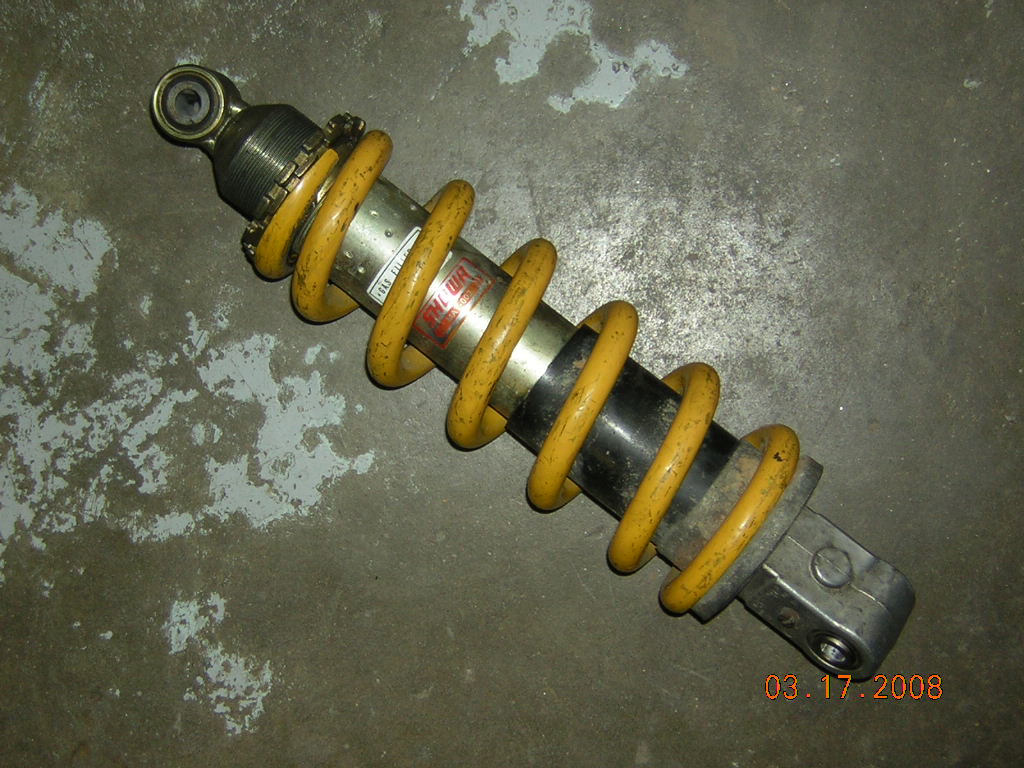
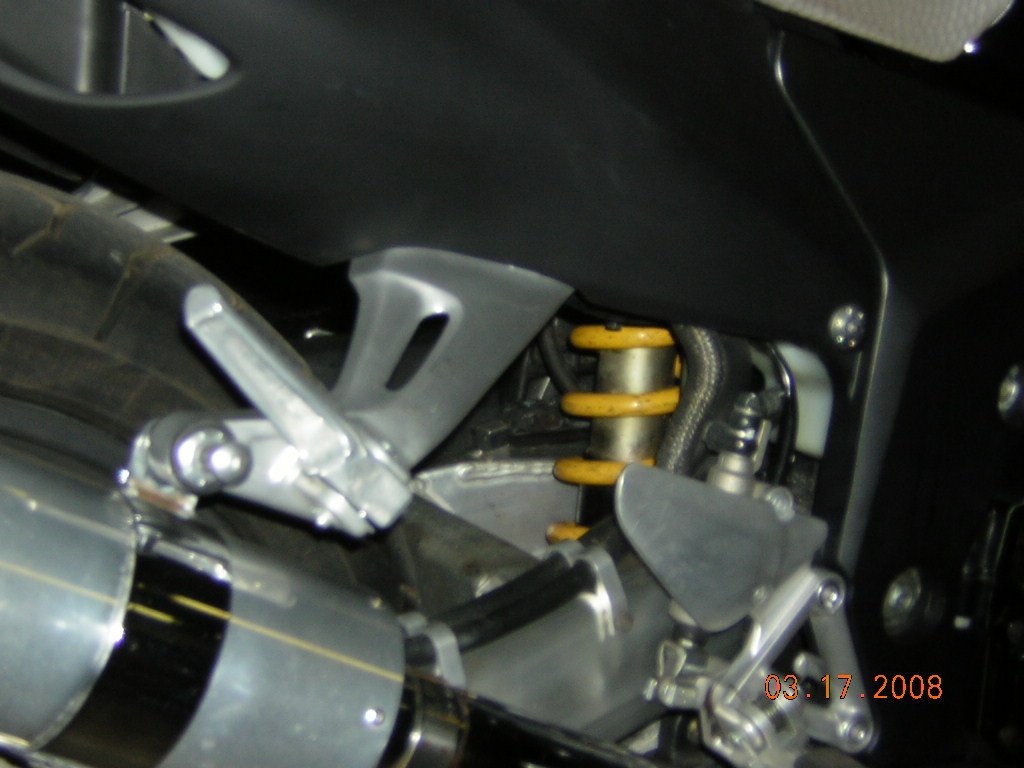
The spring had to be compressed to come off the honda 1000. It's showa 40mm has a locking/adjustable collar at the top, rather than the familiar locking rings on the XX. I went over to the strut compressor I've mounted to the wall, and pressed it with that. It BARELY worked, and I was worrying it would cause me to lose an apendage! :icon_slap: Anyhow, it compressed enough to drop the collar(s) off the bottom, and remove like that. I would not recommend that method. Perhaps a set of those cheap strut compressors would work better? Oh well, I won't have to do it again. BTW: The spring is making a huge difference. The static rear of the bike is still a bit taller because of the spacer I installed, but the rider sagg puts my light ass in the perfect spot. I have noticed that the shock is now responding better to small road bumps and grade changes. Unfortunately, the shock bottoms out when riding 2-up and hitting any large holes or bumps. I haven't noticed any bottom out problems when riding solo, and I have noticed that the bike squats well when the fuel is applied. Still not too much to create any shake issues when exiting a corner under power. I am pleased with the spring, but it still isn't enough. Hell, the shock still has 20k on the original. The bike likes to see-saw a little bit much when on a washboard type street at low speeds. Don't know if that is attributed to the rear spring or front forks. I will continue to ride as weather permits, and update.
-
Meth keeps the weight off. Ever see a fat Tweaker? Good info on the spring. I'm wound tight from design. I couldn't mess with meth or coke, I'd dwindle to nothing. Bad enough I can hide behind a light pole already! Just imagine how small a spring I'd have if I didn't succomb to the mmunchies every night?!
-
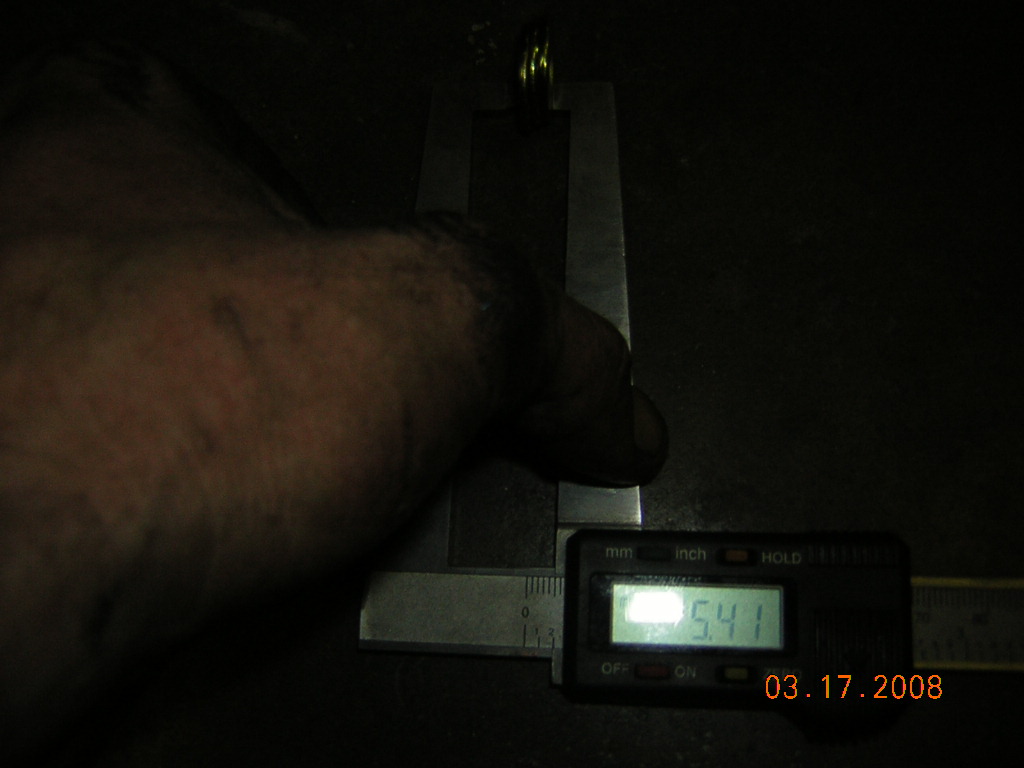
Pulled the stock spring off the rear and replaced it with the stock spring off a 1998 vtr1000 I bought off e-gay for $40 shipped. The Vtr spring was a tad over 1/4" shorter than the stock cbr spring. I also installed 5.41mm worth of shim to the shock. Seems to be negligible ride height difference. I imagine the shim offset the spring. Anyhow, the spring had to be lightly shaped to fit the adjustment collar of the cbr. Other than that, easy as pie. I will post results when the weather is nice enough to get some. I will post pics shortly. Stock spring rate on the vtr spring is 16.4 kg/mm. Stock cbr 16.8kg/mm. for 170lb rider. Racetech recommends 16.40 w/a 156lb rider. I weigh 155 or so. Hopefully I can get some rider sag now. I will check soon.
-
We don't have any wd-40 in the shop. PB blaster is much more the penetrant. I do a lot of suspension work and alignments. I always have a can and a torch! I would not however use it on a chain. I use bel-ray super clean chain lube. It may bite me in the ass, but I don''t clean the chain w/anything but a bucket and soap when I wash the bike. The Super clean sticks like nothing else, so the swing arm doesn't get nasty. It look like white paint which I think is cool. I just think it'd be better to keep the harsh chems away for those o-rings. Keep it greased, then replace when it kinks. Of course, I try to keep my bird outta the grime. Use my rm250 for that.
-
Doing that would only succeed in getting oil into the engine. This isn't a vacuum gauge so much as a balance gauge. If you were to just put the tubes in oil, you would be balancing against atmospheric pressure, thus oil into engine. This tool is measuring vacuum between each other. When you get a small increase in vacuum on one cylinder over another, the low cylinder starts to lose it's tug of war with the other(s). I sat and pondered on this for a minute, and it makes perfect sense. Reefer to step one! It is really amazing how the pressures affect one another in this system. After about 5 minutes of use, any normal hooplehead could understand the relation between the four cylinders. They all act cohesively on the gauge, but it's still a bitch because of how the adjustments on the bike all react to each other. At least cylinder 3 gives a no fuck-up reference point! Now you the hooplehead too!
-
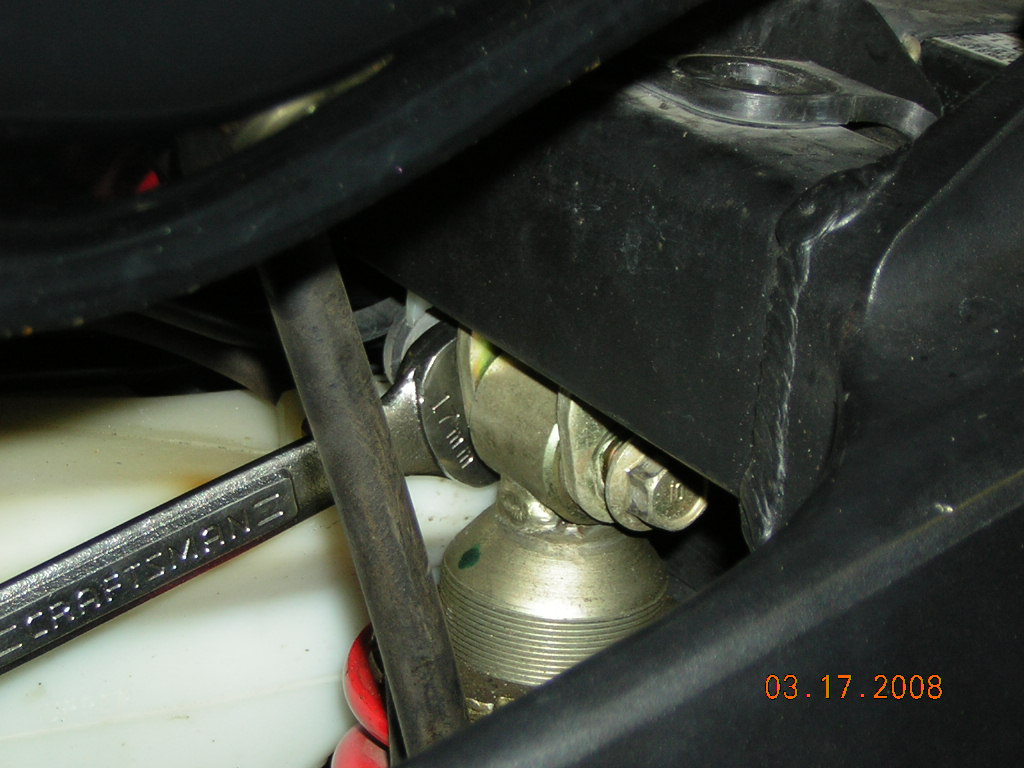
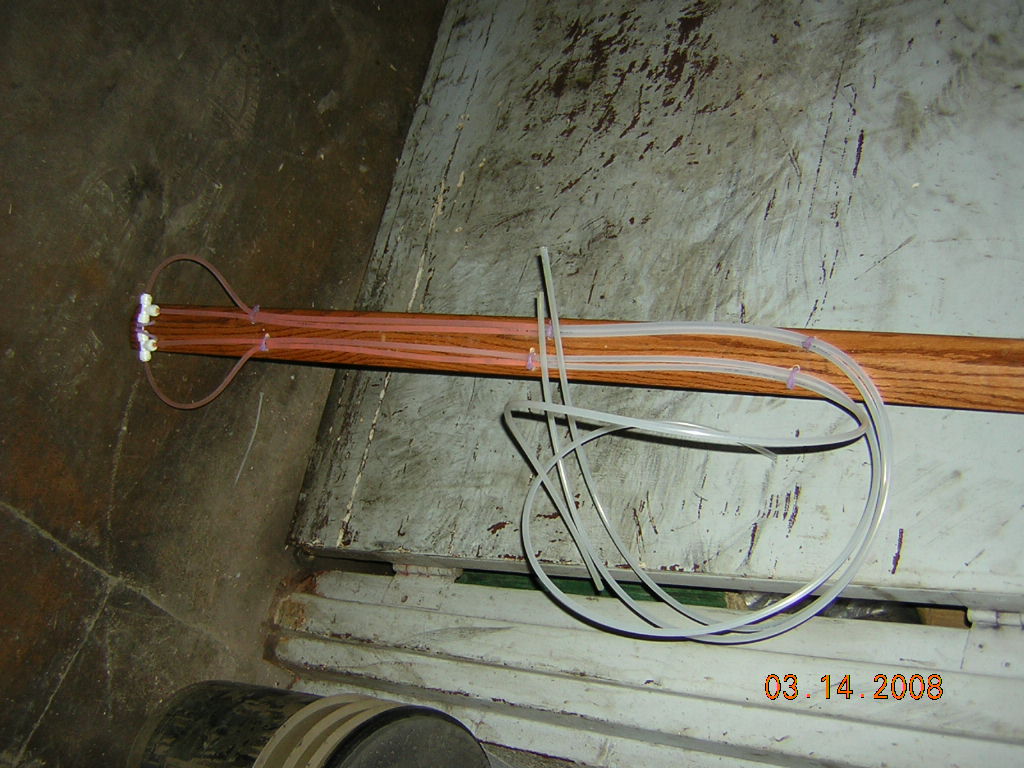
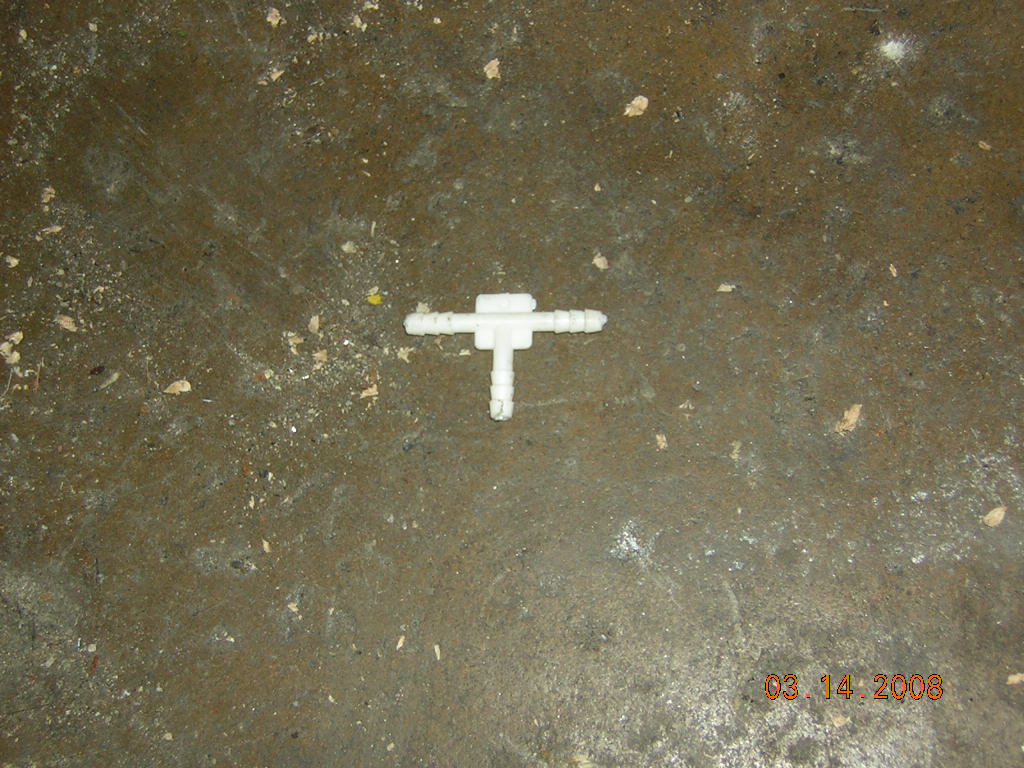
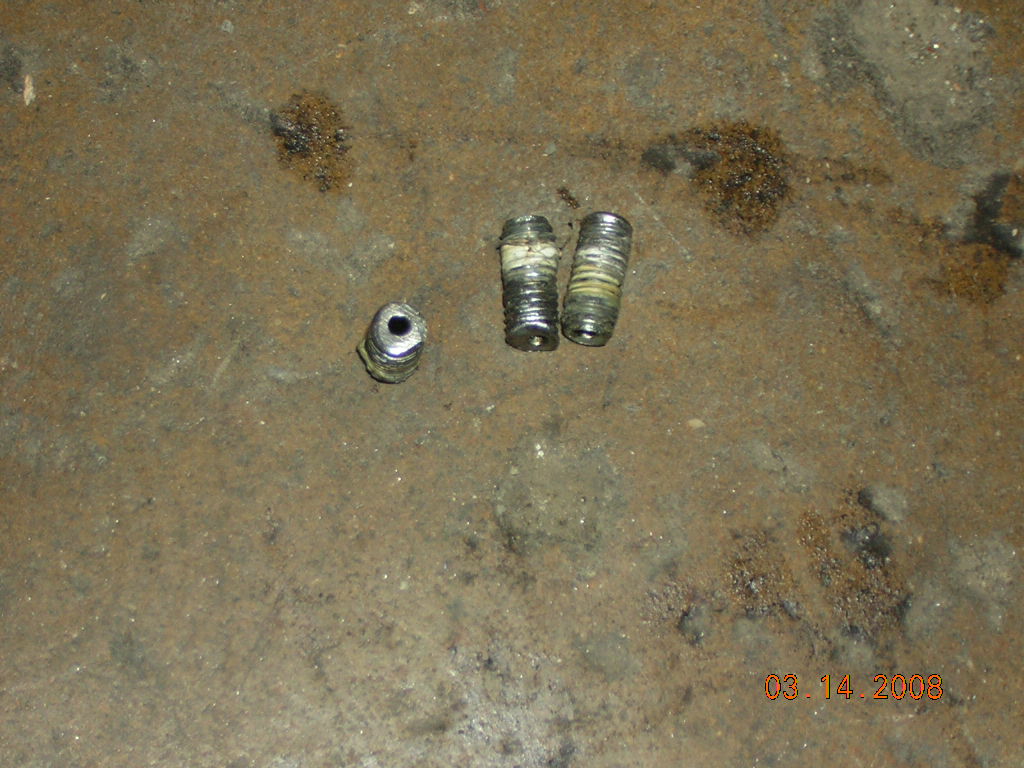
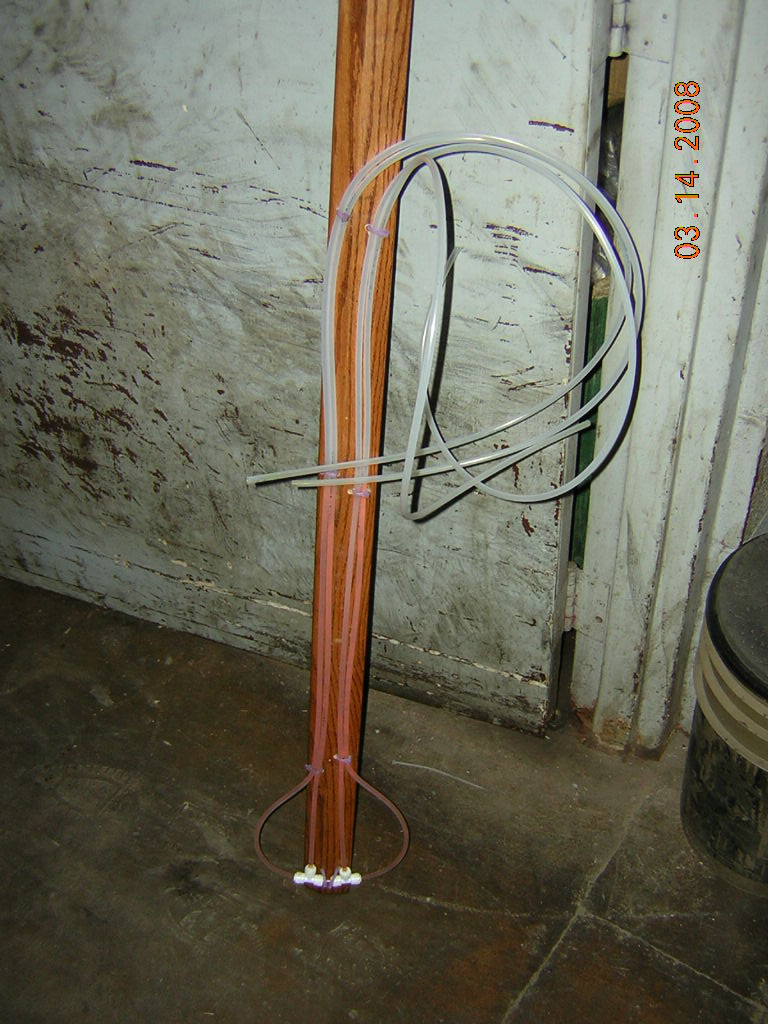
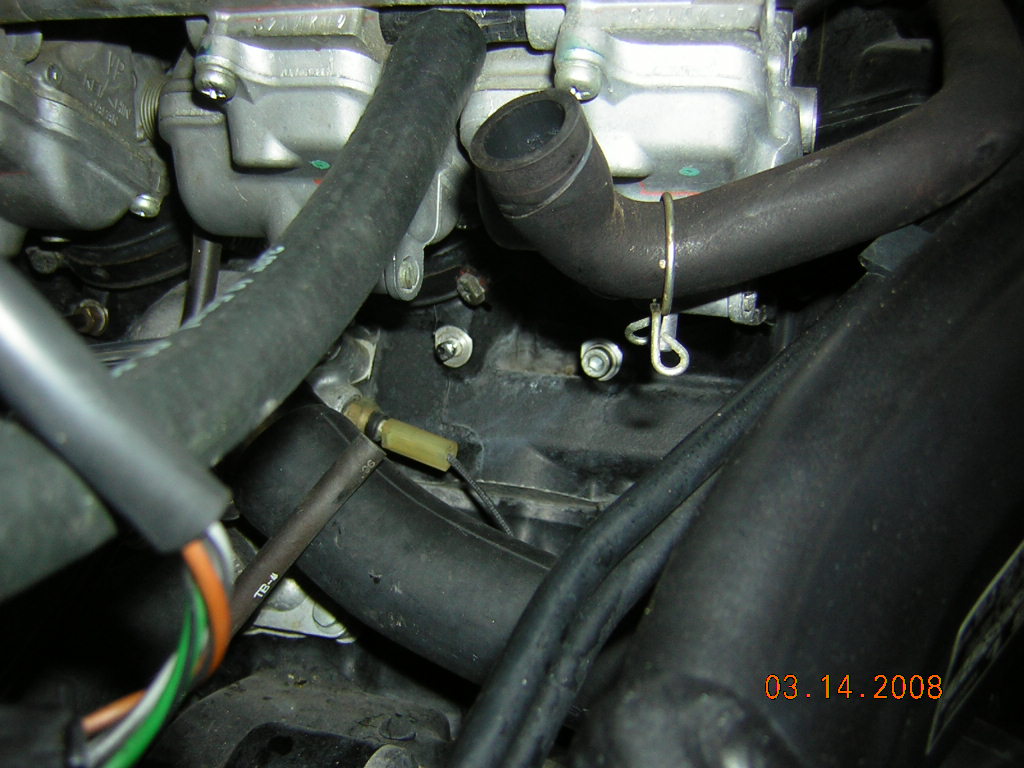
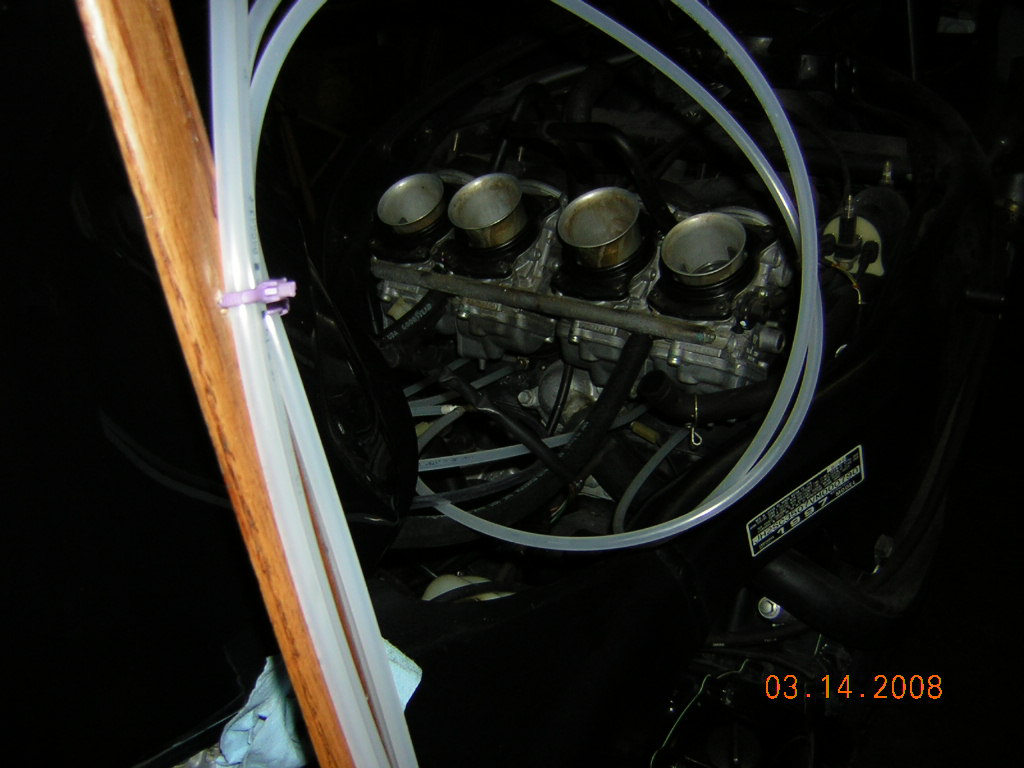
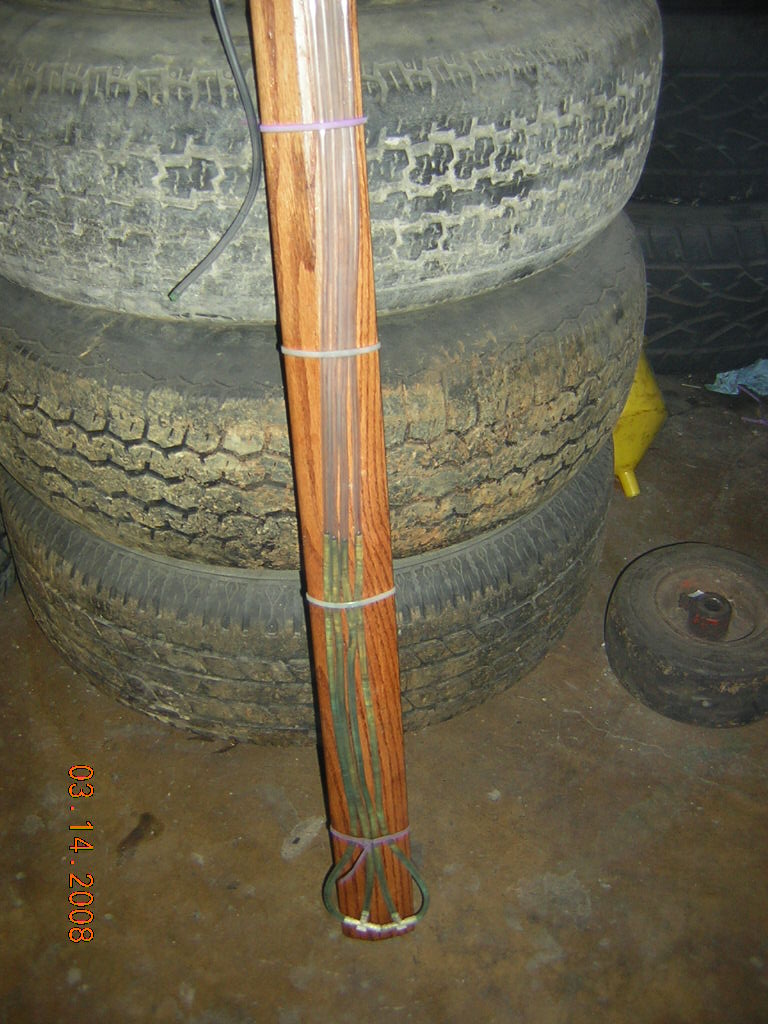
Alrighty. This is going to be a sloppy page, but my picture editor went bad, so there will be rough cuts only. I have used this carb tool, and it seems to be very accurate. I got my adjustments down to the point that visually seeing the adjustment was too much. I actually ended up down to the finite movements that could barely be felt with the screwdriver. After and hour or so, the bike idles smooth and sounds awesome. Even as hard as I tried, the homemade gauge showed slight vacuum variances. So, I will assume that this gauge is as accurate as you could possibly need. Hell, you can only turn a screw so little . You will need: (2) 1/4 O.D. plastic line connectors. I found them at lowes in the plumbing section. $3-4 each. (25') 1/4" O.D. vinyl plastic tubing. This stuff holds up to heat and vacuum fairly well. kind of an opaque plastic tube. $.07 a foot! $3 Some kind of board or plank. Anything to hang the hoses off of. A plastic tee, but you could always rob the one that's under the gas tank. You'll need one of these to tee into the vacuum going to the fuel safety valve. Zip-ties as usual. 1qt of 10/30 or 10/40 oil. And a cup or two of tranny fluid. I used 10/30 GTX and merc dex. Try and stick with the heavier oils, I used 5wt fork oil on my first attempt, and it was way too sensitive. The vacuum kept pulling the oil up too fast. (3) 5mm bolts. Buy four! Get the longer one's and drill the smallest hole you can thru the center. I drilled from the botton and then used the grinder to lop the bolt heads off. To assemble. 1)Hit the bong and relax. 2)Refer to step 1 then skip to step three. 3) 4)oh yeah, the gauge. 5)Cut the tubing into 4 equal lengths. 6' each should do. 6)Cut a 1" piece of tubing from scrap. 7)Connect the tubes as shown in picture. 8)Keep tubes straight and mount to whatever plank you are using. 9)Marvel at how simple this is and wonder how to improve the design. 10)Refer to step one then skip to step 11. 11)Take the 3 bolts, drill a very small hole thru the center (from the bottom). 12)Lop the head off the bolt but be careful to not damage threads at other end. I used Vise grips and a grinder. 13)Wrap with teflon tape a few times, so it will seal where it screws into the engine. 14)Screw the bolts halfway into the engine w/pliers. 15)Cylinder 2 should have a nipple that directs vacuum to the fuel safety valve. Using scrap, tee into it but cap off spare end. 16)Mix transmission fluid into the oil(not in the bike!) until it is the color you want. Don't go too thin however. To Fill: Get the gauge all set up, then unhook two hoses at the very bottom. While holding it upright, I took the oil (colored with tranny fluid) bottle and put the two unhooked hoses down in it. I then sucked the fluid up into the tubes until it was about 2 foot from the top on both. Wasn't too easy, but some of you could suck the bottle dry w/o issue I'm sure. Be sure to not draw air while you do this, or it takes a long while to settle! Put your thumbs over the tops, so you lose no oil, and re-connect the bottom lines. If you got it right, the oil will settle level in all four tubes. If you got some air, try swinging it or pulling vacuum on the line(s). You could always burn a lefty, stare at the thing for 20minutes, and be content that this just may work! To Hook-up: Locate all the vacuum ports. If you are blind, here you go. it's the 3 allen bolts and the nipple with a hose attached. Here is cylinder 1 and two (left to right). The other two are below carbs 3 and 4, inline with 1 and 2. If this confuses you, refer to step 1 then skip back here in 10 minutes. I installed my 5mm bolts w/the telfon end in halfway. Leave the nipple and hose on cylinder 2. Using pliers worked fine. I also installed a tee into the fuel shut-off vacuum line coming from cylinder 2. I used leftovers, rather than cutting the factory hose. Cap-off all the ends, Warm the bike and set idle speed (1100 +-100 rpm). Shut-off the bike, uncap the ends, and hook all the hoses up. Cylinder 2 will hook up at the tee for the fuel cut. Be sure to hook the hoses up in order, so you can easily tell which cylinder goes to which tube on the gauge. Start the bike and be ready with the kill-switch. Using oil probably won't damage the engine, should some get sucked up. However, if any of the levels get down to the tee fittings at the bottom of the tool, it'll draw air and you'll have to try swinging it or pulling vacuum on the line(s). You could always burn a lefty, stare at the thing for 20minutes, and be content that this just may work! It took me starting and shutting off the bike maybe half a dozen time before I got the balance adjusted to where the gauge would be steady enough, long enough, to adjust it on the run. Remember, cylinder 3 does not adjust. The oil never got too far, it just sucked a little low at the beginning when my carbs were out badly! I can't remember which way to adjust to make the vacuum more. I believe that loosening the screw would decrease it, yet I may be wrong. Let's just say I had to "recalibrate" enough that I barely recall. The gauge worked perfectly! The bike idles smoother and seems to have better throttle response. I haven't had a chance to ride it, but it sure sounds better! i have a quick-time clip of the gauge working after I was finished. You can rev the bike and watch the vacuums go rock steady. Seems like the vacuum pulses completely disappear when you gas it. Really cool to watch. The video sucks, and I don't know how to post it. It's 6mb so if anyone wants it, tell me how. If you have any questions, read the fucking manual and refer to step 1 of this how-to. Peace you bunch of Wangs! -Shane aka hooplehead here's a 3$ prototype version that didn't work!

-
I bit the bullet and spent $12 at the hardware store and made a new gauge. The second attempt worked like a freaking dream! I will post a full how too thread later. Now, I can spend that $130 on gas to ride it! I am so fucking happy! Did I mention I was happy Man, I feel this strange sensation. . . .no not that. . . .I believe it's Happiness! 3/16/8 Here's the results: Shane's little tool
-
Tried that. Ran into issues. I got the 5mm bolts drilled to hook hoses to, but the 1st two carbs from the left, when sitting on the seat, are pulling so much vacuum it tries to draw fluid. I will probably fiddle with a gauge and get it closer, then try again. What a pita trying to use one gauge, they all keep changing! Haven't given up on the homeade, since I got less than $3.50 in the set-up. Any ideas how to set a baseline prior to testing. I have tried 3 1/2 turns out, but that aint cuttin it. thanks -Shane
-
Blind is right! Holy shit, I walked over to the bike looked down and damn, there they are. I didn't realize I was supposed to look UNDER the carbs. I was looking for srews, but they seem to be allen bolts. Either way, perhaps I really am a hooplehead? Thanks kel. I'll put a pic for any other visually challenged.
-
Damn, that's a long ass year! Where the hell you living? Or if my math is right, that's a short ass year. Either way. . .poor bird, she must like it rough? Sing it with me: HONDA HONDA HONDA now everybody HOOKERS HOOKERS HOOKERS
-
Can a Bird kill a battery? A brand new DieHard....
Hooplehead replied to Warp11XX's topic in The Garage
I'd recommend Honda parts, unless you can only afford a hooker. -
You paid $90 for a manual... :icon_doh: Yeah, I know. The local shop around here is totally bending me over every time I buy parts. I had to drive two towns up to buy fork oil, cuz Jim's aint seeing any of my money! Bitch about the shop in town, he stocks NOTHING, and doesn't give me prices until he's already ordered the stuff. Either I get screwed up front at Jim's, or screwed sideways in town. I am quickly learning to order everything online! Thanks rideonxx, I'll keep looking at the carbs and see if I can locate the ports. Going to take off the rear cowl and weld/reinforce the grab bar mounting places. I hope this doesn't become an everyday thing!
-
Don't forget, new tires are slick. My new ones are smooth as silk, but are still a little slick when cold. Only 300 miles on them so far. Enjoy the ride!
-
Hookers make the best parts to fit me, yet honda makes the best parts to fit a honda. Depending on the part, you may get more your money's worth investing in a hooker named heather!
-
Been trying to figure out how to sync my carbs. After removing the tank and getting gas on my new paint job, I noticed a shit ton of hoses loose. After being pissed about all that, I couldn't find those screws that hide the vacuum ports for carb sync. I found the adjustment screws, but where the hell do I get my vacuum readings? I know, "rtfm hooplehead", but really I have stared at the damn thing for 15 minutes and finally gave up when I noticed a crack going from my grab bar to the rear seat. Son-of-a-bitch! The more I try to fix on this damn bike, the more I find wrong! Guess I gotta buy a piece of foam for my airbox too. Anyhow, anyone got any pics of where I hook up my lines? This $90 manual is seeming to have been a huge over-investment!
-
Can a Bird kill a battery? A brand new DieHard....
Hooplehead replied to Warp11XX's topic in The Garage
Never trust a battery! Just swapped one today, it was the store's top of the line, and less than a week old. Once you try at least 2 batteries, then start to doubt the bike. Never forget your receipts! -
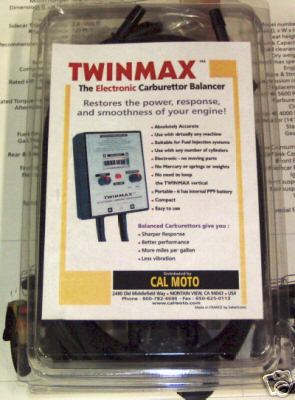
Going to buy a carb sync tool, but haven't a clue which is best. 1. twin max around $100 2. EMGO around $50 3. Motion pro $110 I am starting to lean towards the motion pro. I don't know, but it looks neat-o. Has anyone tried the digital? I am planning on using the tool more than once, and seems like I am always working on my friends' bikes too. Just figured I'd ask you all, I'm sure somebody can tell me which are pieces o' shit. Anyone know of any other brands that are affordable, let me know! thanks


-
Damn man! When you figure out the perfect set-up, all I gotta do is half it. :icon_nana:
-
warm until half choked. 2minutes tops. Cruise 3 blocks, ease choke off and continue cruisin' easy till midways. Course, that's only in the winter.
-
I spent $40 on egay for a lighter rear spring. I spent $11 at bike bandit for fork seals, and am going down to the shop to get 5wt oil. I will shim the rear 6mm. Pretty much going to book it. I bought the lighter stuff cuz it's mostly a solo bike and I'm 155 lbs. Grand total of $65 or so. All swing bearings inspected and re-greased. Hope it helps my '97 /20,000 mi. I'll update soon. 3/10/8 Got the 5wt oil in the forks and put new seals on. Everything looked good, even the copper and teflon inside the fork. Used bel-ray 5wt and measured at 150mm from the top. Seems like there is a lot more dampening going on now. Almost like it became a progressive travel? Much Bueno :icon_thumbsup: One thing odd, was the fluid I dumped out of one fork was red and the other clear? Some tomfoolery going on I presume. Haven't gotten the rear spring yet, and haven't a chance to test ride. I'll update. ---this thread was hijacked by the one and only shanesublett---
-
Bagster Baglux tank cover BLACK! $50 shipped
Hooplehead replied to Involute's topic in The Sales Floor -- For Sale/Wanted
FUCKING WANG! :icon_slap: