
blkbrdrydr
-
Posts
437 -
Joined
-
Last visited
Content Type
Profiles
Forums
Gallery
Events
Everything posted by blkbrdrydr
-
Since the Shim Bank kit disappeared long ago, what size shims would I want to have on hand when I check the valve clearances in December? I'm considering ordering one or two of the Hot Cams refill kits that have 5 of each size between 1.80 - 2.05 and between 2.10 and 2.35 but I'm wondering what sizes that I'm likely to need, if any. I've checked with the local dealers and none of them have shims in stock.
-
YEP... I have a valve stem pulling tool but the handle was too long to allow the thing to screw onto the threads of the valve stem. In any case, I got the Ariete valve stems from Bike Effects today and like the fact that they just press into the valve stem opening with a bit of lubricant and then I just needed to add a little bit of medium thread locker and tighten the nut inside of the rim to about 88 in-lbs.
-
Mike, I wish that I'd read your excellent advice before I removed the valve stem and here's why...! I used a short piece of 2x4 and stood it up on the edge of the tire. Then I wedged a full length 2x4 under the rear tire of my wife's car and on top of the short piece. All it took was a bit of push and the bead was easily broken from the rim. I'm on a roll. THEN.... I used a set of vice grips to pull the valve stem out of the rim and you already know exactly what happened. The little rubber fucker split in half and the part inside of the rim is now rolling around loose inside of the tire. Since I don't have the hands of a four year old Korean girl, it's still bouncing around in there. Since I only have a short tire iron available.......... it's going to stay inside of that damn tire until the No-Mar arrives and I can just remove the tire from the rim. (Since it was shipped today from St. Louis, it may be here on Thursday). If I really get lucky, the Ariete valve stems will also get here by Thursday and I'll have learned this lesson for no reason, whatsoever. Thank you for taking the time to share the great information.
-
A few days ago, I ordered a set of Ariete 90 Degree valve stems from BikeEffects and a No-Mar Tire Changer to be used at my next tire change. Unfortunately, I went out to the garage and carefully examined the existing valve stems and found cracks in both of them. Because I may need to ride several hundred miles before my new valve stems and tire changer arrive, I want to know how to just replace the valve stems myself, with some genuine Chinese ones that I just picked up at the Honda dealership. First off, can I replace those things by just breaking the bead on one side of the tire? How can I break the bead without any special tools? Use the side stand on the other bike to break it? Use the bottom of my car jack while jacking up the car? I don't want to construct something special to just break the bead on two tires. After changing the valve stem, do I just need to inflate the tire until the bead is reseated (one POP)? Do I need to lubricate the bead and/or the inside edge of the rim, and with what? I'm just looking for the most simple way of replacing cracked valve stems until I can use my new tire changer and install my new Ariete valve stems next week.
-
I'm guessing that the rear wheel never got any lower because your PitBull rear wheel stand supports the swing arm and raises the rear axle. OOPS.... I should have read what was already written before I answered.
-
As I recall, I ordered 5 of the SB8125L size for the front calipers and the clutch. For the rear caliper, I ordered 2 of the SB8125LL size I ordered them directly from Speed Bleeder
-
Deciding whether to freeze the steering stem or the bearing, is pretty much like discussing which motor oil is best as everyone has their own theory about which way is best. For the benefit of those who have never attempted to replace their steering head bearings, it's probably better to skip the pros and cons of which choice is the best and just discuss why it's helpful to freeze one of them rather than having anyone think that one of the methods is the wrong way. If you choose to freeze the bearings for a few hours, you do it because the inner race is a ring that's frozen with the purpose of getting the metal to contract and therefore, make the inside diameter larger. That enables it to slip more easily over the steering stem. If you choose to freeze the steering stem, there's a lot more metal to shrink and it's necessary to freeze that thing for several hours, and preferably overnight, to slightly shrink the outer diameter of the stem. If you go that route, it will also make the bearing go on more easily. Honestly, it's six or one, or a half-dozen of the other as either method works for making the bearing go on the stem more easily. Actually, I suppose the ideal method is probably to freeze both in order to create a smaller diameter on the steering stem and a larger diameter in the bearings inner ring. At the end of the day, freezing both would save one or two hits with the hammer over freezing just one, or the other and that may be important to some folks. I choose to freeze only the bearing because it had less metal surface than the steering stem and I decided that it wouldn't have to stay in the freezer for as many hours and I could finish the job sooner. Had I thought about doing the job at least one day in advance, rather than as a last-minute decision... I would have frozen the steering stem overnight. Of course, I would have had to make sure that my wife didn't catch me sticking the steering stem in her freezer. :icon_nono: Since the bearings were smaller, they were easier to hide in the automatic ice maker container in the freezer.
-
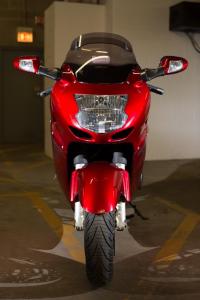
I've owned my CBR1100XX since I bought it new on July 5, 2001. In that time, I've ridden it around 60,000 miles, in almost every conceivable type of weather conditions and... never felt notchiness in the steering, never repacked the bearings with fresh grease and never checked and adjusted the torque on the steering stem nut. For years, I've had HyperPro springs in the front and HyperPro spring around my original and a used replacement OEM Honda shock. Recently, I decided to have GP Suspension rebuild the forks and send me a Penske rear shock since they did a fantastic job on my FJR1300. In any case, I decided to take advantage of the forks being off and replace the original steering head ball bearings with tapered roller bearings from CBR Bearing Company. These are Japanese bearings that may even be supplied by the same manufacturer that Honda purchases theirs from. These are NOT the much less-expensive Chinese bearings that are sold by a company like All Balls Racing. The set was around $53 and included new outer races, the tapered roller bearings, and dust seals. Just contact Charlie Rowlett, and tell him what you need. Yeah, I know that's more expensive than the Chinese bearings but I'm okay with spending $20 extra on something like steering head bearings when I might only have to do it every 60,000 miles or so. LOL I had some free time and removed the original ball bearings. I was amazed to find that the original factory grease was still plentiful and barely discolored. I was further amazed to find every ball bearing in perfect condition. The only problem that I found were a couple of small nicks on the lower race which were probably caused by stones hitting it over the years. I decided to just install the tapered roller bearings anyway. Using a 10" drift and a 5 lb sledge, the upper and lower races each popped out with two hits from the hammer. The lower bearing inner race took 5 taps to get it completely free of the steering stem. Putting the new lower bearing into the freezer before driving it with the old inner race and a 1 1/4" ID piece of pipe also couldn't have been easier. Probably 15 years ago, I bought the Official Honda Steering Head tool to use on my Goldwing so I had the correct tool to tighten everything down. GL1500 Goldwings used tapered roller bearings so I used the same procedure as outlined in the Honda GL1500 Service Manual to torque the Steering Stem Adjuster Nut on the Blackbird. This contains excellent photos and explanation of the procedure for installing new tapered roller bearings. Installing New Bearings. Although Steve made his own tool to remove the races, there are indents in the frame that provide a perfect place to rest the tip of a 10" drift while you smack it with that 5lb Sledge. Additionally, the top bridge nut on the CBR1100XX is torqued to 76ft-lbs. First I torqued the adjuster nut to 29ft-lb and turned the steering stem fully lock to lock a few times to seat the new bearings. Next I loosened the adjuster nut until it was hand-tight, then torqued it to the final setting of 14ft-lbs. Then, I turned the steering stem fully lock to lock a few more times and rechecked the adjuster nut torque. Finally... I attached a spring scale to a fork tube, as close to the lower triple clamp as possible, and then checked to make sure that it would take 4.0 - 4.85 lbs of pull to make the forks start moving. I just didn't want to tighten everything until it "just felt right" to me since I have no idea what "just right" is supposed to feel like on a CBR1100XX since I don't change steering head bearings very often. :icon_think: The Honda Service Manual for the CBR1100XX calls for 2.5 - 3.4 lbs of pull but remember that's the recommendation for a steering head using caged ball bearings. In researching the torque values for different Honda models, I noticed that those with caged ball bearings usually required a final setting of 18ft-lbs while those models with tapered roller bearings usually required 14ft-lbs. I only mention this because I've read many postings from those who have installed tapered roller bearings on their CBR1100xx's and tightened them to 22ft-lbs and mentioned that tapered roller bearings required more torque than caged roller bearings. Of course, YMMV.
-
Give Charley Rowlett a call at CBR Bearing Company. The phone number is 1-800-769-5388 Here's a link to his site CBR Bearing
-
Grandpa on Ludes??? That's fucking funny. LOL I like my new nickname. FWIW... I usually get somewhere between 12,000 and 16,000 miles on almost any tires on my Blackbird and FJR1300. Although I always exceed the speed limits on interstates, I do live in Southeastern Michigan where there are probably 11 curves in 318 miles so the tires don't get too much extreme use. As shitty as roads are in Michigan, the concrete that's used has never been very harsh on my tires. I checked my records to be certain and I did change the Pilot Road 2CT on the Blackbird at 14, 724 miles and there was 3/32" of tread depth on the rear and a bit more on the front. Additionally, I replaced the set on my FJR1300, which is a heavier bike, at 13,452 miles and there was also about 3/32" of tread remaining on both tires. I always keep the front and rear tires inflated to 41psi and I weigh about 215 lbs in full riding gear.
-
I replaced my Pilot Road 2CT tires at 14,700 miles with a set of Avon Storms. I also have another set of Pilot Road 2CTs in a box in the garage that will go on whichever bike needs them first. The Blackbird with Avon Storms or the FJR1300 with Pirelli Angel STs.
-
A while back, I came across a thread at Adventure Riders discussing a product called Vibranator. After finding that the product wasn't what I original thought it may be... I read many positive reviews about how well the product, reduced or eliminated hand numbness and pain caused by feeling the resonant frequency in the handlebars. Vibranator for Honda CBR and VFR models I bookmarked the page and forgot about it for almost a year. A few months ago, I came across the bookmark and started thinking about how much the resonant frequency that I was feeling in the Blackbird's handlebars was starting to bother me and how I was riding the FJR1300 far more often because I didn't feel the resonant frequency on that bike. I found that the ADVRIDER coupon code provided a nice discount and decided to order a set. Besides, they're actually guaranteed to work as advertised and can be returned for any reason within 30 days. Because of some other work that I was doing on the Blackbird over the winter, today was my first opportunity to take the XX out on the highway and compare the Vibranators to the extra-heavy Throttlemeister bar ends that I'd been using for the past 58,000 miles. After almost 300 miles at highway speeds with the RPMs in a range generally between 4200 to 5500, I can only say HOLY SHIT! The amount of resonant frequency was so drastically reduced that I had absolutely no numbness in my hands after riding for several straight hours. I know that the amount of resonant frequency felt in motorcycle handlebars will depend upon many factors, including the individual rider's hand mass and it may not even be noticeable to the majority of riders but for me, these tuned mass dampers worked exactly as advertised.
-
I use a dual-injector Scottoiler so my chains last a really long time. My current chain is a D.I.D. 530 ZVM2 and when I installed it, I also installed new front and rear Honda OEM sprockets. After 23, 600 miles of use, there is no visible wear on the sprockets or the chain and the only adjustments have been when I had the rear wheel off to replace the tires on three occasions.
-
Use Honda OEM seals. My current seals have been in place for 6 years and about 28,000 miles. When I installed the current set, I also installed Hippo Hands Fork Gaiters. Prior to 2005, I'd gone through two different fork tubes and two sets of fork seals because of rocks flying up from our shitty roads in Southeastern Michigan. Any Honda dealer should have them in stock.
-
I called Dave Hodges at GP Suspension today and discussed how to upgrade the suspension on the Blackbird. Ultimately, we decided to do the same things as were done to my FJR1300. Fork Services Labor Oil Fork Seals GP Suspension Fork Springs Correct Valving Stack on Rebound Pistons Compression Kit Dust Seals, Bushings Rear Shock Absorber Penske Model #8983 (felt that it would be a better choice than the Ohlins) __________________
-
That's great news! Now, does anyone have any opinions regarding my Traxxion Dynamics versus GP Suspension question? LOL
-
For the past 50,000 miles, I've had Hyperpro fork springs in my Blackbird and am thinking about upgrading the suspension for the bikes 10th birthday. Several months ago, I sent my FJR1300 forks to Dave Holmes at GP Suspension and was very pleased with the results. However, since the Blackbird forks don't have the adjustability of the FJR1300, I'm wondering if I might prefer Traxxion Dynamics AK-20 cartridges for the Honda. I live in Southeastern Michigan where there are 11 curves in 318 miles, I don't do Track Days, rarely carry a passenger, and only use the Givi sidecases for an occasional trip. Most of the 5,000 annual miles that I put on the Blackbird are on Interstates Thoughts?
-
52,000 miles and I bought it new 7 years ago last Saturday. Nothing has failed! I had serious stone dings in the fork tubes that caused the seals to leak until I installed fork gaiters but I don't consider that to be a failure
-
Stayed at the Two Wheel Inn in Robbinsville last month. Really enjoyed the place and appreciated the garage. Only downside is that Robbinsville is in a "DRY" county.
-
 I've had my VFR bars sitting atop Genmar risers for the past 40,000 miles or so. When I de-linked my brakes, I installed braided brake and clutch lines which are a bit longer than the stock ones. Check to see that you have enough slack with the OEM lines first. If so......... I think that you'll enjoy the added height with that set up.
 -
Avon replaced my defective front Storm with approximately 4,000 miles on it. The replacement tire is smooth, vibration-free, and causes absolutely no head shake at any speed. Huge difference from the original Storm. Nevertheless, I did write to Avon regarding my dissatisfaction over the excessive wear on the rear Storm, and asked if the Azaros might ever be made available in the future. Here's the response that I got from Avon: ============================================================================== Thank you for contacting Avon Tyres. We apologize for your dissatisfaction with the Storms. The Azaro did have an amazing life expectancy, more so than almost all of the competition. Avon wanted to make our sport touring tire more aggressive with a softer tread compound to increase grip and we have noticed in doing so that the tire would not last as long on the bigger bikes as compared to smaller bikes around 1000cc. We will not be producing the Azaro in those sizes, however we will be making a reinforced Storm in certain sizes on bigger bikes to help with stability and hopefully add mileage. Jesse Peril Avon Customer Service c/o Hoppe & Assoc, Inc. PO. Box 5112 Lynnwood, WA 98036 USA Tel: 800-624-7470, Fax: 425-771-4246
-
Gerbing's Heated Clothing
blkbrdrydr replied to blkbrdrydr's topic in Useful Product Links & Vendor Reviews
They never asked for a receipt. Good thing since the Jacket Liner was a Christmas gift from my wife in 1992 -
Talk about a warranty and customer service!!! WOW Many years ago, I discovered heated clothing and purchased a Widder vest and gloves. As time went on, I continued to press the limits of cold weather riding in Michigan and required even greater warmth. I added a Gerbing's Jacket Liner and gloves to the closet. Gerbing's Heated Clothing This Jacket Liner was one of the quilted-look originals. Very UGLY but very warm, and functional with trailer plugs for connecting the heat controller and gloves. (the gloves were double-wired by Gordon Gerbing because I used to smoke and often needed more warmth in the gloves than was needed in the jacket liner) Last winter, the trailer plugs that connected the gloves broke off and I wore my new Warm & Safe jacket liner instead. Ultimately, I was disappointed in the way that my gloves worked that liner, and had also lost some weight so the Warm & Safe was sold on eBay. I then contacted Gerbing's and asked about repairing the trailer plugs on my 15 year old Jacket Liner. They informed me that the repair would be covered under their lifetime warranty and that I should just send it out to them. Well... what I got back was a brand new Jacket Liner to replace my 15 year old one. How many other companies out there stand by their product after 15 years, and deliver that level of customer service???
-
Ive tried the carb cleaner trick on a dirt bike once & it melted a set of brand new rubber grips, Brand name was pro grips, It may have been cheap or NOS rubber ? I would not recomend this to anyone unless you are absolutely positive it wont melt the rubber in the process. I've used brake cleaner spray for years and it works very well on all types of grips
-
At least the ones on the tank. I asked the seller about the missing decals on the tank (Honda name) and on the fairings and here's the reply. "The bike has never been repainted the I just removed them they come right off" - rckqls