

01xxallen
-
Posts
4,754 -
Joined
-
Last visited
Content Type
Profiles
Forums
Gallery
Events
Everything posted by 01xxallen
-
When I mounted my Heli's there was no locating tab, so I thought I could move them around. I quickly found that there is a little room but soon with the wheel turned hard over, you can easily hit the tank in one direction and the fairing in the other. I suspect the purpose of the tab is so the bars can be installed at the factory the same every time. You can grind it off, but you don't gain much. Or, +1
-
Today I bought a new battery. I went to 3 places. First, my Interstate Battery store. They had their version of the Yuasa YTZ 12s for $71. Then I went to "Cycle Gear" and they had the Yuasa YTZ 12s for $165 but would sell it for $135. (I laughed). Then I went to the Honda dealer and he had the Yuasa 14s for $130, but knocked it down to $120. (I checked online and Chaparral sells the 14 for $113.) I bought the YTZ 14s. It is exactly the same size as the 12. I can't tell any difference in weight by holding them. Chaparral's web site shows the 14 as the stock battery in the ST 1300. I expected Honda to be the highest and Interstate Battery and Cycle Gear to be close. My old battery was still good but was dated 7/26/2004 so I thought I'd save myself some grief. :icon_think:
-
You obviously haven't seen me on the bike! :icon_doh:
-
I'm looking for a new battery, before mine goes bad, so I read the thread. Here's what I don't understand; a bigger CCA battery shouldn't demand a bigger draw on the charging system, should it? If you use say, 10 amps, then your charging system only needs to replace 10 amps, right? So the bigger battery would have a reserve of starting power, but no greater load on the charging system. Therefore, the bigger battery is a good thing, with no down side. Or am I wrong? :icon_think:
-
I gotta believe that the power for the starter doesn't go through the starter switch. Is there a relay that the switch triggers? You may be able to short the solenoid and see if the starter engages. Just thinking out loud. It's too odd that all this happened when you changed out the HID, If you replace the original bulb does that help? or is more involved? Often weird electrical problems are traced to faulty grounds somewhere. Good luck, let us know what it was. I guess I should read ALL the posts before responding. Glad it was simple. Anyway you got lots of good advice. (not from me, sadly.)
-
Those considering VFR/Heli bars might look at e-bay. Someone (not me) is selling a one piece bar and billet clamps kind of like the LSL bar conversion. Follow the search to "blackbird" or link The current bid is $45
-
Yes, to install the Heli-bars, you grind off a tab on the master cylinder that keeps the banjo fitting from rotating. I used a Dremmel tool and did it without removing the banjo bolt. When you look at the clutch and brake lines it is apparent what tabs have to go. Just loosen the banjo bolt enough to rotate it slightly and gain a little slack. I did not need to bleed either system. The little tab you nip off is cast into the master cylinder housing. You need a Dremmel tool anyway! In my opinion the clutch line is still a little tight, and others have recommended releasing it from the frame clip and flexing it up. Good idea. The Heli install is easy.
-
By the way, when you lower the brake pedal, your brake light will be on all the time. You will need to adjust the switch also. I found the easiest thing was to release the spring that pulls on the switch from the brake pedal. then remove the switch upward and rotate the plastic adjuster up against the body of the switch. I took mine all the way up and it seems about right, then reattach the spring to the brake pedal.
-
A Dremmel tool is a great addition to your toolbox, between the Buell pegs and Heli bars I needed one. It gets into small spaces.
-
You know what they say, "Les is more"
-
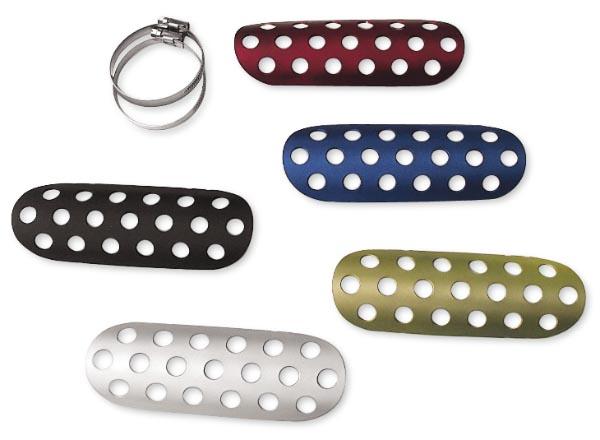
Do a google search for "motorcycle heat shield" and you will turn up a few. I bought the aluminum ones with the holes in them because I thought they looked good with the pegs. They were pricey, I think $32 each and I didn't like the way they mounted. Just tabs bent 90 deg. with a hose clamp through them. I ended up cutting a hose clamp to put between the pipe and heat shield so they wouldn't scratch the pipes. But they do the job and look good. And they were available in several colors including black. From Dennis Kirk.
-
Just remember, arsenic is all natural too! Doesn't necessarily mean it's good for you.
-
No tubeless tires are approved to run a tube in. Especially sport bikes that generate a lot of heat and are rated for high speed. I guess it's a safety issue. I might try it to limp home until I could get a new tire, but never for the long run. :icon_hand:
-
I had to get the book out. When you squeeze the front brake it applies pressure to the outer pistons of both front calipers. The left caliper moves up causing pressure to flow to the outer pistons of the rear caliper. This goes through a proportional control valve which prevents the rear wheel from locking up during extreme braking. When you step on the rear brake pedal, pressure is applied to the center piston of the rear caliper, as well as the center piston of each front piston. The front left caliper moves up again applying pressure to the outer pistons of the rear. A delay valve is used in the front so that pressure is applied only to the front left caliper until pressure rises to a preset level and then the valve opens allowing pressure to go to the right front caliper. That's to prevent nose dive during braking. Okay, that explains why the left front pads wear faster than the right front. But not why they would wear unevenly. (angle). In theory pressure is never applied to the top piston but not the bottom in any condition.
-
If you like the bar style, check out the LSL conversion for the bird. It uses the clip-on mounts to position bar risers for any bend bars. Kinda pricey, not as cool as the setup in the pics.
-
"Undo it from the clamp at the frame below the steering head, and bend the hard line slightly upward." I'll give it a try. Thanks.
-
I just added Heli-bars to my bird and I think the clutch line is a little tight. I see it is a flexible hose attached to a solid line. It seems to be crimped on at the connection. If I got a flexible line a couple of inches longer, can I crimp it on? Or can a dealer do it?
-
I took the nut off the adjuster and cut about 1/4" off the threaded shaft with a Dremel tool. I then screwed the clevis all the way to the top of the shaft. I also squeezed the clevis together a bit to make getting the cotter pin back in a little easier. (I used a split ring) I found the easiest way to adjust the brake light switch was to remove the spring from the pedal and switch, lift the switch out of the peg assembly and screw the adjuster ALL the way to the top. Reassemble and with the brake pedal as far down as it will go, the brake light is about right too. It's nothing that can't be reversed.
-
If you are adjusting the pedal: The repair manual tells to turn the pushrod. No, the rubber is not supposed to turn in a perfect world. However, if you are taking off the locknut, I'd suggest taking the tiny cotter key out, pulling the pin and spinning the clevis. You may want to trim the threaded rod to make sure it clears the pin when you screw the clevis all the way up. I'd suggest this, go to your local boat store and look for a "cotter ring". They are used on sailboats instead of cotter keys. They look like a tiny split key ring, are made of stainless, are reusable, more secure, and easier to remove. (from this location, it's torture.) Also, I removed the two hex screws that hold the brake M/C to the pedal assembly to gain a little flex. Be prepared to adjust the brake light switch also, once you move the pedal down the brake light will come on. It mounts to the back of the pedal assembly and in theory can be adjusted with your fingers by turning the ring. In practice, it may be easier to remove the pedal assembly from the frame (and the exhaust mounting bolt) to gain access to the back of the pedal assembly. Someone said: In theory, practice and theory are the same; in practice they are not. You'll feel great when you fix it yourself (and learn a lot.) That's how I get all my tools, one at a time.
-
Heli's for sure. Older style. Newer ones have a curve in the support. Still good to have!!! Enjoy.
-
Sorry about the bad grammar. Should have said "I was describing".
-
In writing the post I just finished, I was described lowering the brake pedal by taking out the cotter key and turning the clevis that holds the pedal. It just hit me that maybe I should have turned the brass shaft that goes into the Brake M/C. It didn't turn freely but it could turn. Then I would just loosen the lock nut and turn the shaft of the M/C. What do you think? The brake light switch is another matter, still hard to get to. :icon_think:
-
It's a beautiful day here and I had just finished putting on Heli-bars and Buell Ulysses pegs. I went for a spin. I don't think I'd want the bars higher as I can pretty much sit up comfortably and any higher I'd be in the wind too much. The pegs are an improvement but could be lower yet. However, then I'd have problems with the brake lever. I tried to lower the brake pedal a lot (man, is that cotter key a bitch to remove.) I took the nut off, spun the clevis up as much as I could and re-installed it. The brake light stayed on!!! I see the switch but it looks like the way to get to it is to remove the whole peg assembly. Another day. I put it all back together in the normal position and went for a ride. Took it up to 125 and it felt like 75. What a great bike! Kind of awkward at walking speed, but a rocket (to me) when I twist the throttle! At a buck and a quarter my helmet wanted to stay behind.
-
Thanks for all who responded. I did everything. A little heat, so I could still touch it, a few taps, a little spray. I ended up putting a large screwdriver between the M/C and the old bars so it wouldn't turn, and turned the wrench. It broke free with a snap, but nothing broke. I even had a bowl standing by to catch the fluid if it broke. New bars went on like butter.
-
Thanks to all, I'll give it another try.
