

haWHYnXX
-
Posts
422 -
Joined
-
Last visited
Content Type
Profiles
Forums
Gallery
Events
Posts posted by haWHYnXX
-
-
Thanks Philip,
It's supposed to rain this weekend, I may do some more of the install.
I like where Justin installed his servo, down near the transmission. But those are the best pictures I have seen for routing the bead chain to the linkage.
I currently have the tank off mine and can take/post a few more pics if wanted. I also have the servo under my tank above the trans.
-
I would use the electronic flasher. You can use any bulbs you want with it, no splicing of wires, unplug one, plug in the new. Done. I have an integrated on my XX with an electronic flasher and it works great.
+1 Much faster. I got one from my local Cycle Gear made for Honda. Plug and Play.
-
Yeah, from Pro-Oiler install guide:
Important: the pump needs at least 11.5V to operate - but the controller needs only 5.5V.So, if the controller counts through the 20x Prime pulses, but nothing happens at the pump, just start the bike's
engine so that the battery is charging and the voltage is up - then try again.
And I think butt whacking is good at any time!!!

-
When I first installed mine, it would not pump either. After rechecking, I realized I wired it wrong.
That's when I talked to Pablo at Pro-Oiler. One of his suggestions was to whack the pump with the butt end of a screwdriver (don't try to kill it, but not too lightly). This in conjunction with the WD-40 lube you already mentioned.
Also, try unplugging the oil line at the sprocket nozzle and see if it will prime. If it does, you'll need to clean all the crap out of the nozzle. Grease and grime could be plugging it up there.
Good luck - if nothing else works, email Pablo at Pro-Oiler. He's very responsive.
-
IIRC, the rims are chrome. If so, I'm interested.
-
Noreen is definitely looking for these. As before, will PM tonight after confirmation.
-
Tim, I think Noreen has been looking for one - so dibbs...
Will find out tonight for sure.
-
I've got some pictures here.
-
Just a quick tip for after you have the cc installed.... ALWAYS volunteer to be the lead bike in a group. Even if the lead guy has a cc, it is next to impossible to match the speeds. At least for me it is much easier to use riding alone than with a group.
I found that after installing the accumulator, throttle response is much better and faster enabling me to get a good speed match in short order.
Like Rich, I also use the TM a lot in the city and the CC for longer slabbing.
-
Josh or Keith,
I am interested in the header! Josh, you know where I am going with this................
And maybe I could entice you guys out of the chrome rims...

Keith - sorry to hear about your off. Heal up bro. I'm feeling kinda lucky "only" to have broken a collarbone. (And a bike)
-
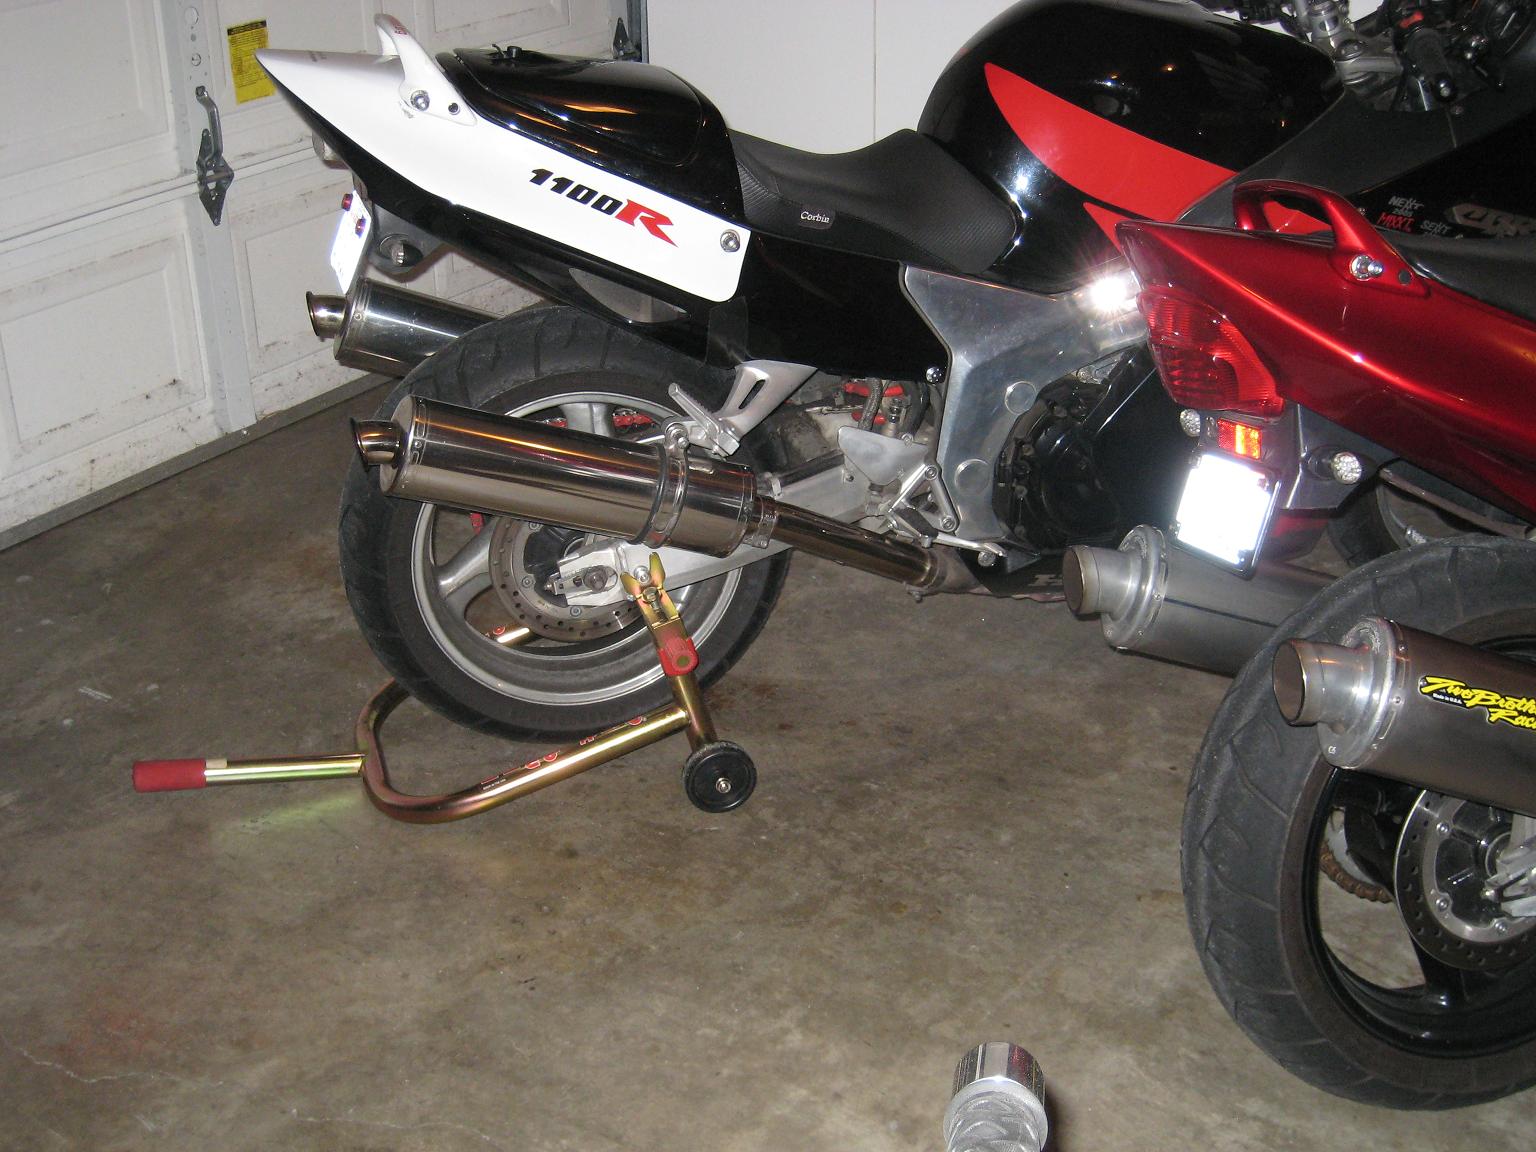
So.....did you guys go through one wall on the swingarm or all the way through?????
Only one wall.
-
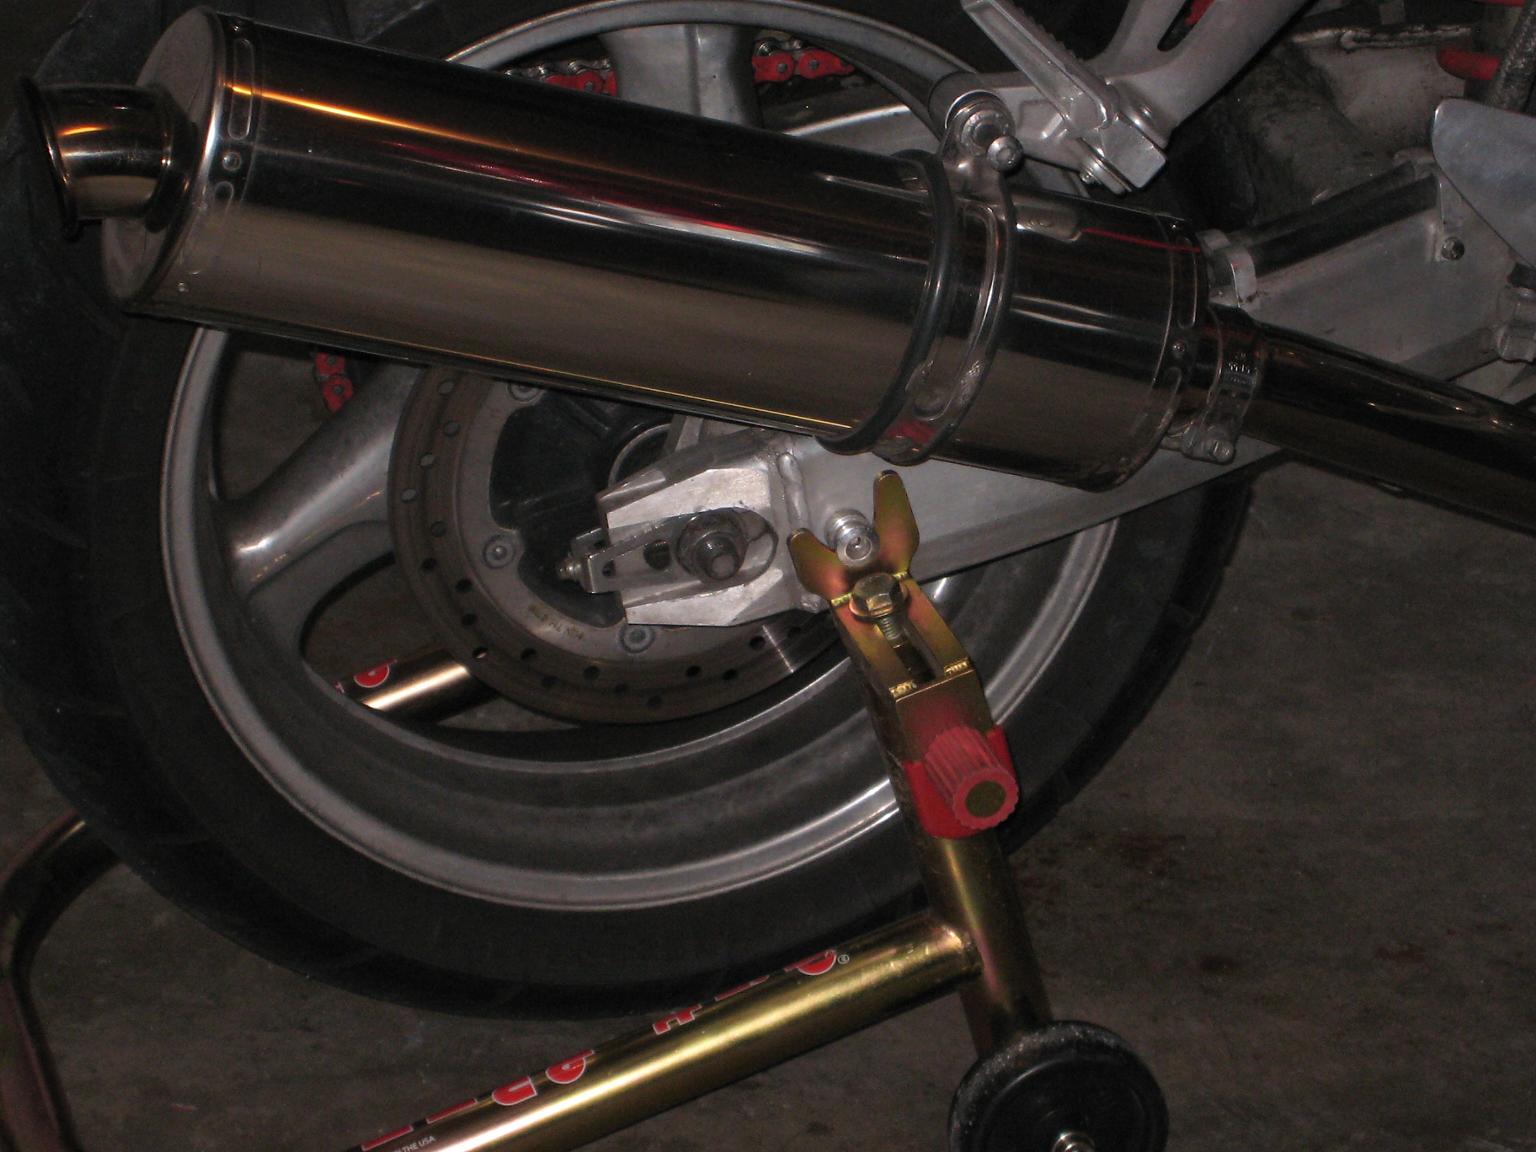
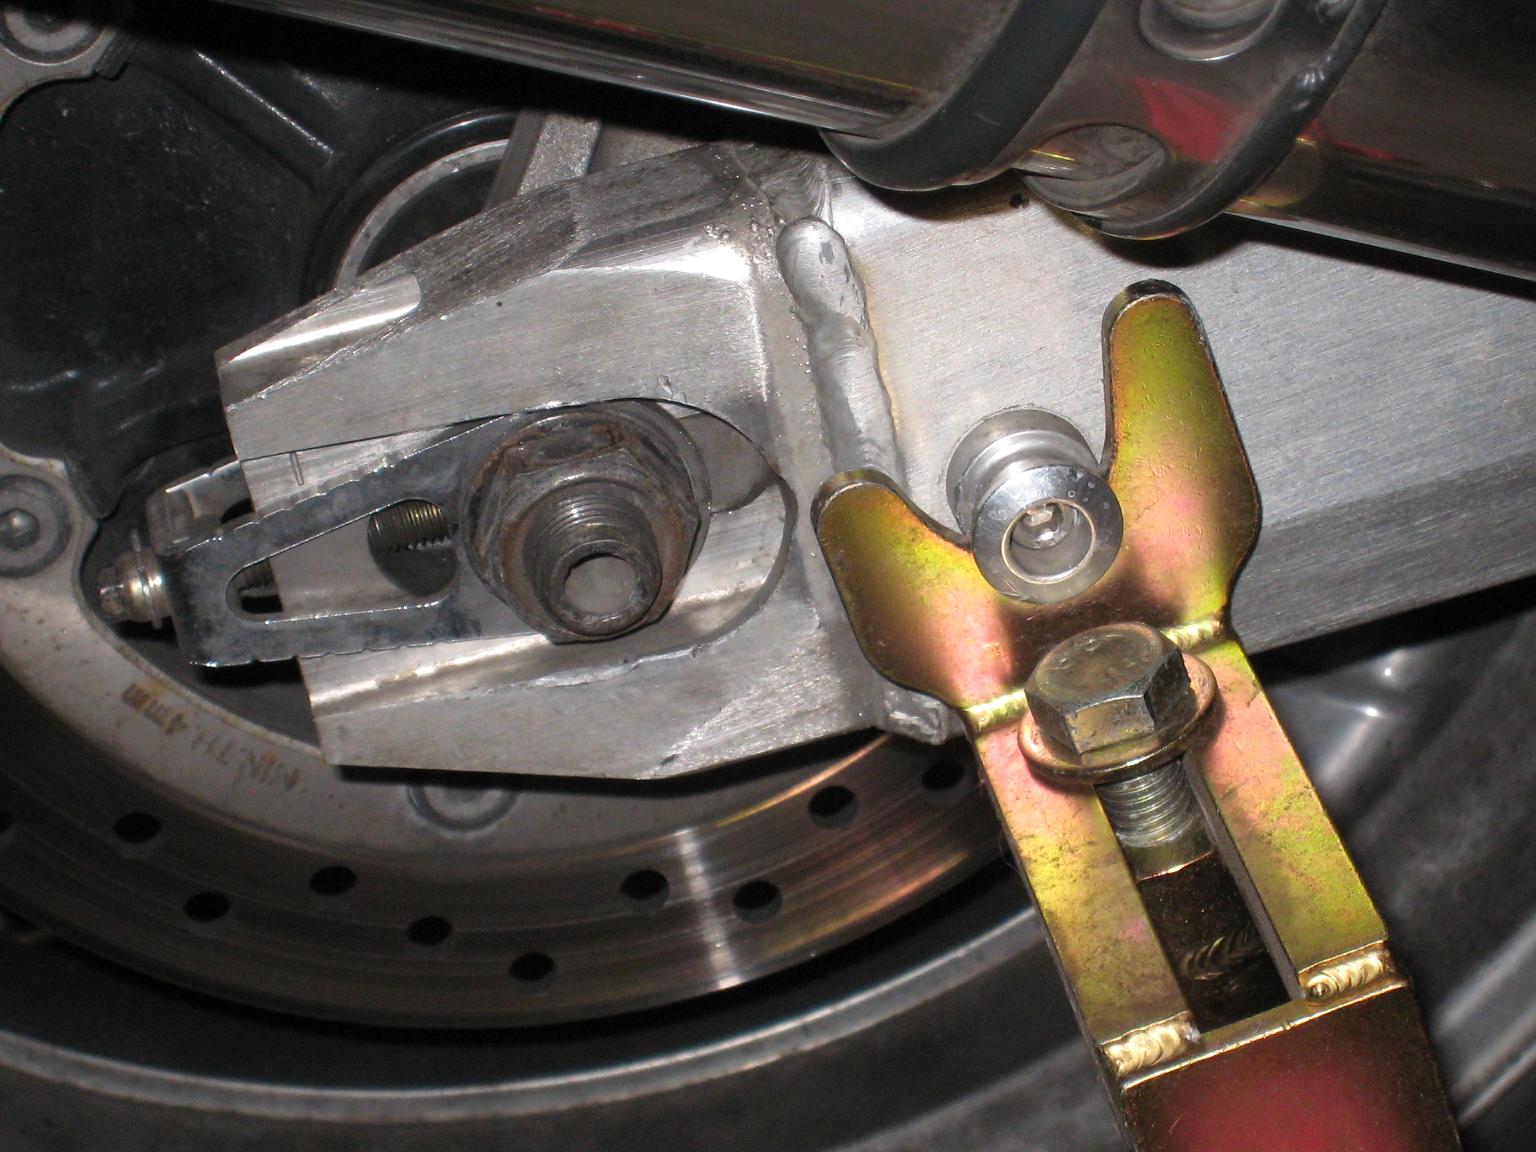
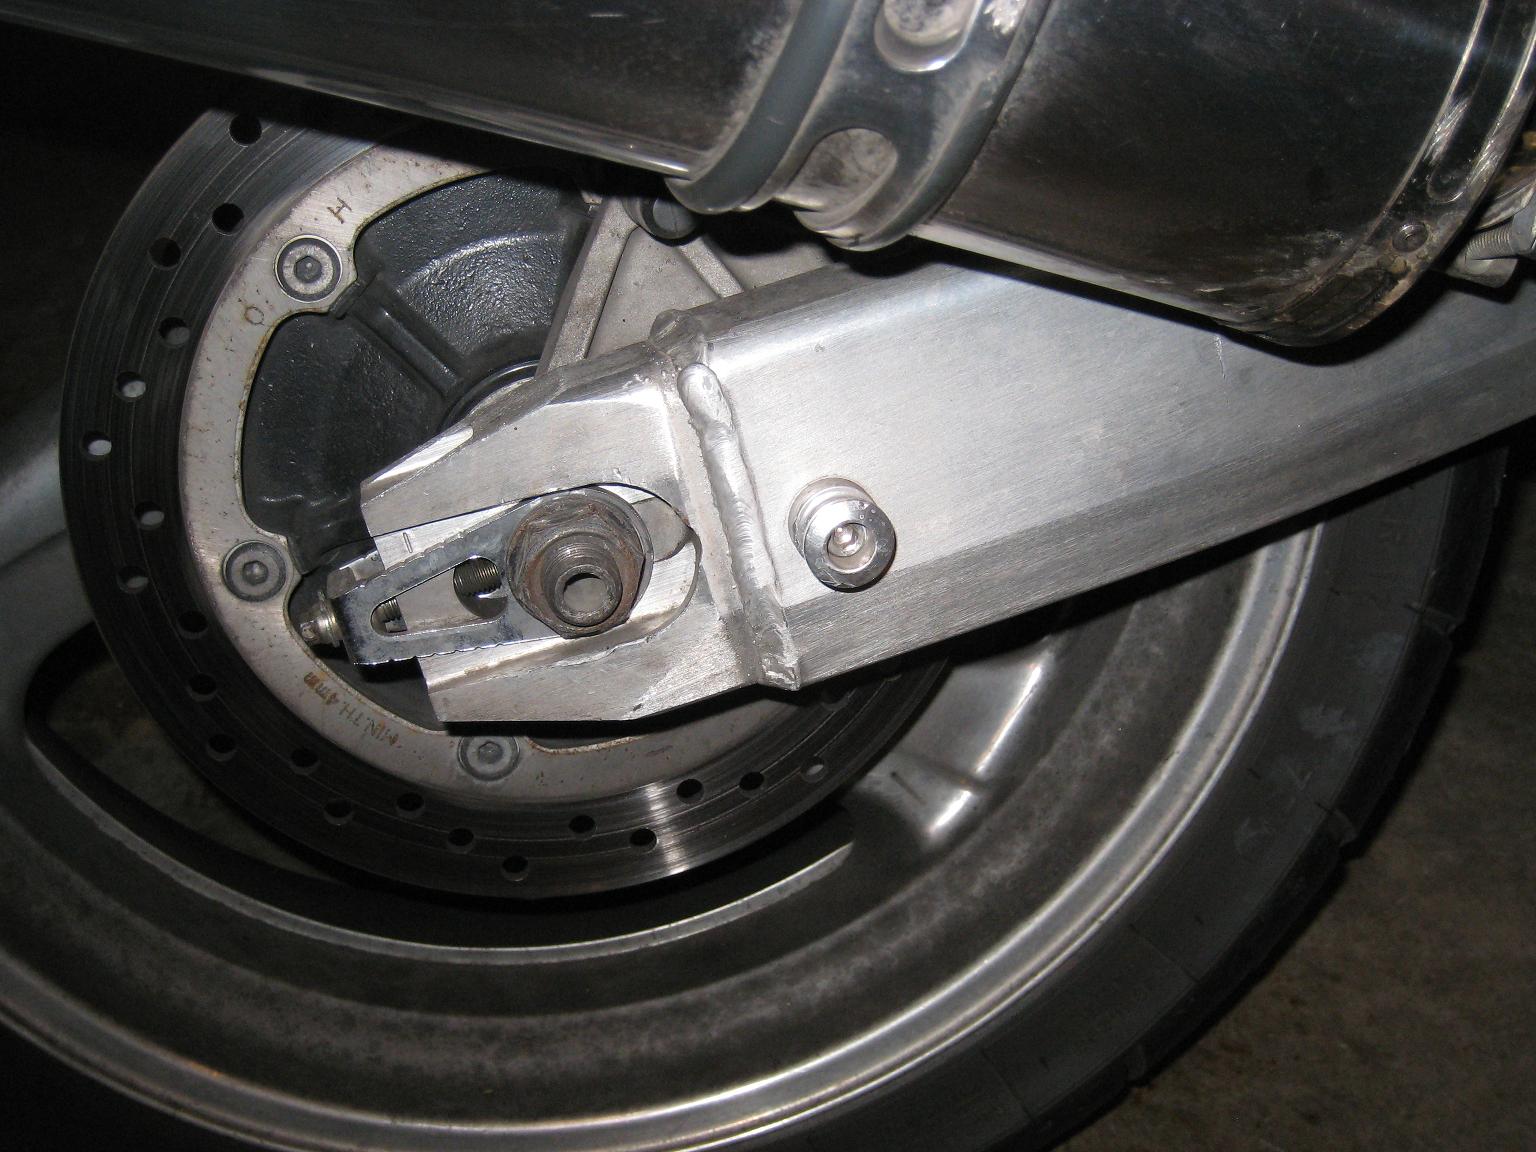
I'd like to add spools to my Blackbird too. I'd like to know exactly where to drill and tap. I want to drill and tap once on both sides just once :icon_think: Any way we could get a measurement or something more definate to go by?
Oh and ..Please and thank you

Pick a spot, hold the spool up, mark it, then drill and tap. Measure for the other side and you're good. Just make sure it's low enough that you'll lift the tire off the ground with your stand. If I were to do it again, I'd probably locate it a little further down but don't go further back or the stand will get in the way of the axle nut. BTW, this spot works with an 8mm shim. Also used red loctite when installing.
Looks like Jeff and mine are in the same place:
-
Vern's got a real clean setup.......where is he? Vern, where are yoooouuuuu???
Hi Philip - how's it going?
Glad you like my setup, but it's not completely waterproof. I did what Mike did with the CCS-100 and took it apart and siliconed the interior and around the buttons, and the FirstGear heated gear switch is a surface-mounted rheostat that's silicone encased waterproof from the manufacturer. One of the 4 switches is the standard 2 position rocker for the Symtec heated grips and the other 3 switches are standard round rocker switches that I bought from Autozone - however they have been through 2 Seattle winters and no problems yet. I ride year round here and the bike sees plenty of rain. If you want to see waterproof switching ask Chris (02XXCA) for a pic of his setup. I believe they are standard toggle switches with the rubber casings screwed over the top of them. If I ever redo mine, I'd probably change over to that setup.
The bike is torn down at the moment so I can't snap a pic and I don't have any clear closeups of the switches but you can see what it's like with these two pics:

-
Well I decided to go down a differnet route, bought some emgo twin fillament bulb holders that came in 4 pack for 8.99 that had fairly long leads. I cut off the plug ends on both the bike and new bulb holders and just had to file out the Tail lamp assembly to the bulb holders would twist into place. The factory plugs are a bitch to remove and like I said I have had several wires eventually break as they go into the connector.
How MacGyver of you!

-
Sorry brother - my 2000 does not have that middle plug...
Good luck.
-
+1 on the Datel. Mounted mine on top of the instrument cluster next to the radar detector:
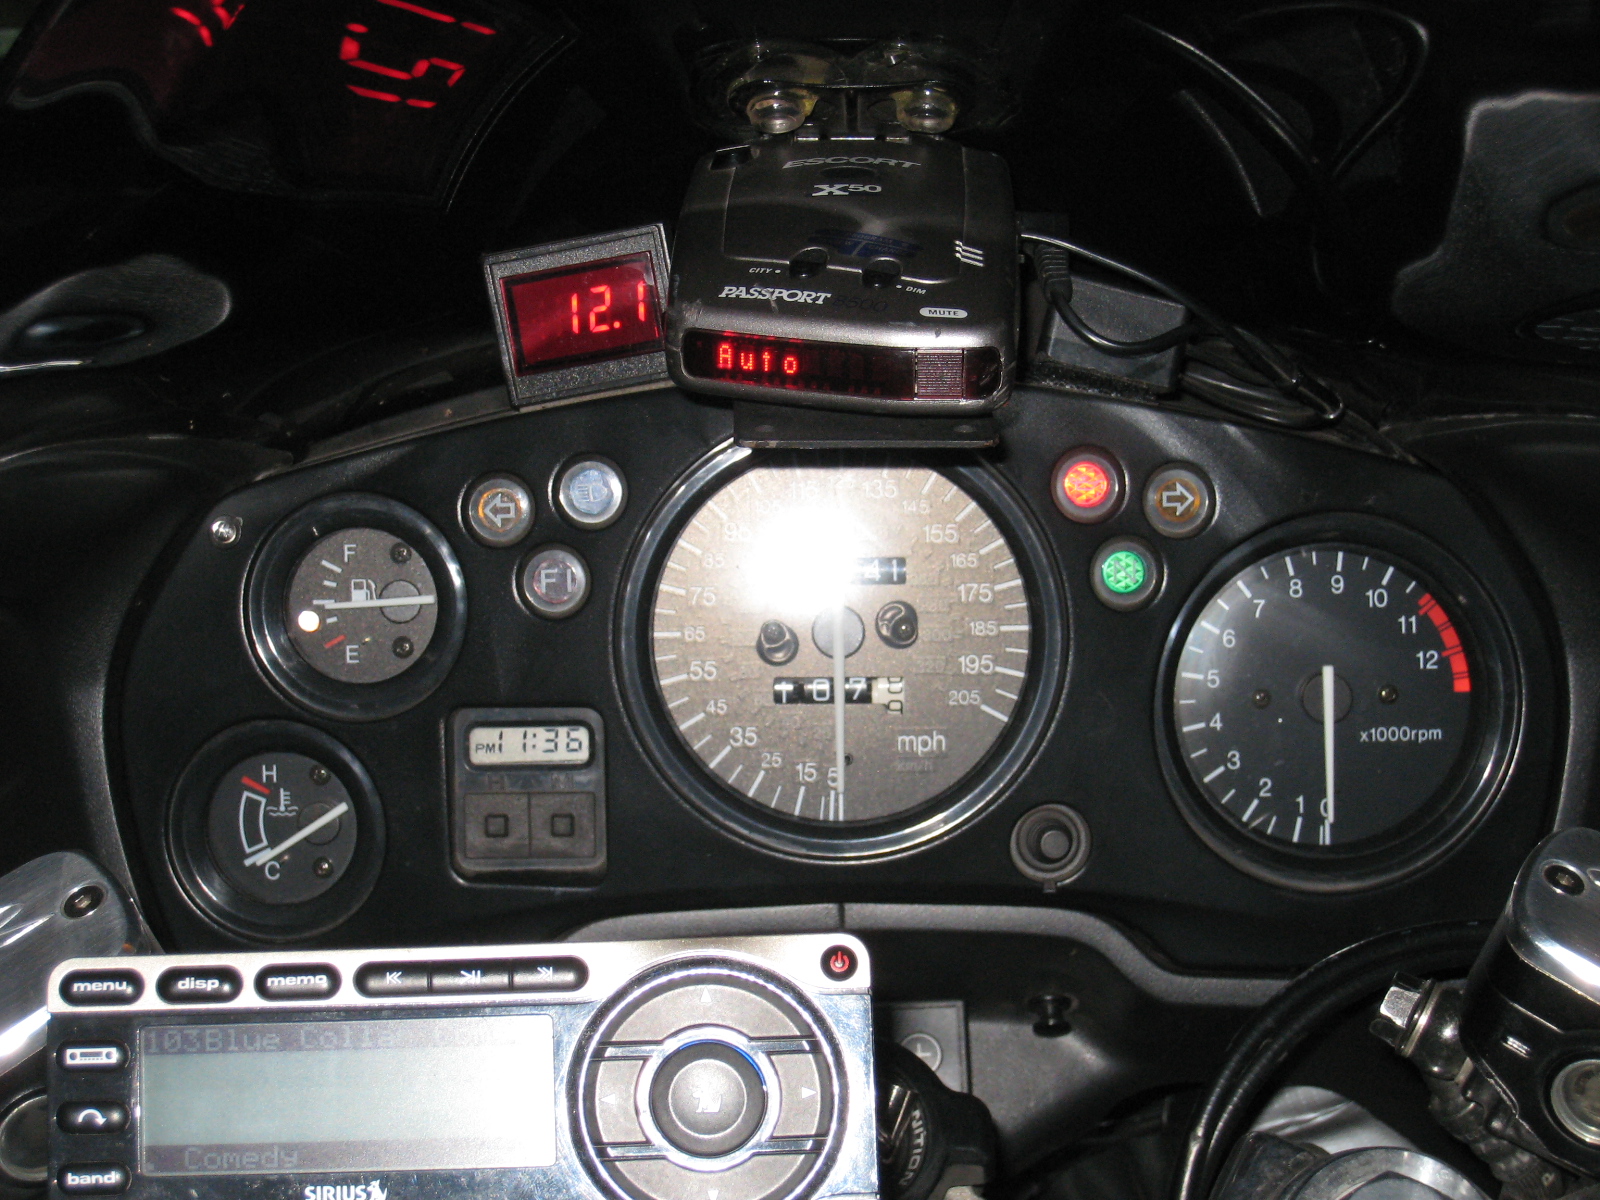
You do realize that you can use that detector as a voltmeter?
Had the Datel first - but also like the bigger readout.
+1 on the Datel. Mounted mine on top of the instrument cluster next to the radar detector:So where did you mount the coffee maker?

-
+1 on the Datel. Mounted mine on top of the instrument cluster next to the radar detector:
-
You can also drill a small hole in the back section(towards the battery) and zip tie it up just a bit about another 1/2 inch which should do the trick.
+1 I actually drilled a hole on both sides of center figuring that if the tire still hit the undertail, it wouldn't break the ziptie. I was able to pull the front end of the undertail up about 3/4" - no more rubbing.
-
Where can one find this Audiovox CCS100 ? The guys at Auto Zone looked at me like a tree full of owles when I asked if they had such an animal.
And how much do they cost?
Can't get the really good deals anymore since AutoZone closed them out.
Schmucks has 'em for about $110.
-
Much like on a car, install a check valve, so the vacuum can pull air out of the canister, but not the other way around. I used a 3-way vacuum check valve from a car, so that I am taking vacuum from the vacuum line and that line only goes one way, but I have free use between the vacuum canister and the cruise control. Most cars have these on them already (because of what you're experiencing), and they're readily available at auto parts stores. You can use a 3-way check valve, or you can use a standard check valve and have a seperate line coming out of the canister going directly to the cruise control.
Mike
+1
On mine I have 1 tapped vacuum line going into the canister through a 1-way check valve, and a second line going from the canister to the CCS.
I'm still getting that same #11 FI fault code though (like at the WCB), and not positive it's not related to this CC install. Chris seems to think it has to do with the Pro-oiler since that is tapped to the VSS, but it seems to be more RPM related than speed related. Enough of MY canister weirdness - good luck with yours. I'm pretty sure though that if you don't have a check valve in there, that's the culprit.
-
I think Will posted once that you can buy LED replacements for those of you with bulbs.
I saved the link ( I think it was this site). Then I realized that the 01 came with LED's.

I originally replaced mine with a single LED bulb. It was brighter than stock, but wanted it a little brighter. Now I've got the 4LED cluster and looks great. Gives the dash a bluish glow instead of the tired old yellow tinge.
-
IIRC, they share a common fuse 10a under the seat, If you got the bike wet recently, could have caused this.
Actually, I believe they share a common bulb. As Stan says, replace them all when in there. There are only 4 in there.
-
Stator covers are interchangeable.
-
I know the part numbers differ from each other, but does anyone know if 97-98 stator covers fit 99--and up engines?
My Audiovox CC setup
in The Garage
Posted
No prob on the pics. I'm at work now but will snap some pics this evening and post. Will show some close ups of the linkage.
I was concerned with the linkage hookup also, but if you analyze closely what is happening during acceleration, you can minimize the amount of ball chain drop by cutting the ball chain to actual need. Then make sure the path of drop is clear in all directions (due to bike lean). I think what was happening is that the ball chain was too long and would get tangled up in plumbing during accel, consequently holding the throttle open unexpectedly .
.