
Hypnotik
-
Posts
34 -
Joined
-
Last visited
Content Type
Profiles
Forums
Gallery
Events
Posts posted by Hypnotik
-
-
I have an APO address. I'm military.
-
From what I understand the '97-'98(carb) wheel is different from the '99-up(fuel injected) wheel.
-
My wheel has a dent in it and I want to replace it. Please let me know if you have a later model('99 up) front wheel that is straight and you're willing to ship it.
Zip code is 09613.
-
I don't thing the spring in the kit is meant to be used with the XX. There are several other parts in the kit that you don't use. But I could be wrong. It feels excellent, especially over bumps at speed. I would recommend doing it.
-
I've been wanting a dedicated track bike, too bad I wont be in the states for another year.

GLWS
-
**Disclaimer**
I am not a professional. Follow these recommendations at your own risk. I am not responsible for any damage.
I rebuilt my other forks today and took some pictures along the way to help out anybody else that does this in the future.
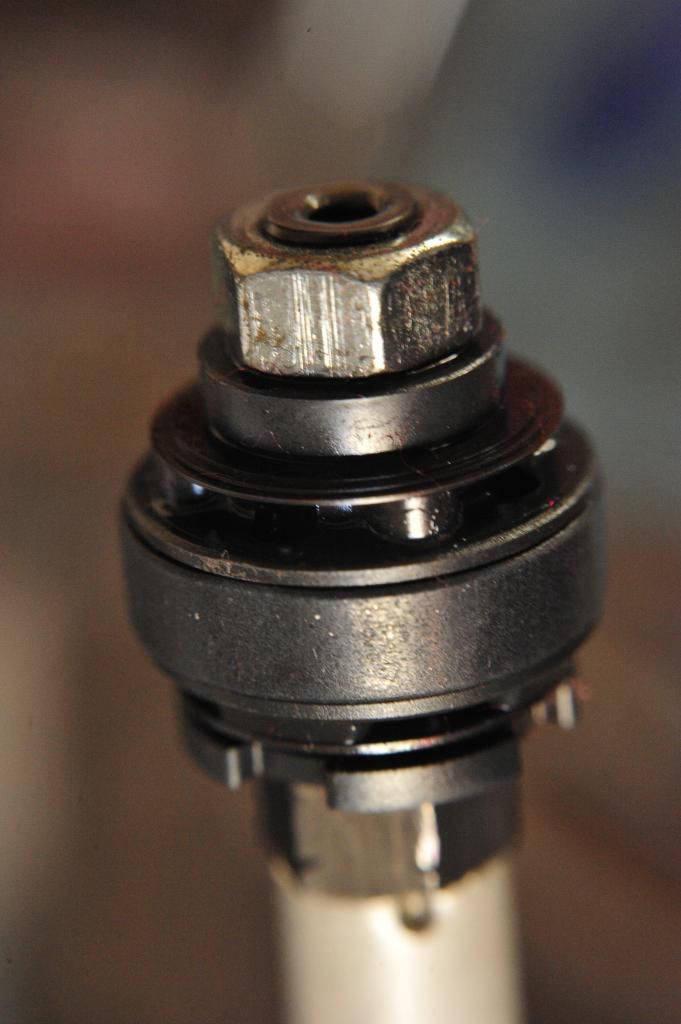
First is the compression valve.
Stock valve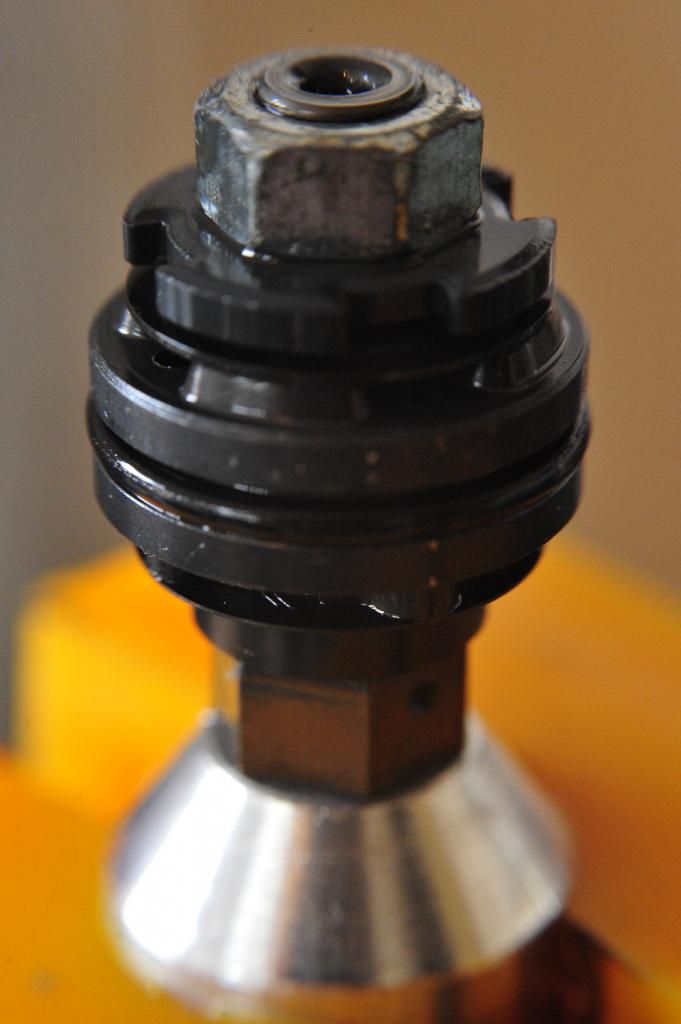
You have to file the end off of the threads so you can get the nut off.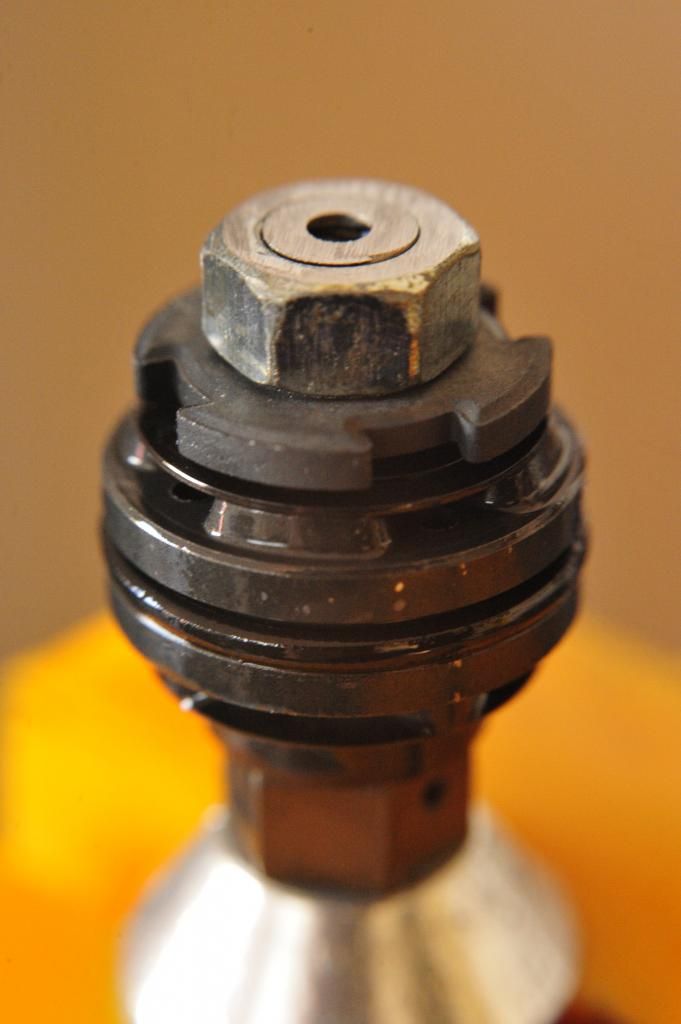
Pull off the stock valve and clean up the end of the threads with your file.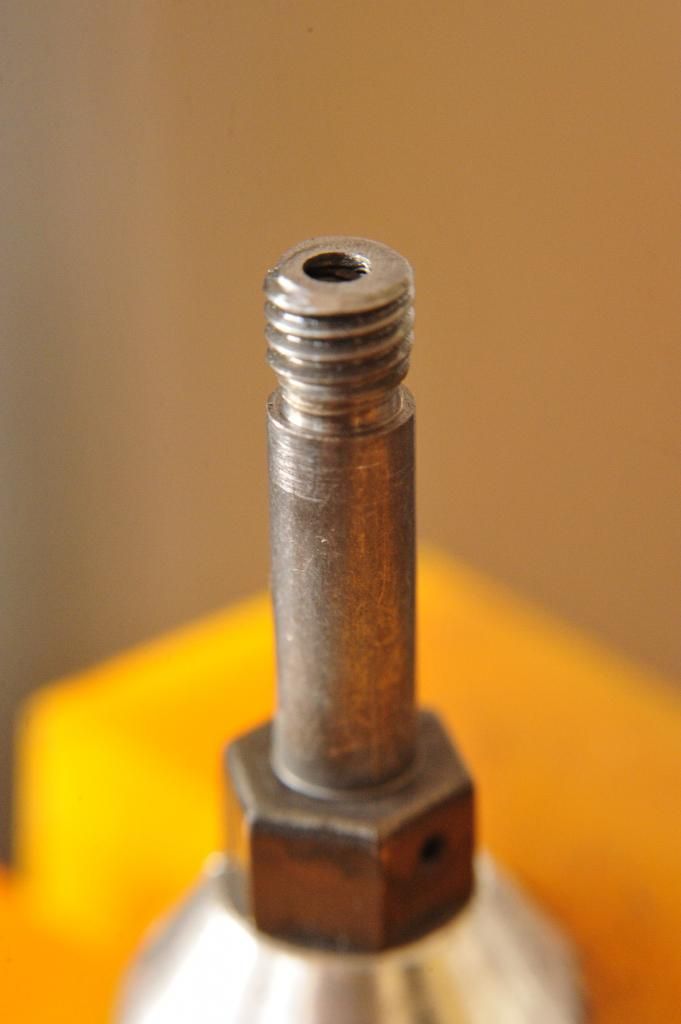
Then put your base plate on. I used the stock and one of the Race Tech ones to make the overall height correct.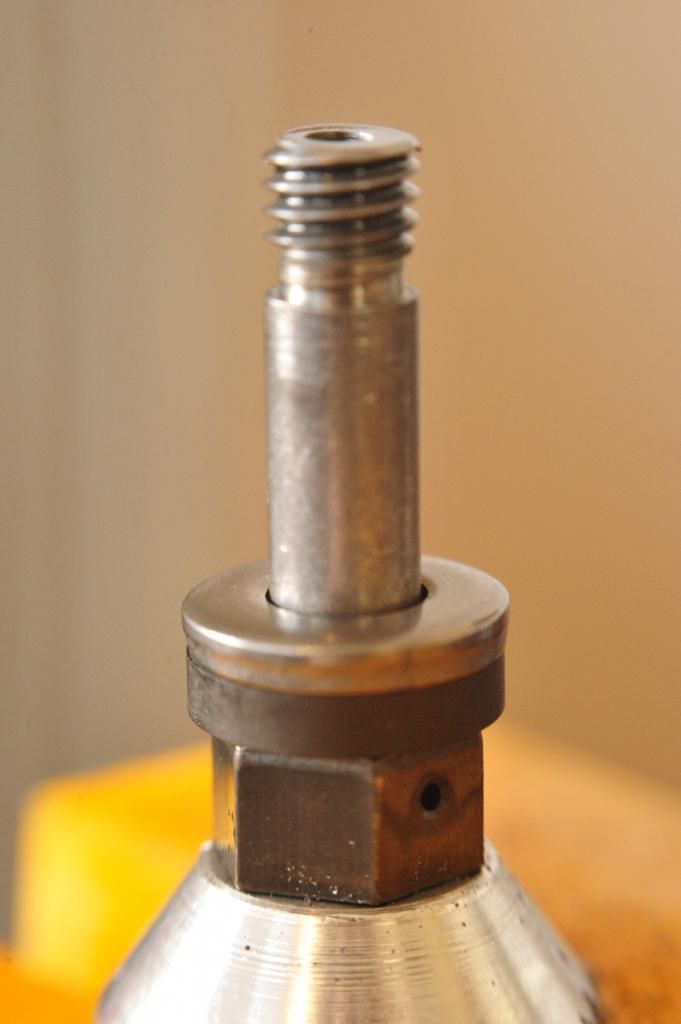
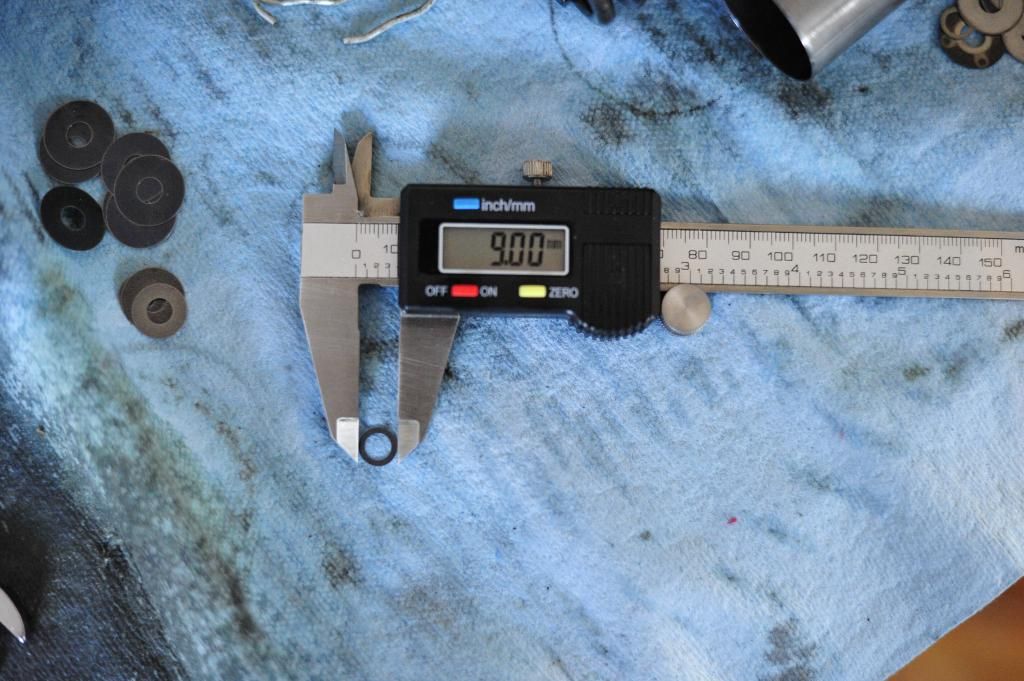
Next you need to build your valve stack according to the Race Tech chart. Make sure you get a digital caliper and measure the thickness and diameter of each shim. It's impossible to tell them apart otherwise.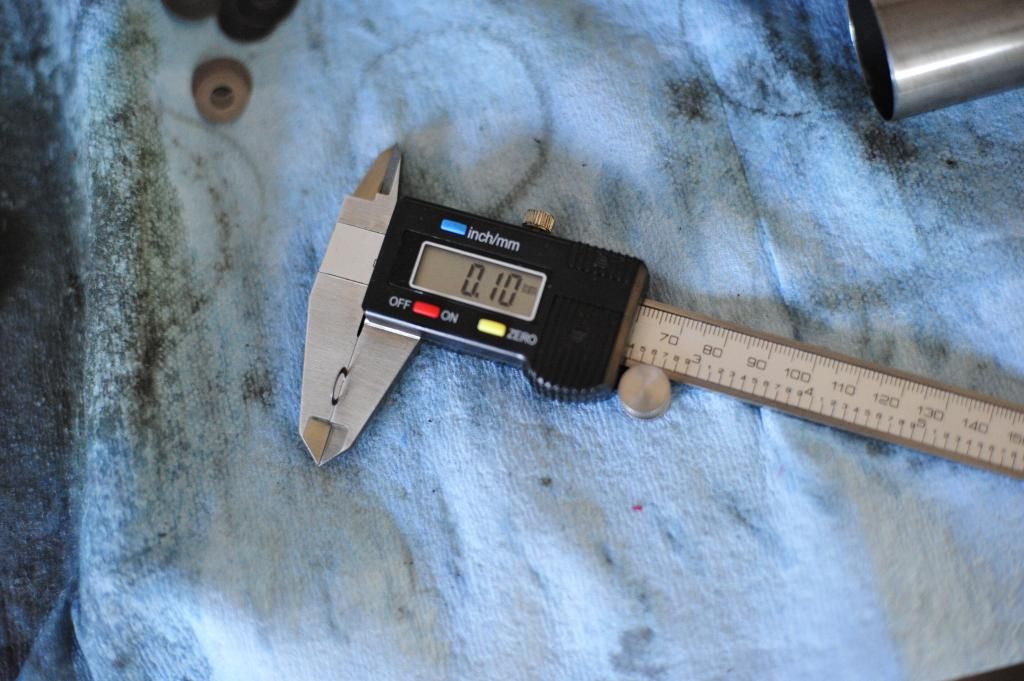
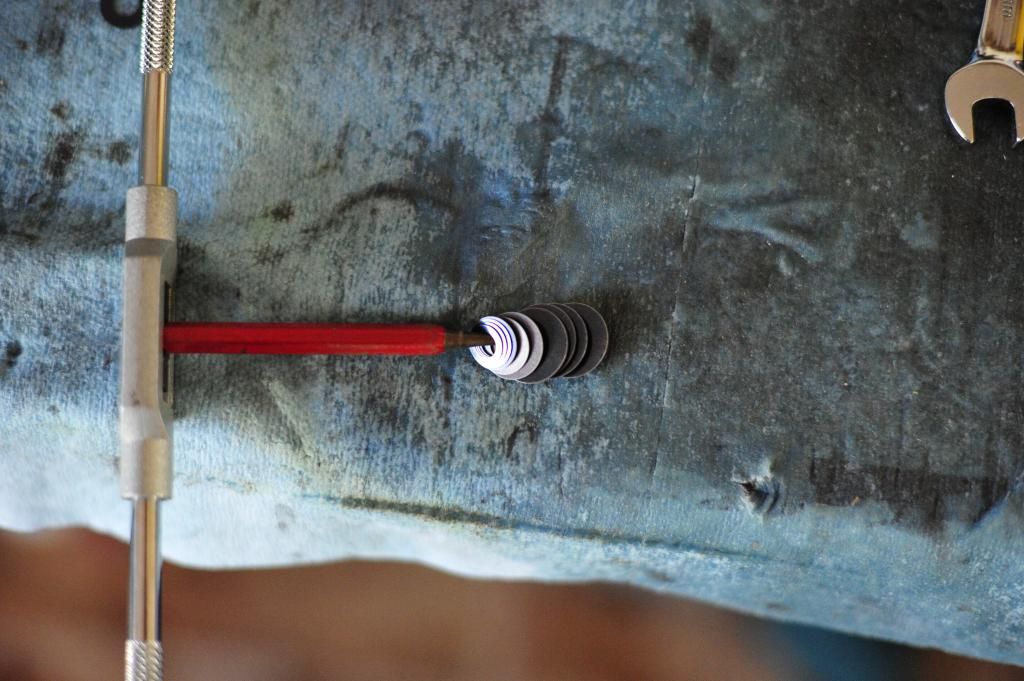
Put the valve stack on starting with the smallest shim closest to the base plate.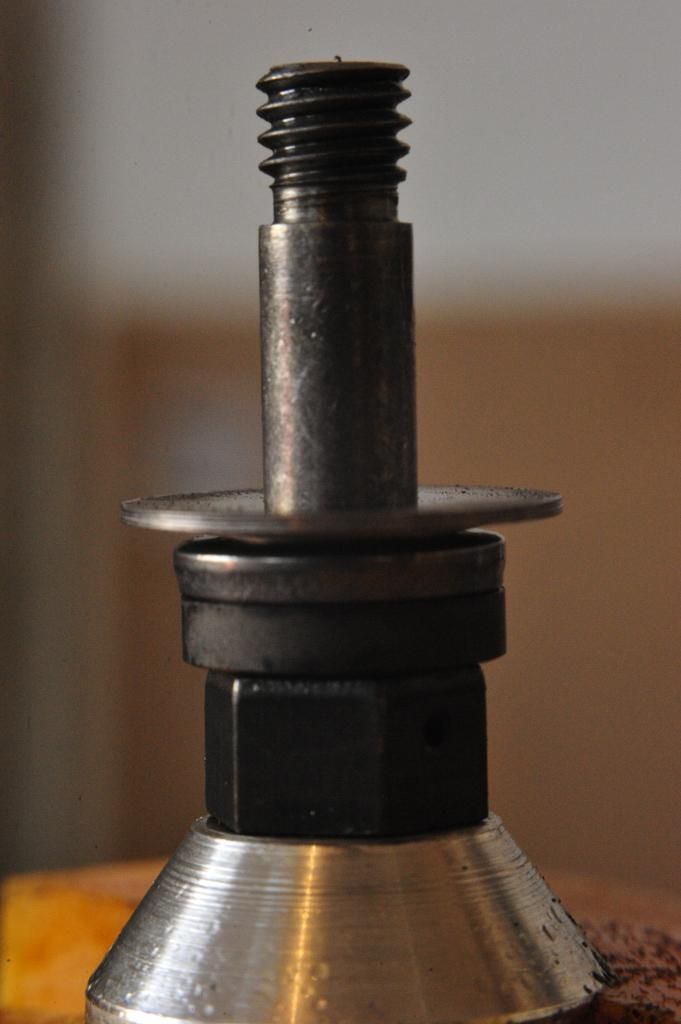
Then the preload stack.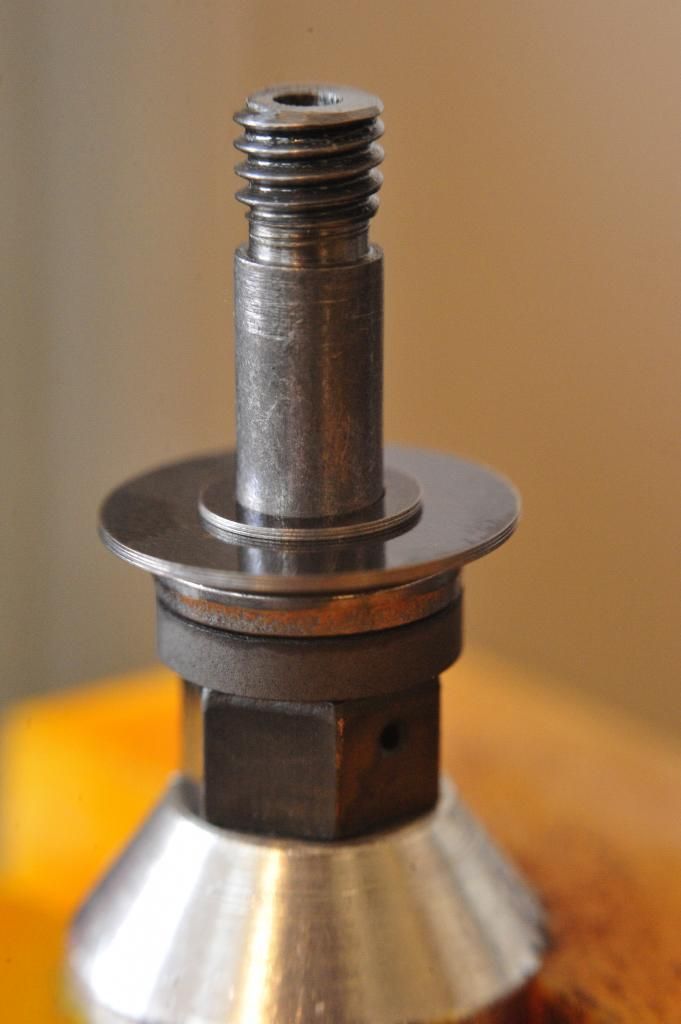
Gold valve next with the small recess on top as shown in the picture.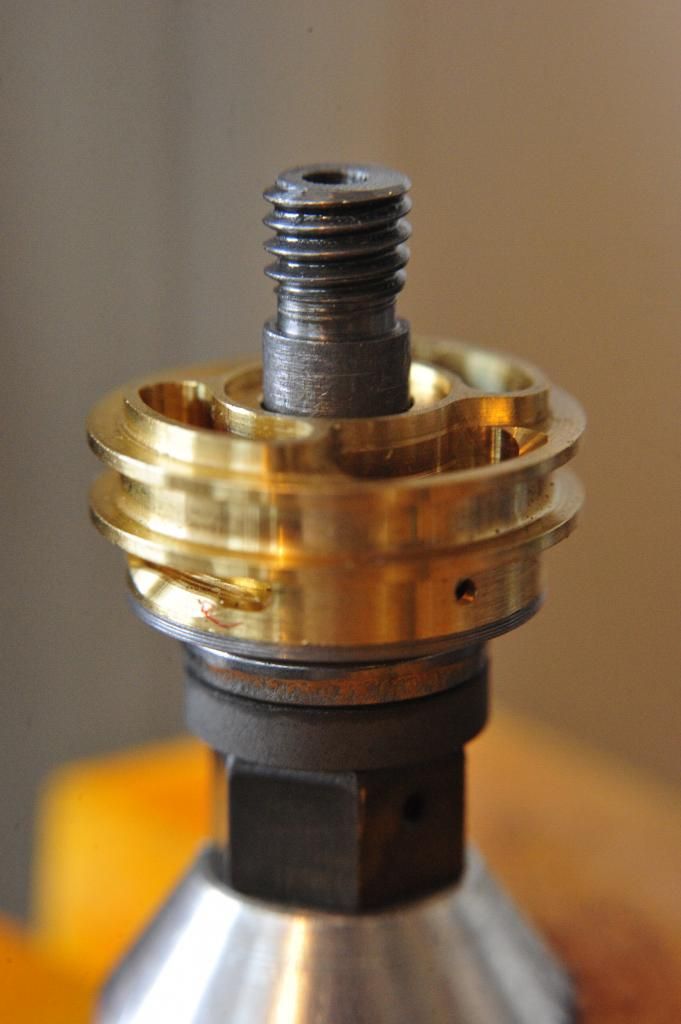
The "check valve" goes on top of the gold valve. It's basically just a washer with a bigger center diameter than the shims.
Then the cupped washer and spring. The Race Tech kit comes with a spring but I reused the stock spring.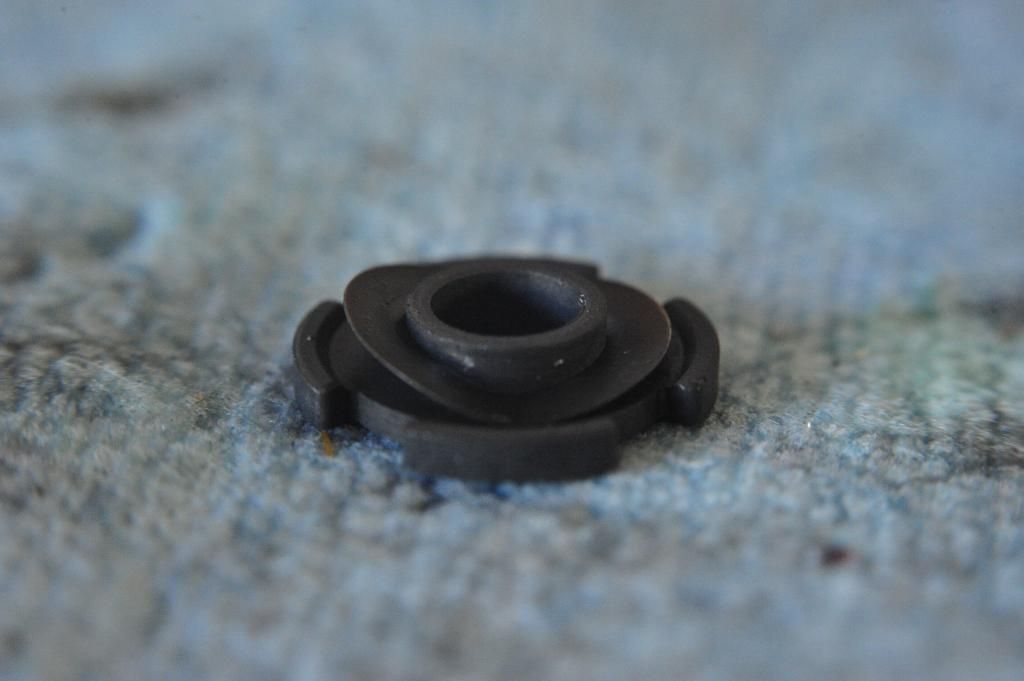
Make sure the small sleeve fits all the way on and rests against the gold valve so that the check valve is free to move. You might have to wiggle the check valve while you slide the cupped washer on so that it fits through the check valve.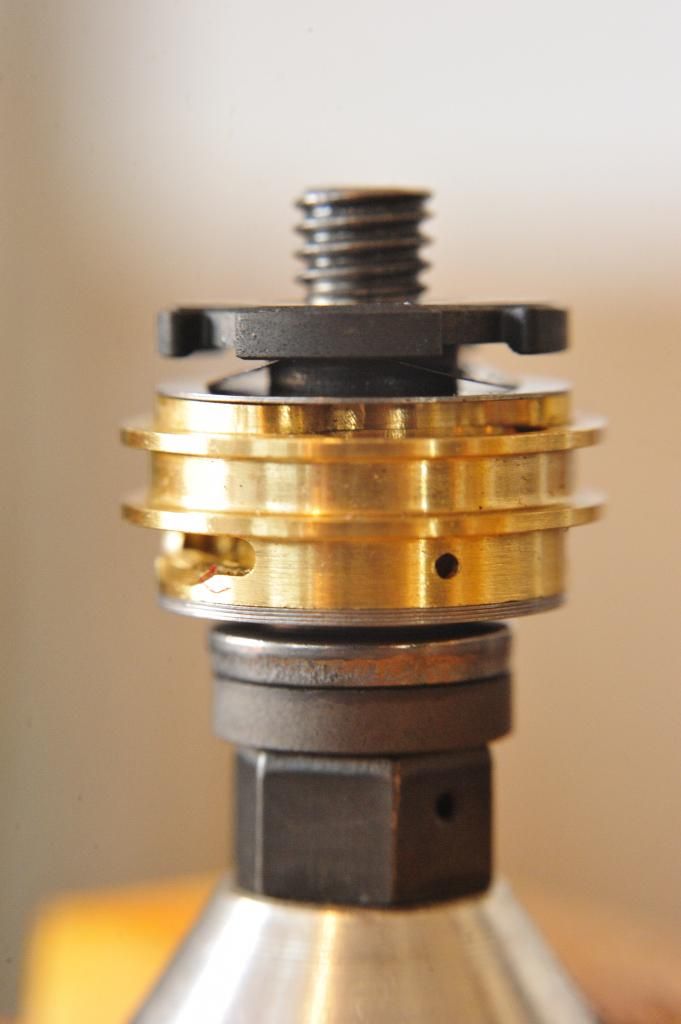
Install the nut with red thread locker and torque to 30 in/lbs.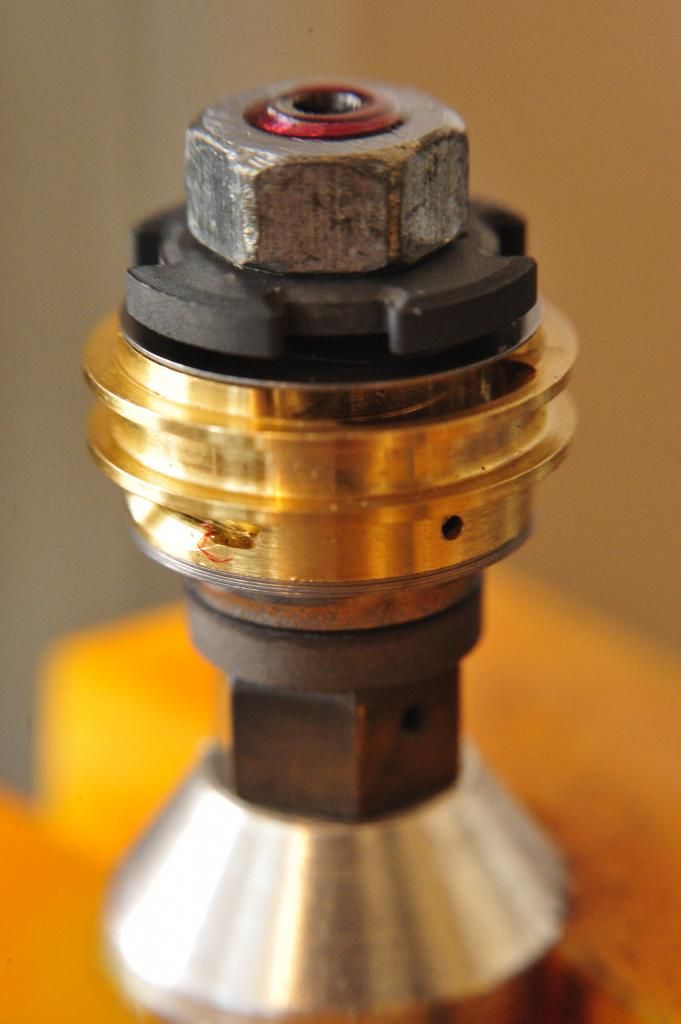
When you're done make sure the check valve moves freely.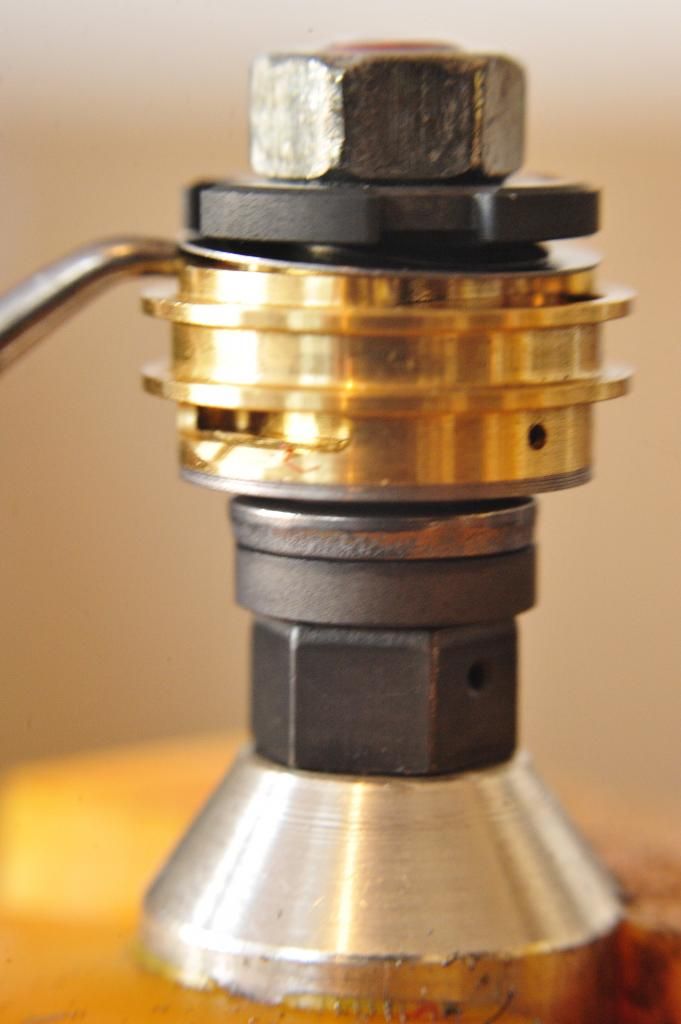
Last, install the o-ring onto the gold valve.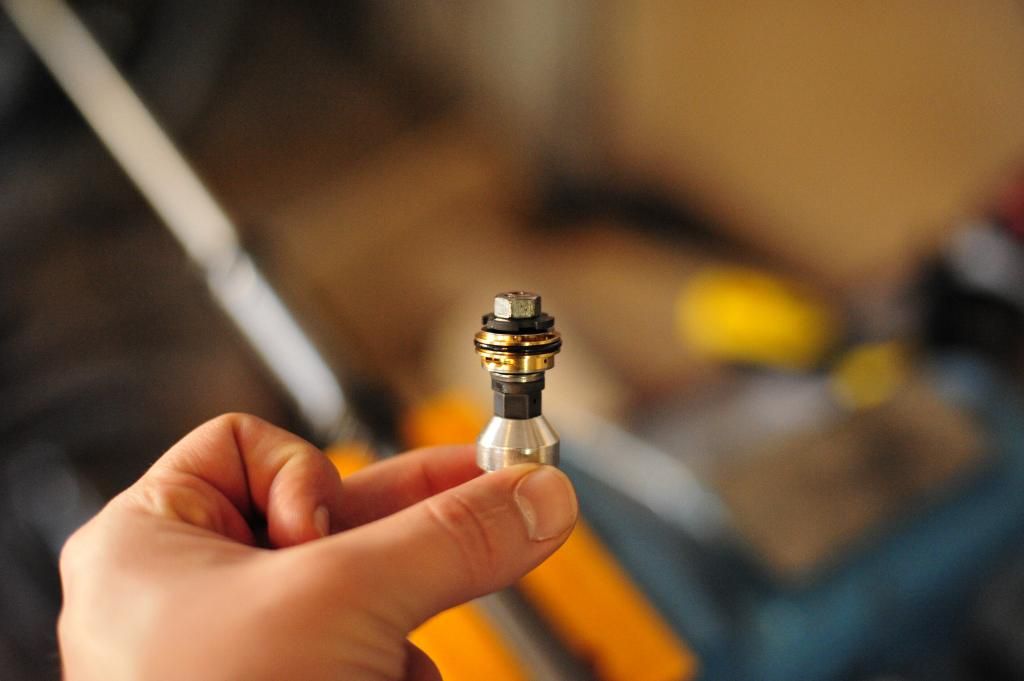
Rebound valve.
File down the end of the threads to get the nut off and remove the whole stack.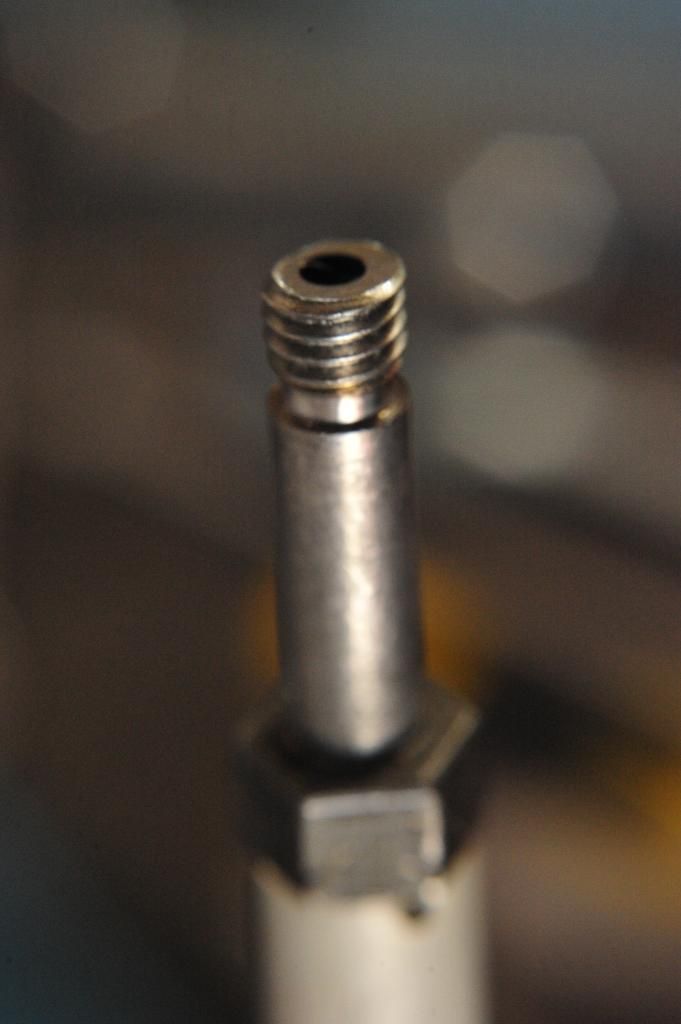
Baseplate from the kit.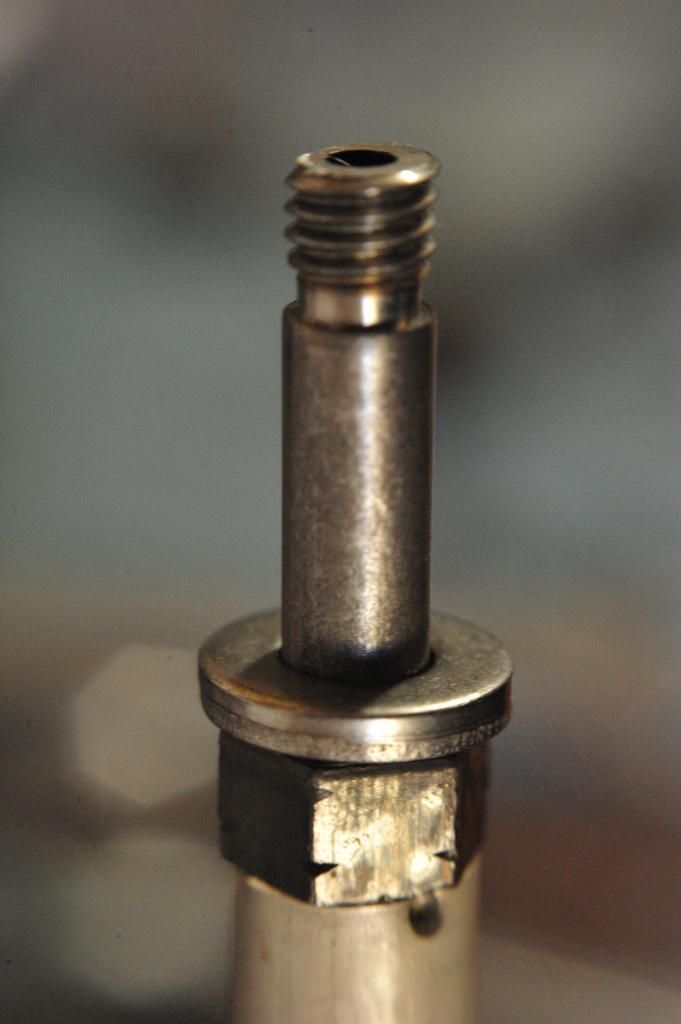
Mid-valve stack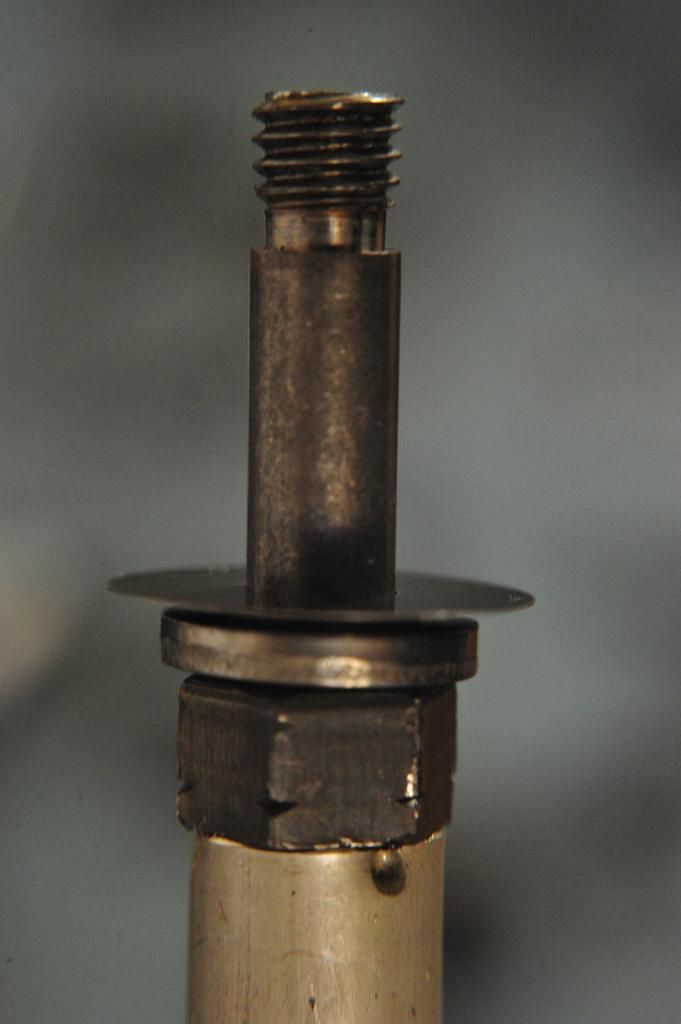
Gold valve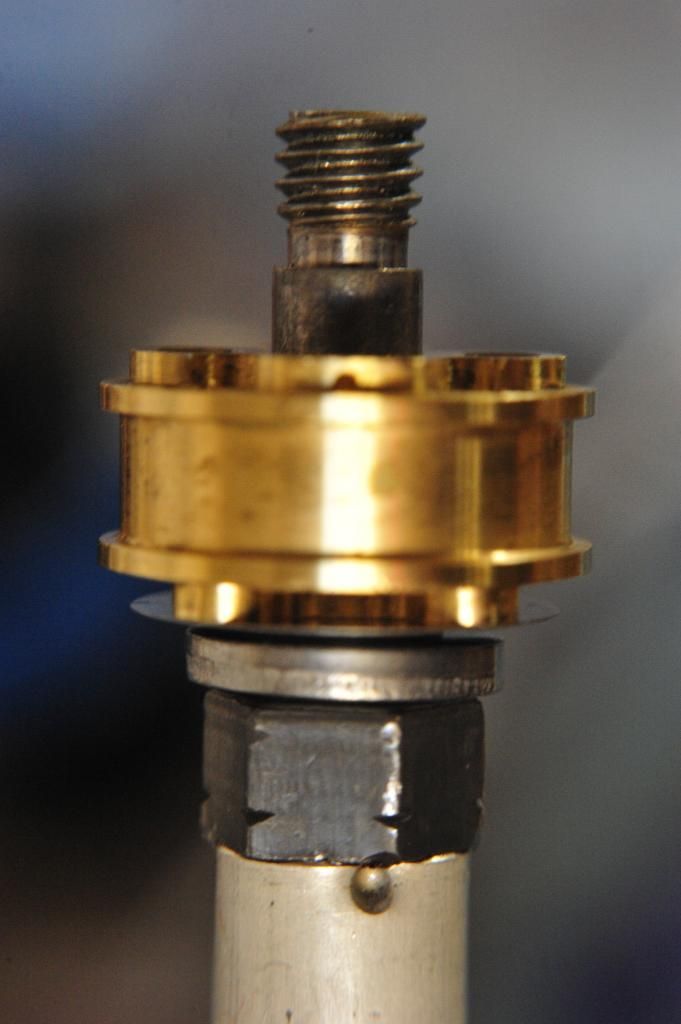
Rebound stack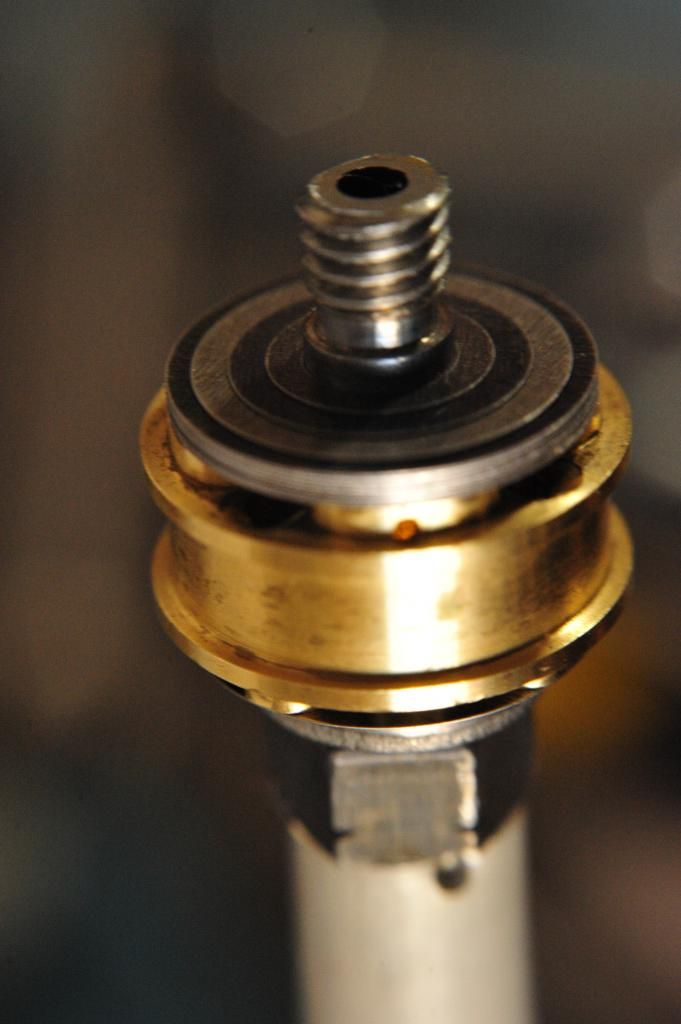
Baseplate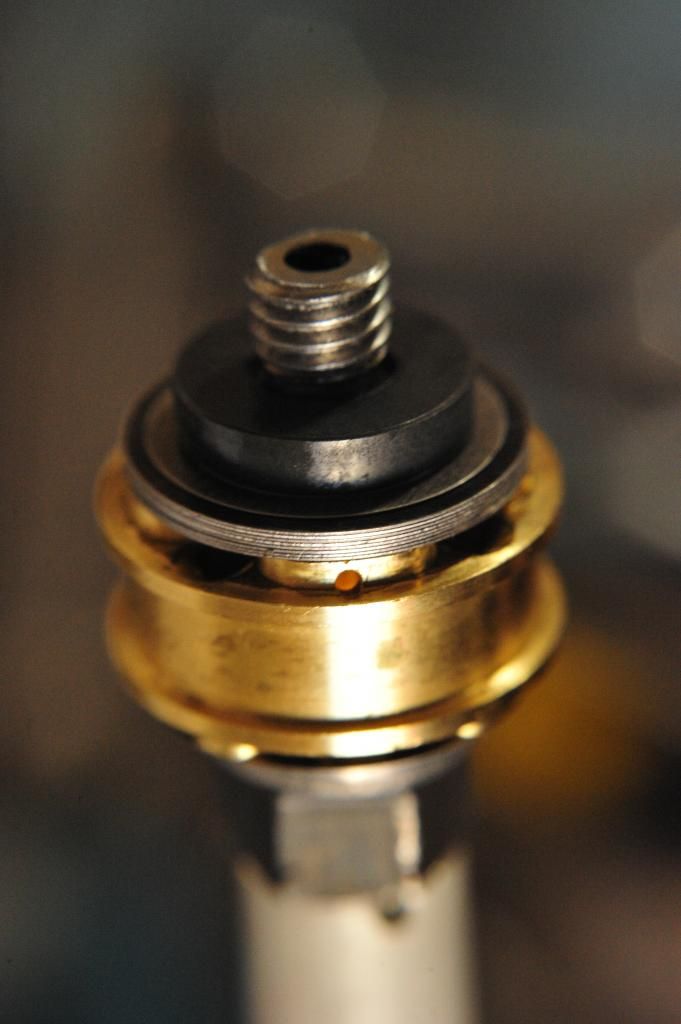
Nut torqued to 30 in/lbs with red thread locker.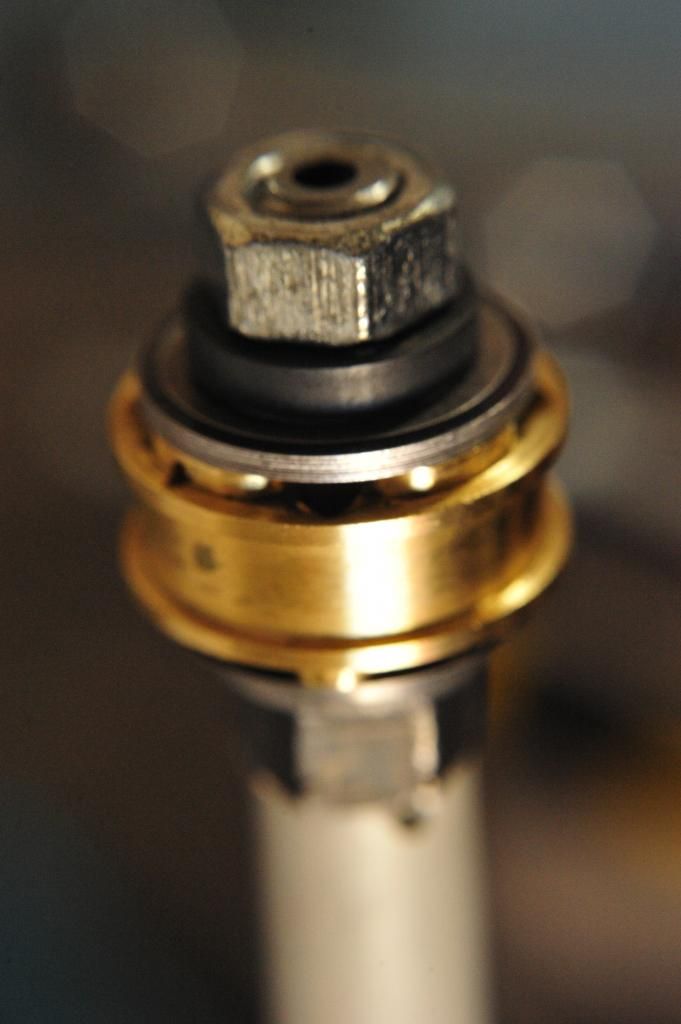
Don't forget the teflon seal before you install it back in the cartridge.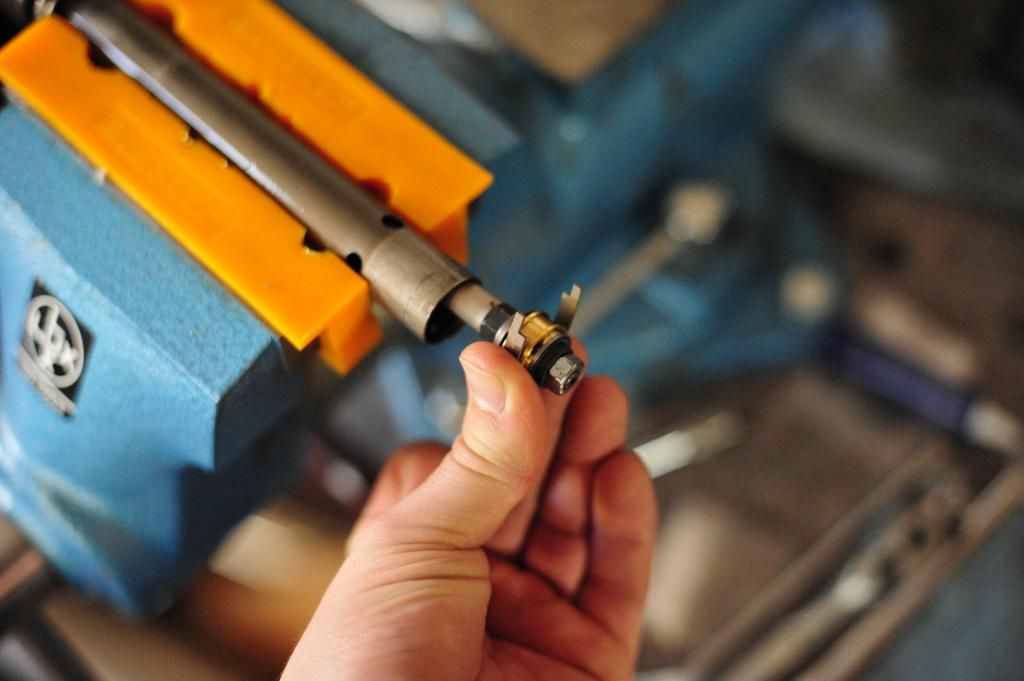


Gas Mileage issue?
in The Garage
Posted
My bike is a 2002 with RS-3 full exhaust, stock replacement filter, new FPR, and fresh plugs. I'm getting about 140 miles until my gas light starts blinking. Is this normal? <26mpg seems pretty low, it's barely better than my 4x4 V6 truck. If I give the bike a good rev sitting in neutral it puffs out black smoke which tells me it's over-fueling but is this just because the exhaust? I just ordered a PCIII and I'm hoping this will help but it seems like it should be much better. Any suggestions?