

BearXX
-
Posts
3,361 -
Joined
-
Last visited
-
Days Won
6
Content Type
Profiles
Forums
Gallery
Events
Posts posted by BearXX
-
-
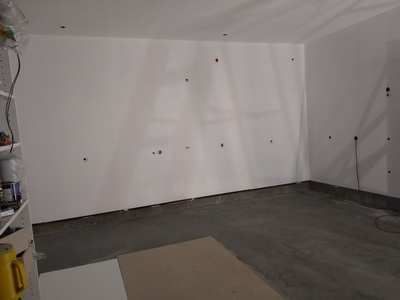
Finally getting to do the ground floor.
Sheetrock, plaster and paint
")
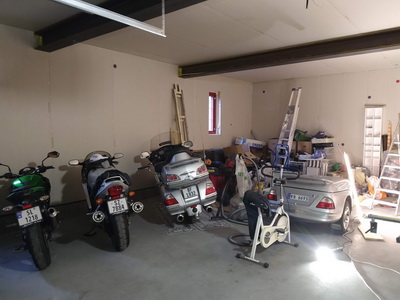
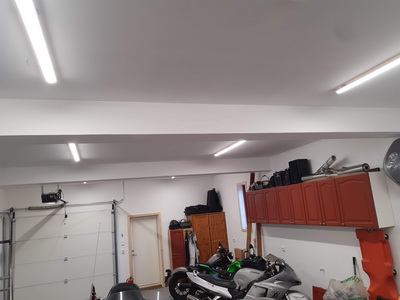
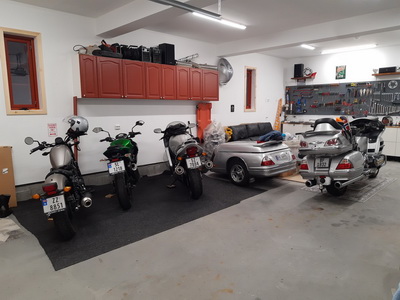
Workshop done

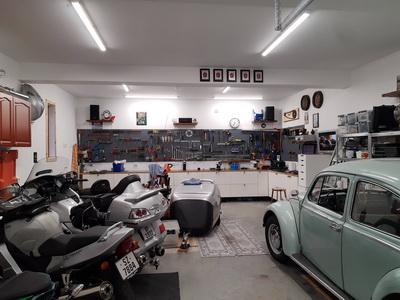
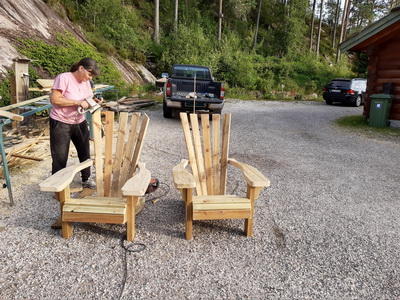
Time to make other things..
-
 2
2
-
 3
3
-
-
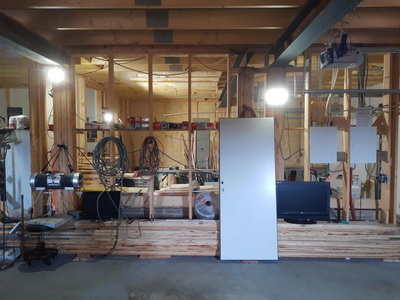
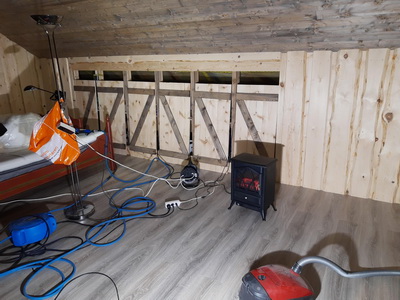
Now the winter is knocking on the door, and it is time to move indoors.
First floor is the first priority.
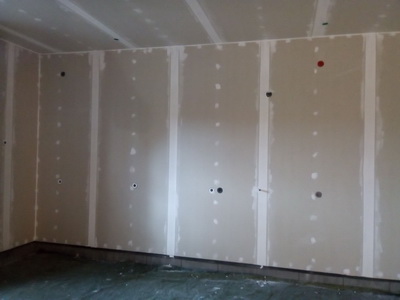
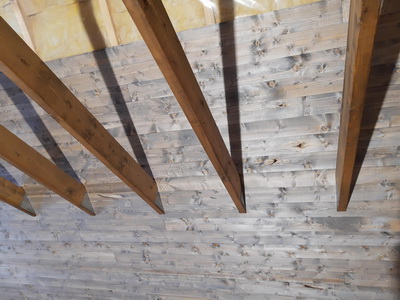
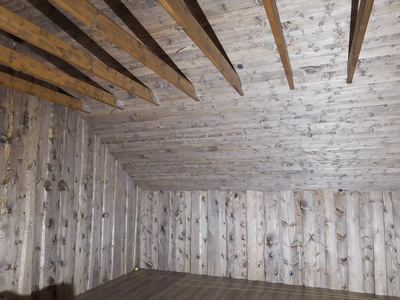
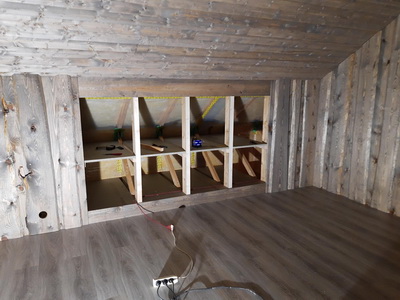
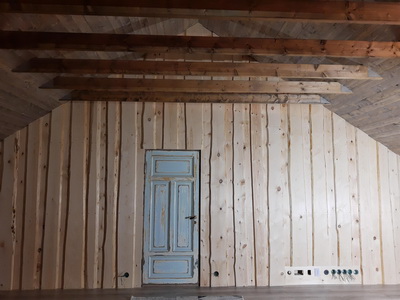
After insulation and moisture barrier being done, it is time to do the ceiling.
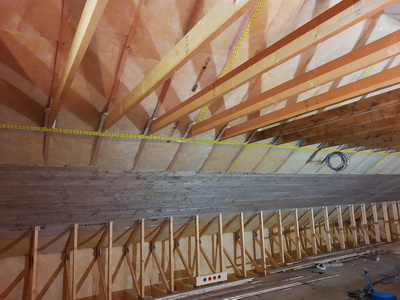
Linda is staining before I nail up the tongue and groove ceiling.
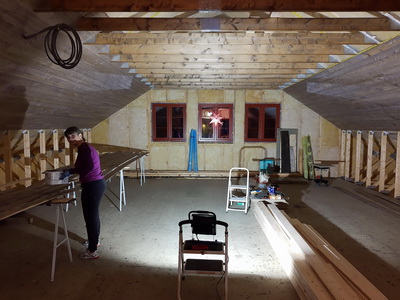
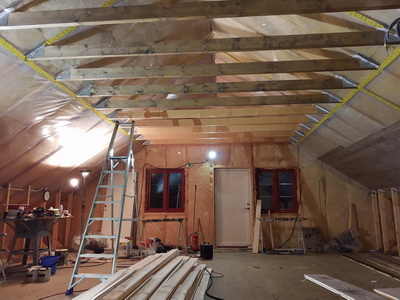
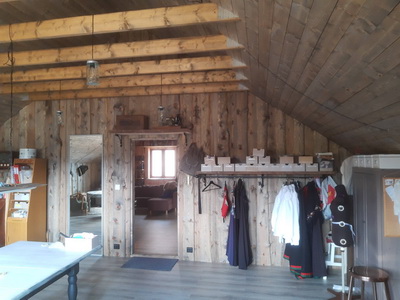
The the dividing wall has to come up.

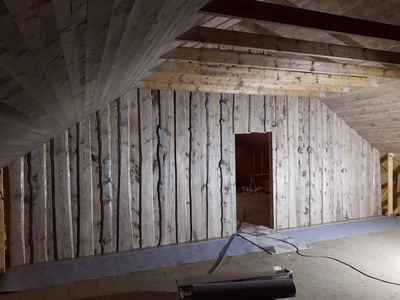
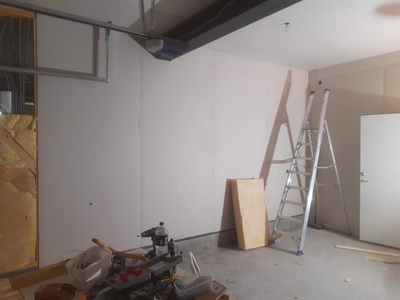
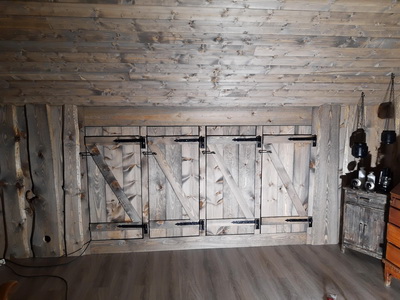
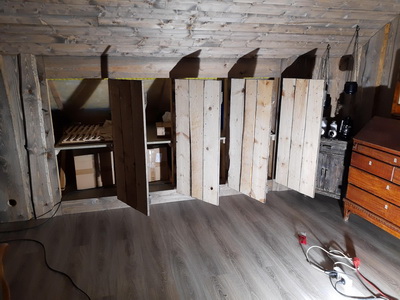
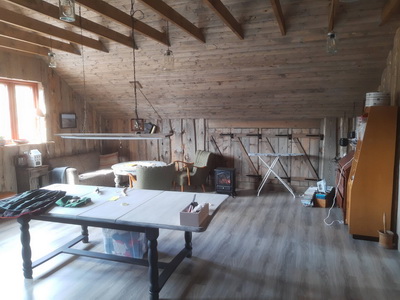
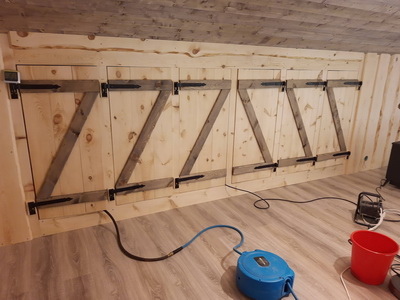
Floor is done, and the rest of the walls getting up. Linda has stained them before screw them to the wall.
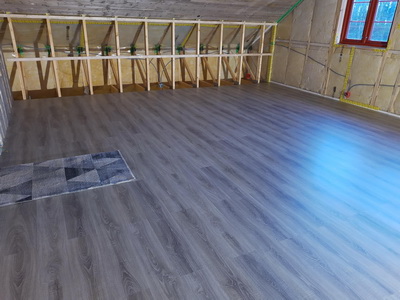
We use some of the knee wall for storage.
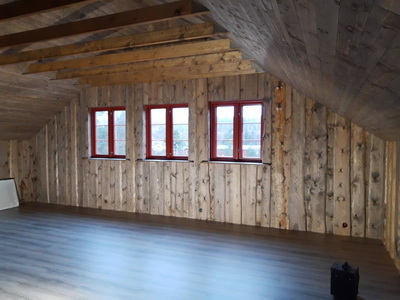
Next is decorating, and get the furniture in the sewing room for Linda
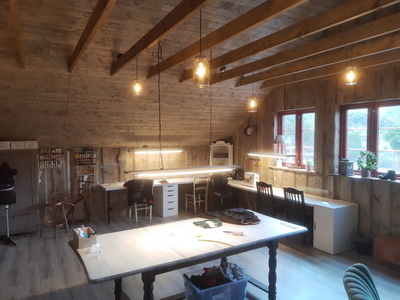
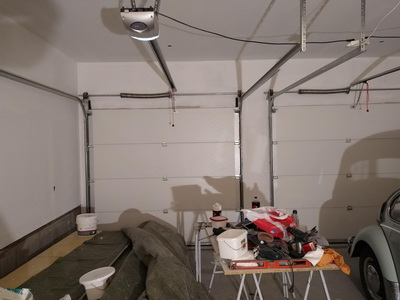
Now to get the mancave done
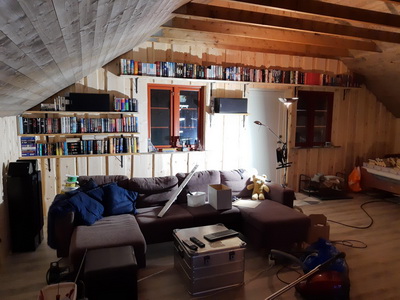
My books are up, and a TV bench is made.
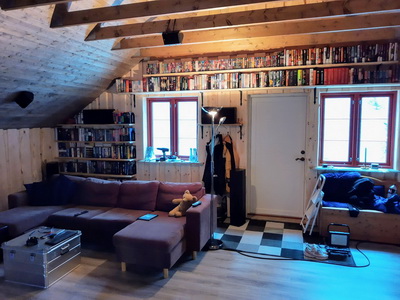
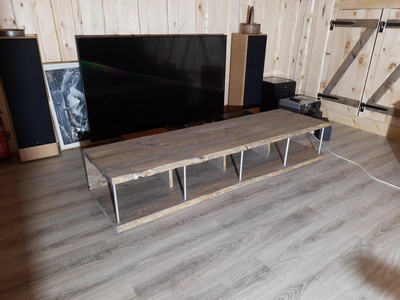
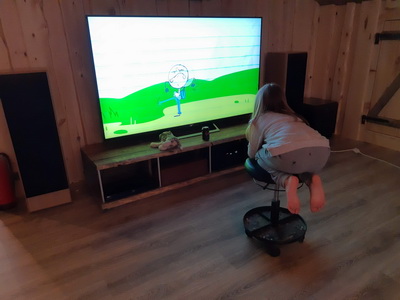
Linda's granddaughter enjoying the home cinema. 10 speakers and a 75 inch tv.
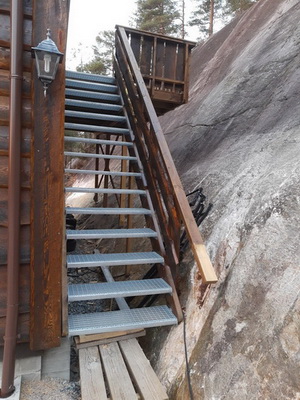
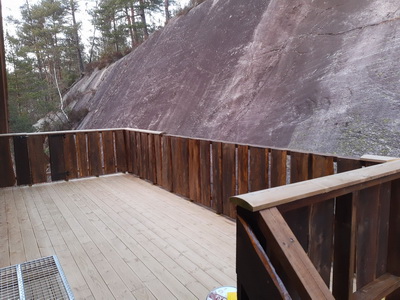
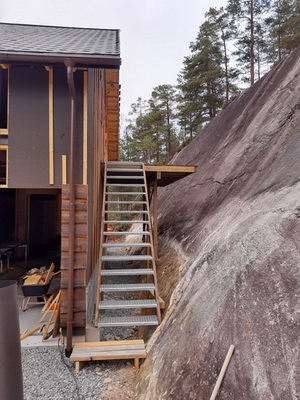
staircase and deck getting done.
-
1
-
-
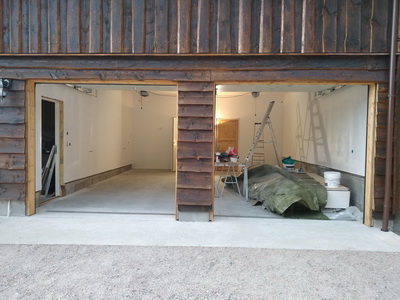
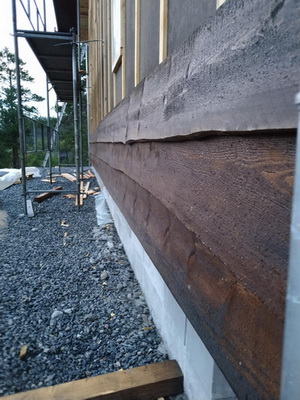
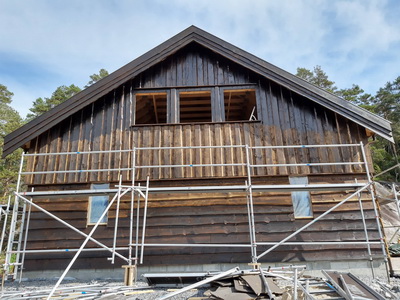
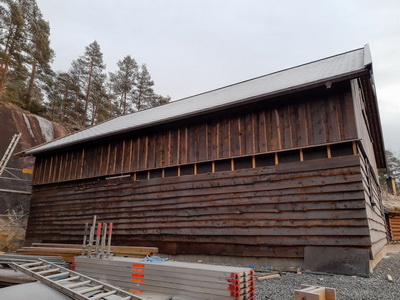
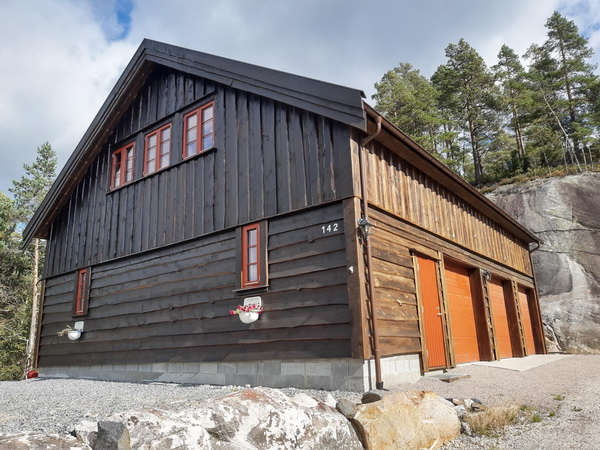
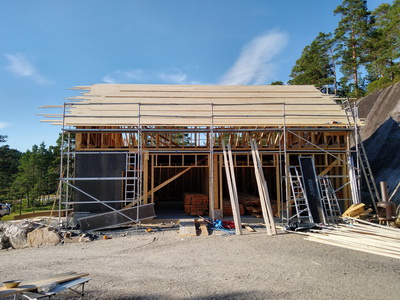
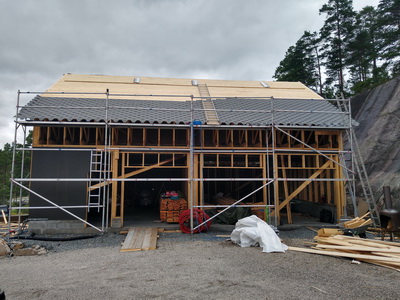
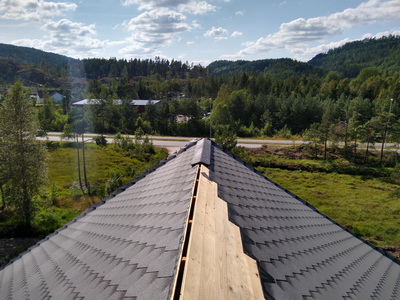
The roof is done, now we had the sides to get the garage cladded.
we stained the planks before mounting them.
Staircase made, and making it easier to get upstairs.
Podia from Australia dropping in for a visit, touring Norway and a lot of Europe
.jpg.a4a6891ef79d00ffd3c8a108b3fd29d9.jpg)
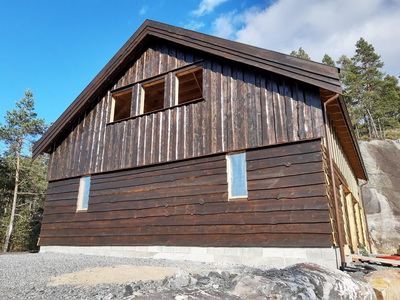
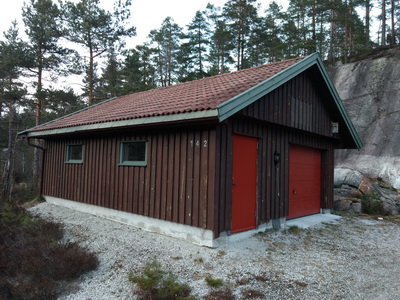
Looking good the windows, doors and garage doors installed
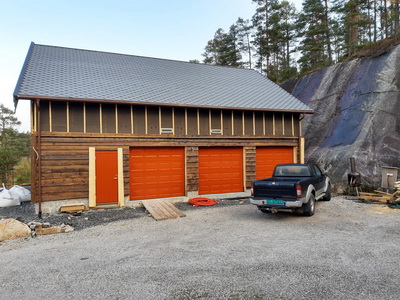

Outside done
-
1
-
-
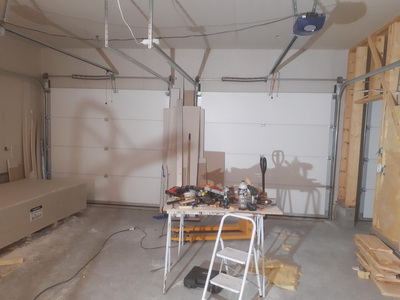
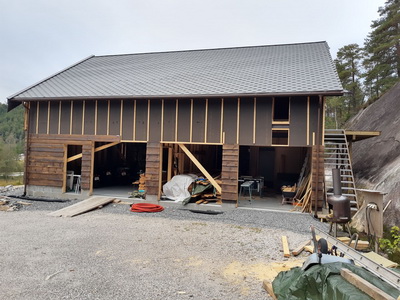
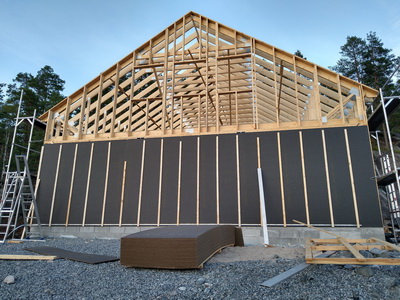
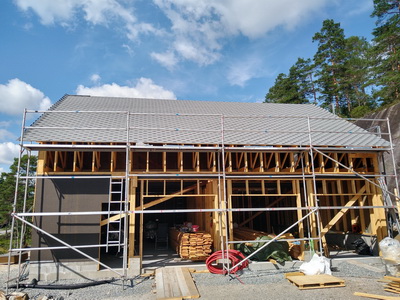
Time to get some serious work done.
2 days to frame the ground floor.

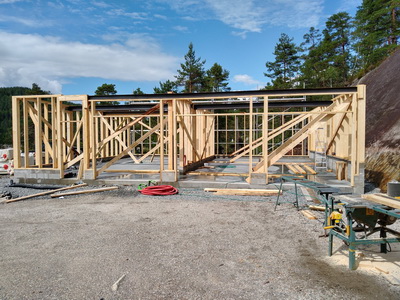
Third day the trusses came and was hoisted up.
Then the first floor was done
and the rest of the job was mine....


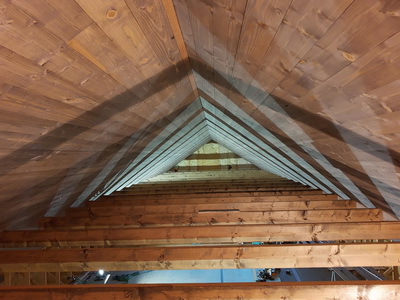
First the floor upstairs
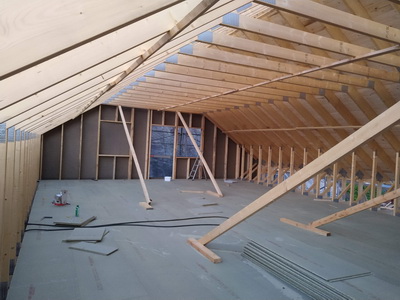
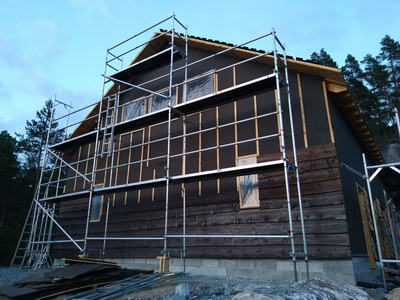
And then to get the sides covered, and the roof laid with tongue and groove panels.
After this job, I hated shingle 🤣
-
2
-
-
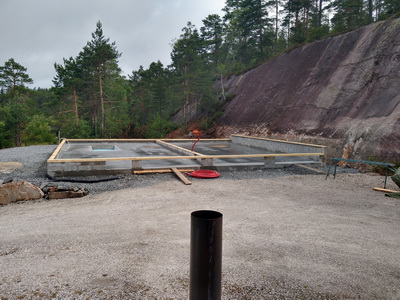
This is what I have been doing last year and a half
Old garage had to go, and it took a week to demolish it 🤩
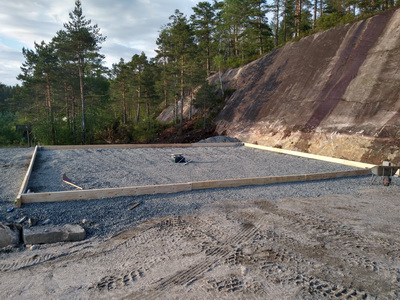
Then we had to blast a bit, and get the area big enough for the slab
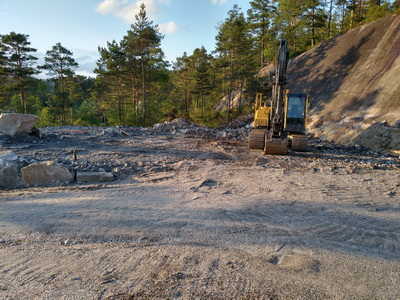
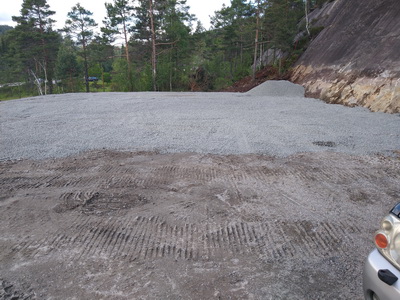
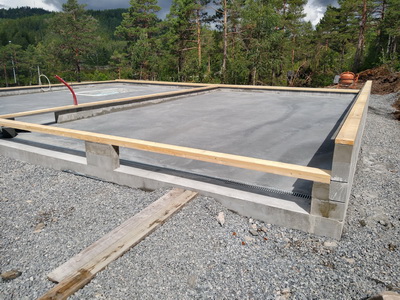
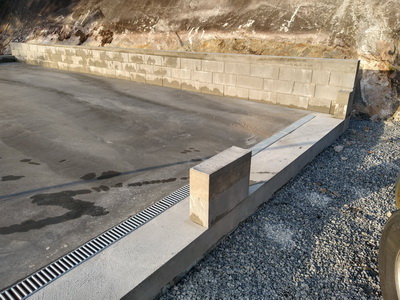
Next was to get it ready for concrete. Styrofoam and a lot of rebar work.
Making it with a 1,5% slope from back to front for drainage.
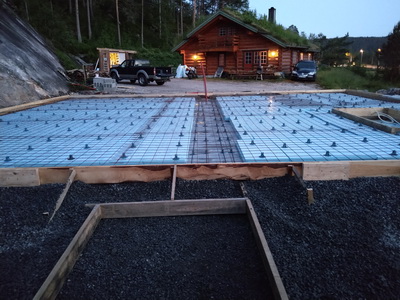
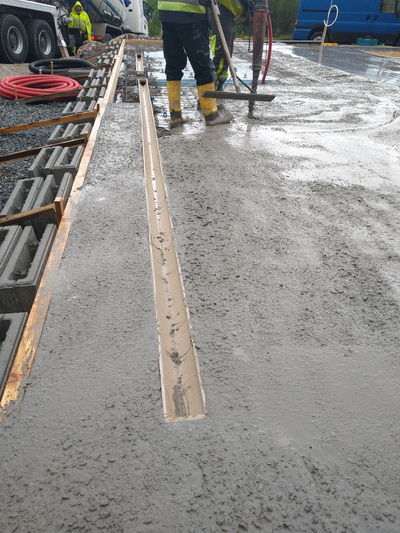
CONCRETE DAY
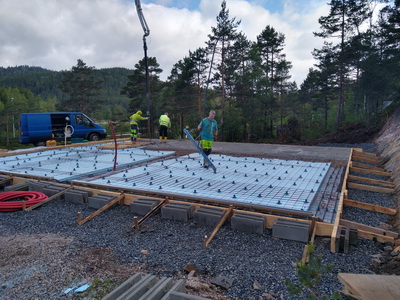

I'm glad I hired help for this job.

1 week to keep it moist to let it cure
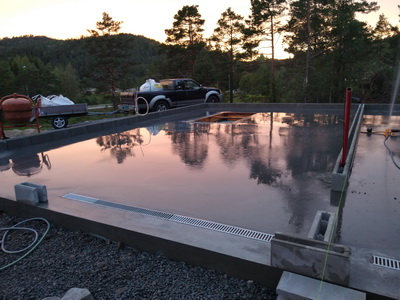
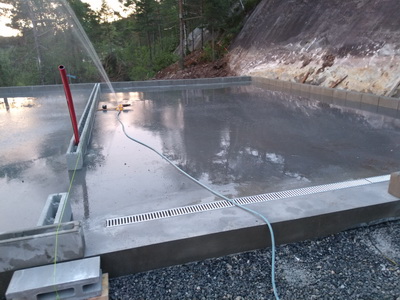
Then a bit of foundation for the walls, and make it level.
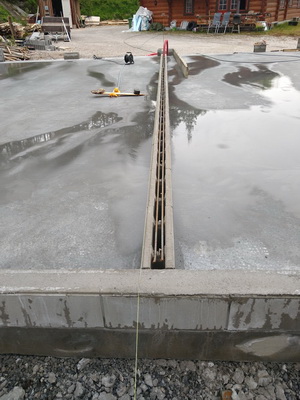
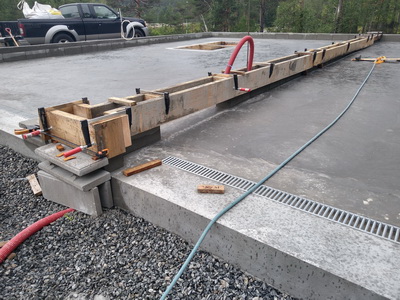
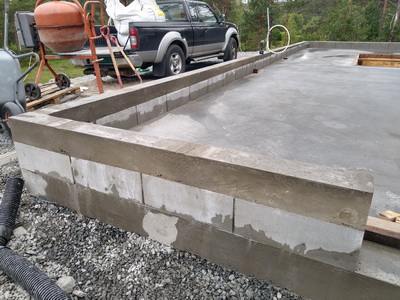
No wait for the carpenters to do the framework
-
1
-
-
Found this one.
-
-
Amsoil 10/40
-
41 minutes ago, Aunt Zero said:
How does something like that wear out?
That's why we have AFAIKBZITE ....

-
On 28. mars 2016 at 2:56 AM, sandman said:
Thanks for the advice, BanditSid + Superhawk996- I'm going to go ahead and do just that. I had uncovered the plug and visually inspected it, and seeing no corrosion just recovered it. Will remove plug ends and solder it together and report back. This could be it- exited by the possibility of solving this.
Have you fixed it?
-
Check the petcock diaphragm.
-
Is there a nut loose between the tank pad and rear seat?
Welcome to the forum!Yes a 48 year old one.
Welcome to the nut house
you'll fit right in 
-
1
-
-
Yeah, any update? Don't leave us hanging...
+1
He might be too embarrassed to post up a reply

-
I put a kit in my old 97. Fixed the problem

And it got a bit more power too

-
Blah blah blah. Just makes my extensions look bigger.
Fixed that for you
-
Someone rang???
Jen, PM me you # whenever and I'll text you some pics and info. Just try to focus on the bike in the pics and not me in my leopard thong sitting on it.

Woohoo! Lol. Sending pm now, sorry, I haven't been on in about a week.
Was it this you one got?
Pic is semi NWS. Changed it to a link - RC
http://cdn2.holytaco.com/wp-content/upload...get_thong-1.jpg
The leopard print is very faint
-
1) Put the bike on the center stand
2) Remove the front fender
3) Remove the handle bars/clip ons. Loosen the allen, wiggle them up and loose. Make a note of what lines run where, you will be thankfull when you're re-assembling everything.
3) Loosen (break free only!)the bolts on:
The front wheel (4 12 mm bolts, 1 22 mm big bolt.
Both brake calipers, including the ones for the LBS and the lines.
Using a 24 MM socket, loosen the fork caps.
4) (if you have a front end stand, that goes inside the steering stem, you can skip this step)
Put a block of wood on your jack, and roll the jack under the oil pan and jack up the front end until the front wheel is off the ground. The bike should be pretty stable. if it wobbles on the wood, re-position it and try again.
5) Remove the brake caliper bolts on the right side of the bike, and work the caliper loose.
6) remove the 22 mm nut holding the axel in place, and pull the axel out. Make a note of where the spacers in the wheel are, you will thank me later.
7) Remove the rest of the caliper bolts from the fork, loosen the 10 mm bolts where ever the brake lines mount to the fork tubes.
8) Once you have all the brake lines free, there's a 14 mm and an allen holding each fork tube in place. Loosend the fork tube, and it will drop right out.
9) Before you do ANYTHING ELSE, spray the fork tube down with Honda Polish (or equivalent) and clean up any bugs/dirt/etc that might be on the tube. This will help keep your seals from leaking.
10) I remove the allen bolt from the bottom of the tube when I do mine. I just makes emptying them so much easier, and certainly more thorough. I usually need to take the fork, and putting the base in my vise, I can usually just break it loose. I do each side. IF it will spin but not come free, I take it out of the vice and with it upside down (note, I have not removed the end caps yet!) I push down on it, and turn the allen. That usually works. As long as the end of the allen isn't boogered up, you can also try using a longer Allen with an impact wrench, and spin it out.
IF the end is boogered up, I just remove the fork top, since getting it out is going to be a giant pain.
11) With the allen out, when you turn the fork over, oil will start to leak, so put the end in a bucket ,and remove the top fork cap (you loosened it before you dropped them, but you may still need to put a wrench on it to get it to come free. Once you get the cap loose, the oil will flow pretty quick. Find the brass washer behind the allen bolt, sometimes it gets stuck up inside.
12) To pull the cartidge out, you will need a 14 mm wrench to loosen the nut under the fork cap. Loosen the nut, and the cap will come all the way off. You can then pull out the spacer and spring. Make a note of the order and orientation of the spring, so you can put it back together the same way. (as I remember, it's narrow end down)
13) Pull the cartidge out, and pump it a BUNCH of times. You will find that it takes quite a bit to get the oil out of it. I have been known to spray it down with brake cleaner to clean it up, too.
14) I usually clean up the spring and spacer as best as I can, using a shop towel and occasionally using some brake cleaner. In the end, you want to make sure everything's as clean as possible.
15) When cleaning inside the fork tube, it's usually a good idea to rinse it out a bit with oil too. You also want to clean the underside, where the allen bolt will seat with the brass washer. It's a good idea to plan on replacing the brass crush washer. I've reused them on a regular basis without incident, but I did have one incident where it leaked. As it turned out, I had not cleaned the underside well enough (Where the brass washer seats, and it left enough dirt on there that it leaked.
16) To re-assemble, first put the cartridge inside the fork tube. I usually put the spring and the spacer/washers in as well, without oil, and put the fork cap in place, too. Then I start the allen which holds the cartidge in (see above about the brass crush washer and getting the dirt out of there!) until it's tight. Pushing down on the fork tube, compressing the internal spring, is usually good enough to get it to snug down nice and tight. Your shop manual will have a torque spec, but it's been my experience that it's usually worth taking down to the vice and making sure it gets nice and tight.
Note: some people like to put permatex on the bolt for extra leak protection. Like I said, if you get the surfaces nice and clean, you should be OK, but it's your call.
17) Once the cartridge is back in, you take the fork cap off, and remove the spacer and spring, too.
There's 2 schools of thought as to how to fill the tubes with oil:
1) Measure with a graduated cylinder.
2) Over fill and use a Mity Vac to extract any extra.
Because the only way to know if you got it full is to measure how much oil's in there, I use the 'Over fill and Extract" method, as taught to me by Redbird. I don't remember the stock height (230 MM comes to mind, but I will check my manual when I get home and update the post. EDIT 142 MM, not 230!) But basically here's the process:
Fill the fork tube most of the way up with oil. Pump the inside cartridge up and down about 20 times. After the first few times, you'll find that it gets much tougher to move, as it's filling up with oil. Try to work it the full length of travel. After you're sure you got all the air bubbles out, you're done.
Tape a piece of wire with the tube on your Mity Vac (to keep the tube straight). Measure from the bottom of the tube up to the height you want it to be (so.. 142 mm, or 14.2 cm) and mark the tube. A smart guy bends the wire so it can hook on to the tube, but make the mark as accurate as possible.
Holding the fork upright, without the spring or spacer in there, with the tube all the way DOWN, (having a helper here makes it much easier) put the Mity Vac tube inside the fork tube down to your mark. Now suck out any extra fluid, holding the tube at the mark the whole way. When you start sucking air, you've got it to the proper level.
[uPDATE 4/23/2008: According to my service manual, for 99-03 XX's, that number is 142 MM, or 5.6 IN, not 230 as previously posted]
After that, it's pretty straight forward:
18) Put spring, washer and spacer in fork. Tip: Pull up on the inside cartridge first.
19) Attach cap to the cartridge top. Spin down to the to pof the 14 mm nut. note that the goal here is to get them even. so make sure the nut is at the same level (and tight!) on both sides.
20) Push the cap into the tube, and tighten. This can be somewhat tricky, and a helper is usually good here if you need someone to hold things. If you dont' get it super tight, that's fine, just get it snug.
21) Put the fork tube back in the bike. Raise it up until it's 1.5 inches (I will dig up my manual, as listed above, but that's what I remember) fromn the bottom of the fork cap to the top of the triple tree. Tighen down up at the top tree first (because it's easy to get to) but don't forget to tighten the 14 mm bolt on the lower tree, too.
When fishing up the forks through the trees, pay special attention to the position of the wires and brake/clutch lines, they should be where they were when you pulled the fork out.
22 ) Once the forks are back in the trees tighten down the caps one more time, now that you can torque them properly.
23) Replace Handlebars - Do not pump brake handle, though!!!
24) I usually take this time to spray the brake calipers with cleaner and push the buttons/pads back inside the caliper. Makes assembly easier, and you'll be amazed at how good your brakes feel for a while
25) Install brake line bolts in the forks, and put the front wheel on (check direction of spin) Snug the front axel bolt, but not the 4 pinch bolts.
26) Lower the bike off the jack. Torque the front wheel bolt.
27) Install the brake calipers. Note that while a properly torqued bolt shouldn't fall out, I would recommend using at a minimum blue loctite on the caliper bolts. I HAVE had them fall out.
28) Pump up the brakes. Make sure they are nice and working.
29) Using the brakes, bounce the bike on the new forks.
30) Tighten the pinch bolts on the fork tubes. (Yea, I know, it's silly, but that's how the manual says to do it)
31) Replace the fender.
As with any major change to the bike, before you go balls to the wall, take it easy for a bit on your first trial ride.
How long do you think it would take someone who has never made the attempt before? I plan on working with rideonXX and letting them hang overnight but maybe not pulling the carts themselves...also thought about throwing some cleaner in the night before the forks are pulled...any thoughts?
I did it first time last year.
Took them of and removed the cap, spring, spacer and shim.
Emptied in a bucket and pumped the rod several times.
Let them hang upside down over night. Then filled up
and sucked out the excess. I let the screw in the bottom be.
Couldn't be easier.
The oil wasn't black and greasy and still looked new.
So I didn't bother using cleaner.
-
Pics next year?
-
That might be one of the most loaded, clean, low miles XX's left on the planet. Good luck with the sale, hopefully it goes to someone who will appreciate her.
My 2005 only got 10.000 km (6000 miles) on it

-
It came today.
Thanks man, now I have to figure it out how to connect the sucker
Cool, that didn't take long. I will see what I can do to find the diagram Jay gave me. There is a thread on here that shows how to hook it up but I'm not sure how to find it.
Found it
http://www.cbr1100xx.org/forums/index.php?showtopic=74773
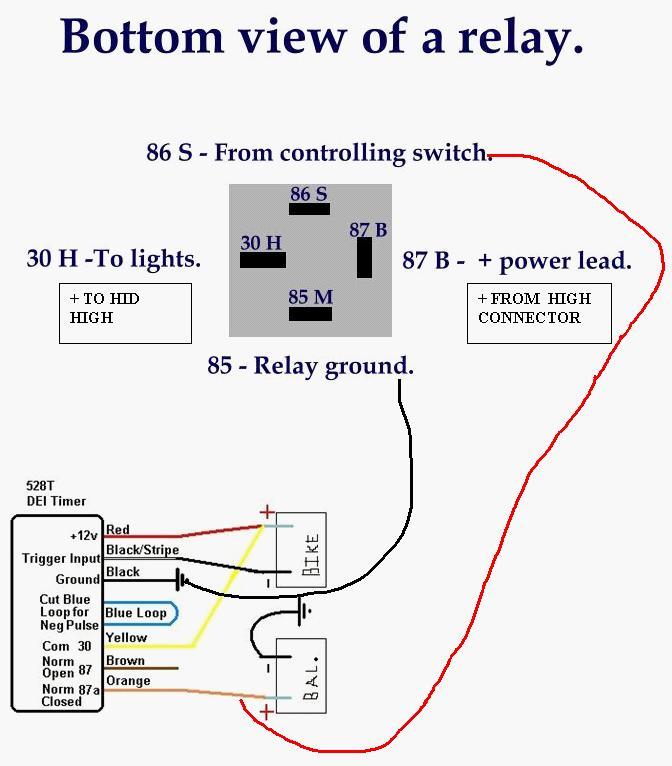
Now I can use HID on LOW and HI.
I'll connect a relay to the HI from the delay relay to keep the HI beam to go off too.
Something like this. :icon_think:
Nice, let me know how it turns out.
It works
Connected it like the chart, and set the timer to 12 sec :icon_thumbsup:
HID HI and LOW.
-
KaziXX - That looks a LOT like the one I saw but it has a chuck and a trigger to let compressed air draw it out.
blackhawkxx - Well, since it was the dry sump and there is no plug in the bottom, I guess we got all we could out. If one doesn't use a vacuum pump, the standard instructions are to fish the sight tube down the frame with a plug over the hole, pull the plug and let it dangle under the bike for an hour, then fish it back up and reconnect it. There is also a plug in the block that drains about 1/2 a quart there.
I've also looked at the mighty vac, but heard a lot of people complain about the tube collapsing.
I think this is what I am going to settle on.

http://www.zorotools.com/g/00044176/k-G131...CFWIaQgodsWcA2g
It looks like what I had in mind, unless anyone else has any suggestions? Gonna order it tomorrow.
I got this one, and it's excellent
Used it on gas, break fluids, coolant, oil etc.

-
Good work, and keep posting on the progress :icon_clap:
This summer the scale has been even, no gain and no loss.
But I'm happy I don't gain weight.
Still 90 lbs of and 30 lbs left to loose in the winter
Kudos on quitting smoking :icon_thumbsup:
-
Good luck. I'm doing it the hard way, and it is tough.
But I’ve manage not go up this summer, and plan to loose the last 20lbs this winter.
-
It came today.
Thanks man, now I have to figure it out how to connect the sucker
Cool, that didn't take long. I will see what I can do to find the diagram Jay gave me. There is a thread on here that shows how to hook it up but I'm not sure how to find it.
Found it
http://www.cbr1100xx.org/forums/index.php?showtopic=74773
Now I can use HID on LOW and HI.
I'll connect a relay to the HI from the delay relay to keep the HI beam to go off too.
Something like this. :icon_think:
Build a new garage.
in Handyman
Posted
I moved to a new house last year, and had to get more space")
Snow load for the area is 458 kg/m2 or 94 lbs/sq ft.
We usaly get about 6-7 feet of snow 🙄