

YO
-
Posts
43 -
Joined
-
Last visited
Content Type
Profiles
Forums
Gallery
Events
Posts posted by YO
-
-
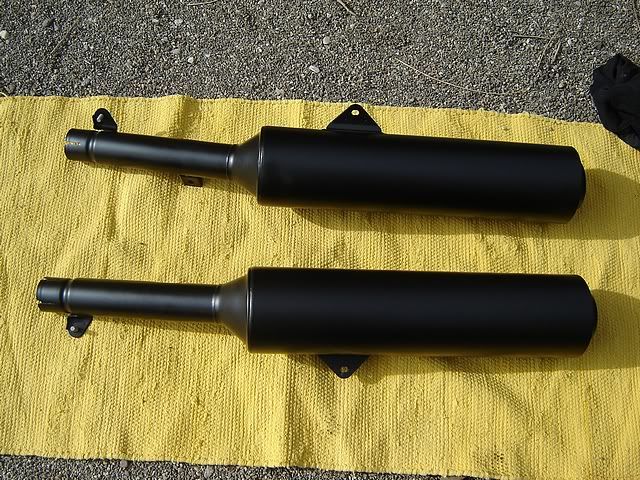
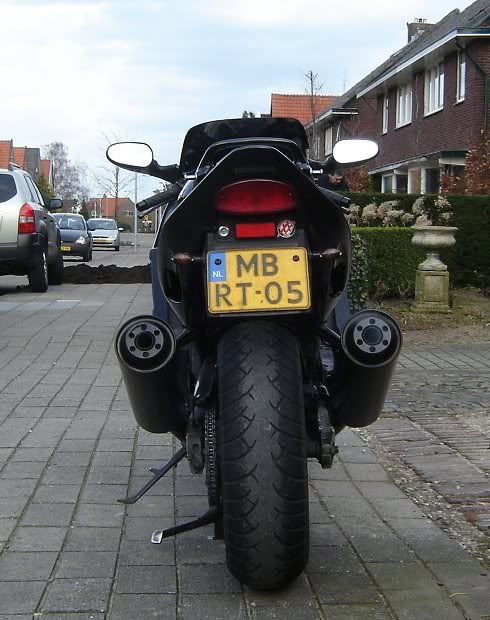
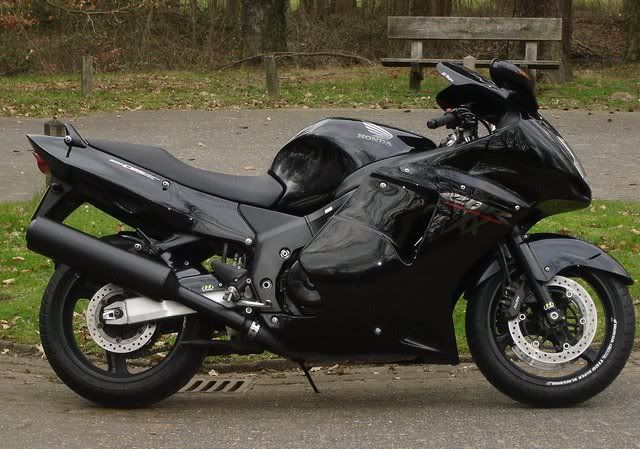
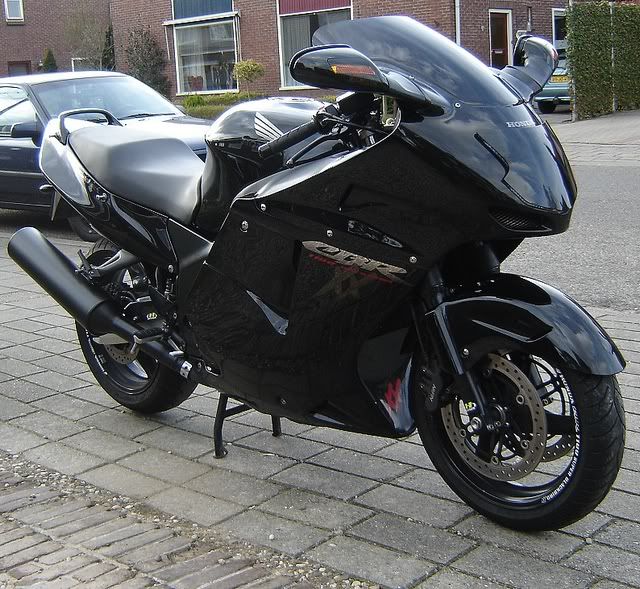
Stock exhausts heat-resistant powdercoated (500 degrees C)
-
Hi Birdies,
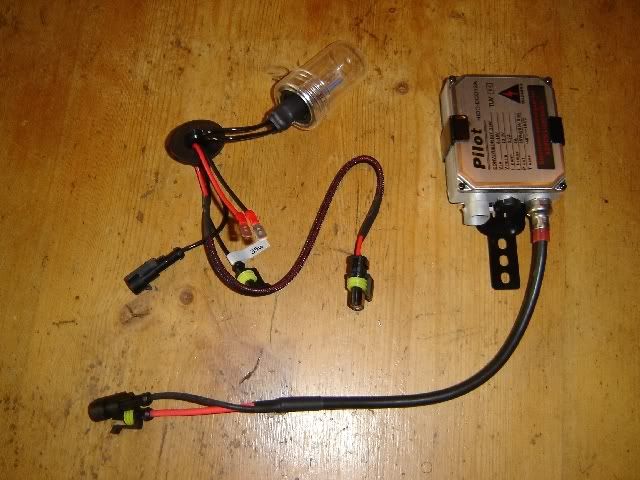
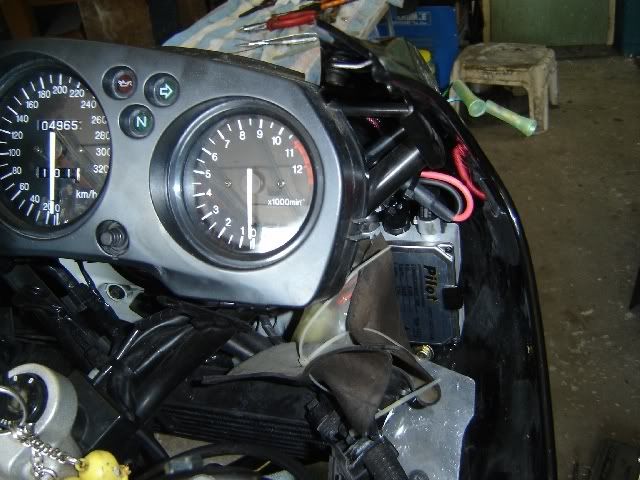
Today I´ve mounted my Xenon set 8000K. The most work was finding a place to put the ballast. The pictures shows you where I put it. I´ve mounted it on the bolt of the headlightunit.
The Kit

-
Would spraying clearcoat on them help the finishes longevity?
Well, it may help the finishes longevity but when damage occurs it is much harder to correct cause you have to correct the clearcoat as well...
With only colorpaint it is much easier to cover up spots cause you've only have to put on new color..
-
Sandpaper 400, scour lightly, degrease with petrol(the kind you use in the household)...I did 4 layers in 2 hours, 24 hrs drying, then 5 layers within 2 hours and 24 hrs drying. Especially the drying is essential! I used a hot air heater and placed it in front of the paintjob.
The job looks great Yo - Just one thing though I think you would be better using thinners or simolar to degrease as petrol has oil in it and can affect paint and stop it sticking IMHO :icon_think:
I don't know the exact word but it is a degreaser that you use in the household. Freely translated from Dutch to English it is called "washing petrol" . Works like a charm

-
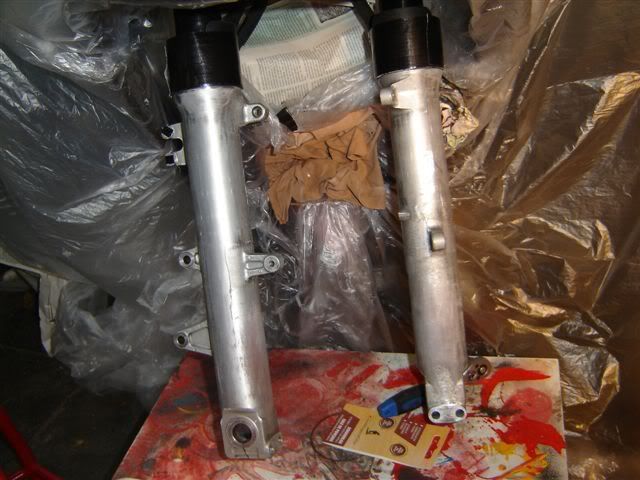
So true. I already own the forks, the black paint, and the masking tape. Plus I have some old lumber tarps I can use to block the living room wall from overspray. I'll just have to move the Christmas tree.
Hi Montana, beware of the mountingholes of the front fender and the holes underneath the fork. (screwthreads) Underneath I rolled little pieces of paper and stuck them in the holes..
Also cover up your inner tubes cause the spraypaint gets really everywhere....
Sandpaper 400, scour lightly, degrease with petrol(the kind you use in the household)...I did 4 layers in 2 hours, 24 hrs drying, then 5 layers within 2 hours and 24 hrs drying. Especially the drying is essential! I used a hot air heater and placed it in front of the paintjob.
-
Easy mod that looks great. I may have to do the same.
You forgot the CHEAP part


-
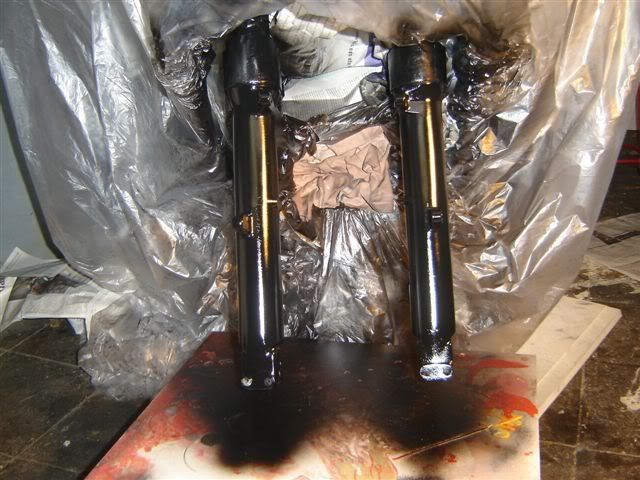
Paiontjob
Paintjob.

Looks good, do you think it will stay on or will it chip off?
Only time will tell
-
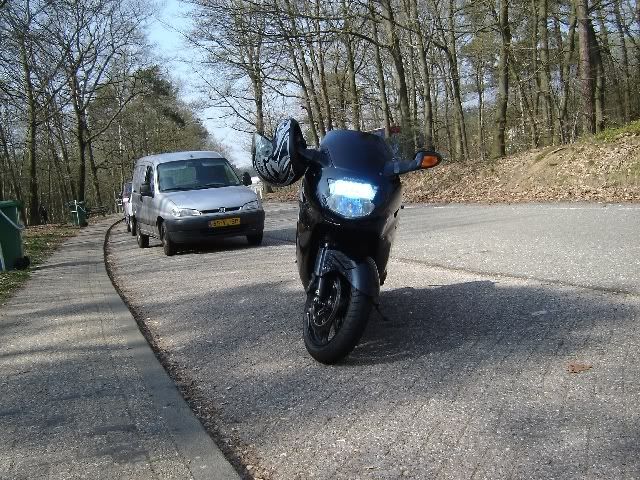
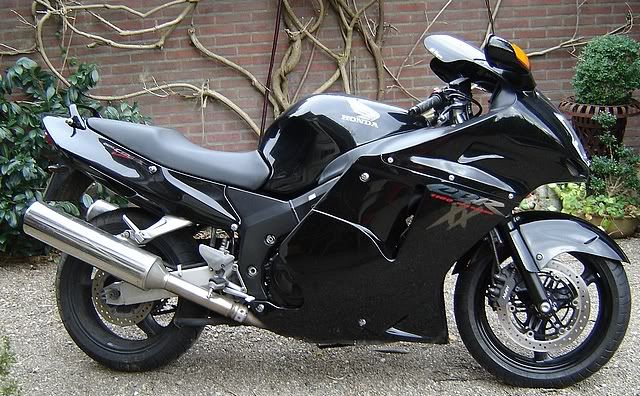
WITHOUT....
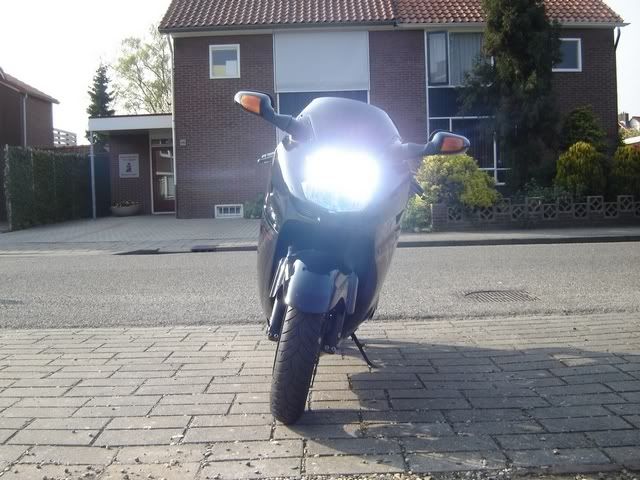
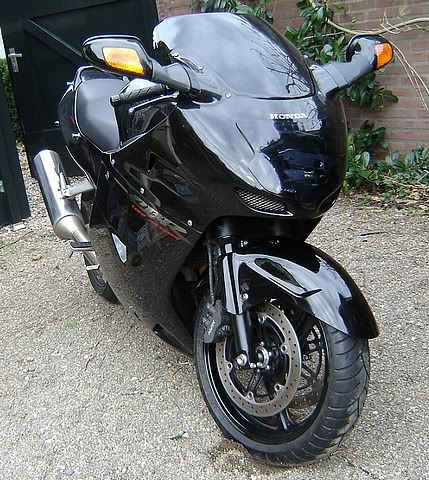
WITH HEADLIGHTCOVER.
-
Hi Birdies,
Here a fault finding checklist of our XX.
Search the fault in the index and click the corresponding number at the thumbnail section.
To hell with the check list....thats one wild written language you got going there....

Is this better?
-
Hi Birdies,
Here a fault finding checklist of our XX.
Search the fault in the index and click the corresponding number at the thumbnail section.
-
my 99' has 30,000 would you replace it it is still good should I be looking for one, thanks Ron
The 99 reg/rec are of a modified type so it lasts longer dan the 1997. Why bother to replace it XXSTAR...
If it's good it's good
Some BB-pilots always have a spare with them just in case....
-
Hi Birdies,
Did you replace your reg/rec?
Mine broke down at 36000 km.
I say yes.
-
Hi Birdies,
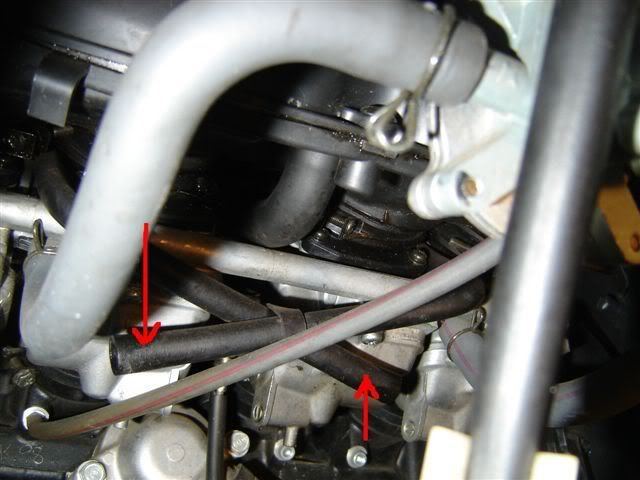
Sometimes, due to dirt, rust or not riding for a while, the float needle valve can be stuck causing excess fuel to be admitted to the float chamber resulting petrol overflow through the overflow tubes.
In most cases this can be solved by tapping with a screwdriver against the float chamber to release the float needle. Also a good suggestion is, when you have this overflowproblem, to drain the floatchambers by unmouniting the drainscrew and get rid of the dirt and water.
@If this method does not work or occurs often you might have a worn needle or seat or other problems concerning the float chamber
TOOLS
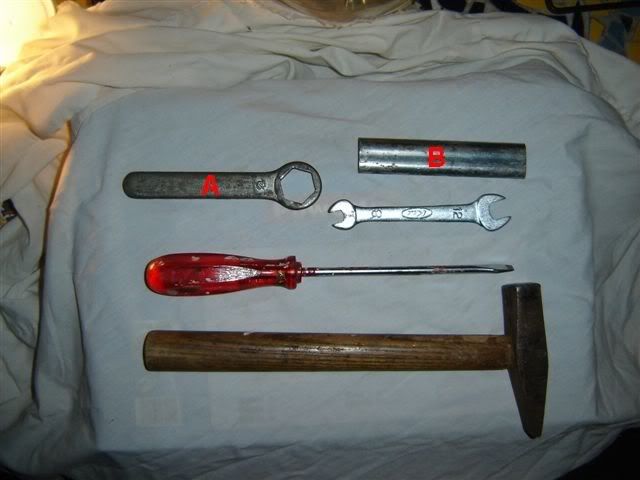
Flat ringspanner A and flat hollow piece of metal B (original Honda tool-set)
Ringspanner 12
Flat bladded screwdriver
Hammer
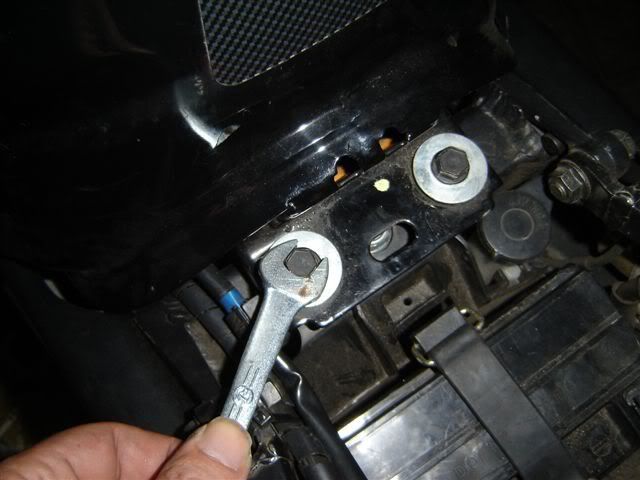
Remove the rear mounting bolts of the tank
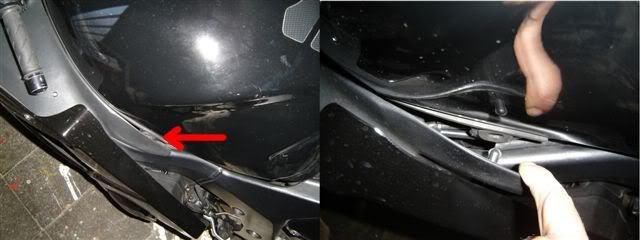
Pull the rear of each tank trim panel away from the tank to release the lugs from the grommets
Raise the tank at the rear and put B between the tank and the batterybox (there is a space where you can fit B in) Slide A (through the hole at the rear of the tank)into B resulting in a secure work-position
Look beneath the tank. You see two tubes (arrows) Those are the overflow tubes. One tube for carbs 1 and 2 and the other for carbs 3 and 4.
Ascertain which tube overflows and follow it to the carbs.(1&2 or 3&4)
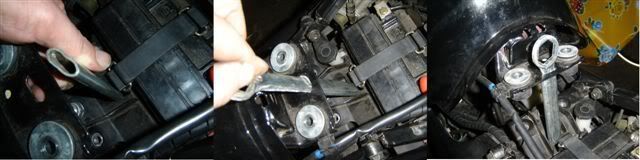
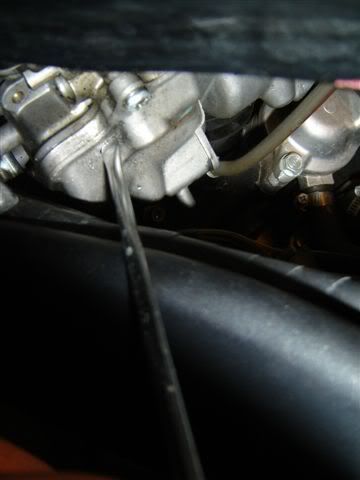
Place a screwdriver on the floatchamber (bottom carbs) and tap slightly with a hammer on the chamber at several places. Repeat this proces by the other carb if you don’t get a petrolflowstop after a restart
Tap not too soft and not to hard (you can cover the blade of the screwdriver with a piece of cloth to prevent it from scratching). Your floatneedle is released when the petrol overflow stops
To prevent this overflowproblem, drain the floatchambers by unmouniting the drainscrew and get rid of the dirt and water.
 (Photo Haynes Manuals)
 -
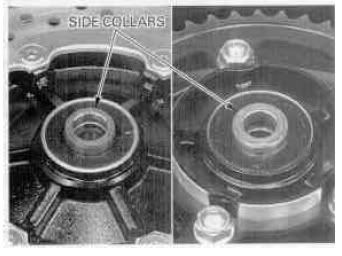
My question is, are these things idiot proof to where they will only fit on the correct side? This is really starting to bug me, because i'm obsessive compulsive and i'm starting to wonder if I installed them correctly.
Could one of the resident experts help me out here?
Maybe this will put your mind at rest...
In my opinion they are idiot proof, you can only install them one way. If you swap the collars by accident, your wheel won't fit.'
-
i have hyperpro springs on now.
I also changed my suspension in to Hyperpro.(rear spring and washer (5mm) and front springs with thinner oil and lowering)
I think it made a huge differnce. The XX is much stiffer and sticks better to the pavement then it used to. I would recommend it to every-one.
the weight of the bike can be lowered by mounting lighter cans. That will be my next investment.
-
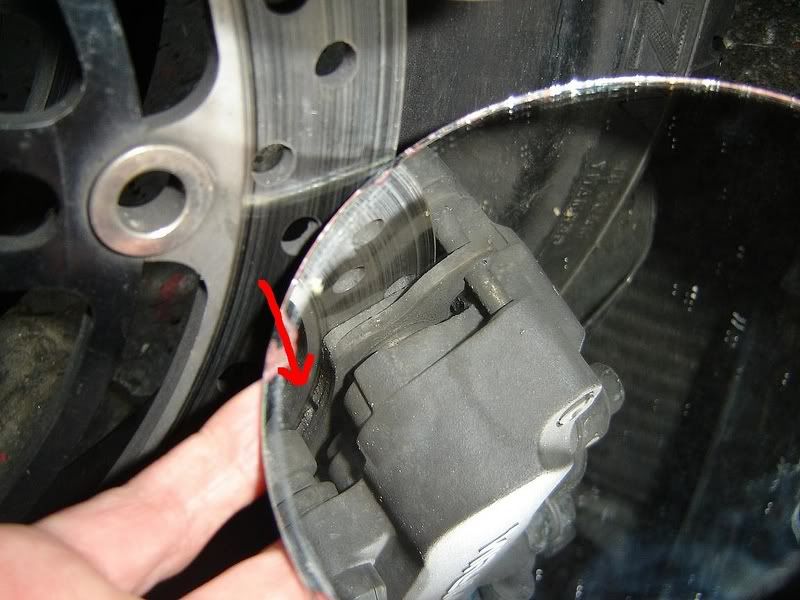
Hi Birdies,
An easy way to check your brakepads is holding a mirror under the brake-caliper, shine with a flaslight on the mirror, the mirror will focus the light on your brakepads. Works even better in the dark.
Now you don't have to kneel down and damage your nose on the pavement
-
OK..........dumb question, I know. Just went out to pop the lense cover to see what size bulb I need, as I have to keep smacking my mirror housing right now to get the bulb to work.
Don't see any screws that need removed. Tried popping it out, but don't want to take a chance on breaking some tabs or the whole lense.......I have a habit of muscling things when they should be finessed

Hi Fonzie...
Here's the answer.
greetz,
Yoan.
CAUTION! While undoing the screws in the first picture, keep hold of the mirror to prevent it from falling!

-
He Birdies,
Hereby a workshop how to bleed your brake-system.
Sorry, I discovered I already posted this one.
BLEEDING THE BRAKE-SYSTEM
TOOLS

Set of Allen keys
Open-end and ring spanners 8 + 10
Phillips head screwdriver
Bottle with clear plastic tube that fits well on the bleed-valves
Brake-fluid DOT 4
Cloth.(use this to protect the work-space from the agressive brake-fluid.)
FRONT BRAKE
Undo the retaining screws and remove the right master cylinder reservoir cover, diaphragm plate and diaphragm and slowly pump the brake lever a few times, until no air bubbles can be seen floating up..

Starting on the LEFT side calliper, pull the dust cap off the UPPER bleed valve. Attach one end of the clear plastic tube to the bleed valve and submerge the other end in the bottle. Carefully pump the brake lever three or four times and hold it while opening the calliper bleed valve. When the valve is opened, brake fluid will flow out of the calliper into the clear tube and the lever will move toward the handlebar. Retighten the bleed valve, then release the brake lever gradually. Repeat the process until no air bubbles are visible in the break fluid leaving the valve. Tighten the bleed valve with the specified torque and install the dust cap.
Ask a person to assist you by pumping the lever and the brake-pedal.
Repeat the procedure on the RIGHT side front calliper.Check the fluid-level and do not allow the fluid level to drop below the lower mark during the bleeding process. Then refit the reservoir cover with its diaphragm and diaphragm-plate
This is a picture of the right side caliper but you have to start with the LEFT

REAR BRAKE
Remove the seat cowling to gain access to the rear brake master cylinder fluid reservoir.
Unscrew the bolts (arrows) on each side, remove the grab-rail and release both pegs from the grommet (second arrow on the right) and carefully remove the cowling.

Unscrew the fluid reservoir cover and lift out the diaphragm plate and diaphragm.

Start with the RIGHT side front caliper CENTRE bleed valve, remove the dust cap and attach the tube.Carefully pump the brake pedal a few times and hold it down while opening the centre bleed valve. When the valve is opened, brake fluid will flow out into the clear tube and the pedal will move fully downwards. Retighten the bleed valve, then release the brake pedal gradually. Repeat the process until no air bubbles are visible in the break fluid leaving the valve.
Repeat this process for the LEFT side front caliper.

Repeat the process for the rear caliper CENTRE bleed valve.

Repeat the process for the rear caliper UPPER bleed valve. Check your fluid all times and be sure the fluid level never exceeds beneath the lower mark of your brake fluid cylinder.

Then move to the front LEFT calliper, push the secondary master cylinder (arrow “valve”) and calliper upwards and bleed again the rear UPPER bleed valve. (so no break pedal, only pressure gaining by moving upwards the left calliper) Fill the rear fluid reservoir and tighten the cover with its diaphragm-plate.

Mount the cowling.
By pumping the pedal and lever beware of squirting brake fluid, so pump carefully

Greetz,
Yo.
-
By the way, my spelling is incorrect...Has to be BRAKES in stead of BREAKS.
-
Very nice write up but I think you forgot to mention that you need a second person to work the rear brake pedal when you bleed the left front caliper center bleed valve as well as when you bleed the front left m/cylinder from the rear caliper.
I know, I assumed that this was logical but I added the info. Thx
-
He Birdies,
I had the Bridgestones and the Michelins but what i like the best for the XX is the Metzelers. Roadtec Z6 or Sportec M1.
-
Then move to the front LEFT calliper, push the secondary master cylinder (arrow “valve”) and calliper upwards and bleed again the rear UPPER bleed valve. (so no break pedal, only pressure gaining by moving upwards the left calliper) Fill the rear fluid reservoir and tighten the cover with its diaphragm-plate.
i don't really understand this part. when you say push upward, how much does it move because isn't the caliper still bolted to fork? i did not do this part, i don't remember seeing it in the manual? please explain. thanks.
Yes, the caliper is bolted but if you move upwards the caliper AND the valve (see arrow) you will notice it will slightly move upwards (not the caliper but the valve) resulting into pressure. It is slightly (a few mm) but it moves upwards. The caliper is a kind of lever. (don;t know if this is the right word..lever)Then bleed the top valve on the rear (not the centre) And true, most manuals don't speak of this and it is often forgotten during maintenance. Hope this is of some use to you.
-
An easy way to clean the inside of your headlight of stains and spots without demounting the unit...
TOOLS:
Long soft cloth.
Long wooden flexible cocktail (BBQ) stick.

Wrap the stick in the cloth leaving a free piece of the cloth at the top.

Remove the access panel underneath the top-fairing and then draw out the bulb-holder and stick the self-made cleaning tool into the headlight.

Push up the tool and beware of holding the cloth AND the stick tight between your fingers.

Wipe like a windscreenwiper and remove the spots and stains. When all is clean, carefully draw out the tool and mount the bulbholder and access panel.

-
He Birdies,
Last week I did my breaks bleeding the whole system. Here's my Photo-report.
BLEEDING THE BRAKE-SYSTEM
TOOLS
Set of Allen keys
Open-end and ring spanners 8 + 10
Phillips head screwdriver
Bottle with clear plastic tube that fits well on the bleed-valves
Brake-fluid DOT 4
Cloth.(use this to protect the work-space from the agressive brake-fluid.)
FRONT BRAKE
Undo the retaining screws and remove the right master cylinder reservoir cover, diaphragm plate and diaphragm and slowly pump the brake lever a few times, until no air bubbles can be seen floating up..
Starting on the LEFT side calliper, pull the dust cap off the UPPER bleed valve. Attach one end of the clear plastic tube to the bleed valve and submerge the other end in the bottle. Carefully pump the brake lever three or four times and hold it while opening the calliper bleed valve. When the valve is opened, brake fluid will flow out of the calliper into the clear tube and the lever will move toward the handlebar. Retighten the bleed valve, then release the brake lever gradually. Repeat the process until no air bubbles are visible in the break fluid leaving the valve. Tighten the bleed valve with the specified torque and install the dust cap.
Find an assistent to pump the lever and the brake pedal
Repeat the procedure on the RIGHT side front calliper.Check the fluid-level and do not allow the fluid level to drop below the lower mark during the bleeding process. Then refit the reservoir cover with its diaphragm and diaphragm-plate
This is a picture of the right side caliper but you have to start with the LEFT
REAR BRAKE
Remove the seat cowling to gain access to the rear brake master cylinder fluid reservoir.
Unscrew the bolts (arrows) on each side, remove the grab-rail and release both pegs from the grommet (second arrow on the right) and carefully remove the cowling.
Unscrew the fluid reservoir cover and lift out the diaphragm plate and diaphragm.
Start with the RIGHT side front caliper CENTRE bleed valve, remove the dust cap and attach the tube.Carefully pump the brake pedal a few times and hold it down while opening the centre bleed valve. When the valve is opened, brake fluid will flow out into the clear tube and the pedal will move fully downwards. Retighten the bleed valve, then release the brake pedal gradually. Repeat the process until no air bubbles are visible in the break fluid leaving the valve.
Repeat this process for the LEFT side front caliper.
Repeat the process for the rear caliper CENTRE bleed valve.
Repeat the process for the rear caliper UPPER bleed valve. Check your fluid all times and be sure the fluid level never exceeds beneath the lower mark of your brake fluid cylinder.
Then move to the front LEFT calliper, push the secondary master cylinder (arrow “valve”) and calliper upwards and bleed again the rear UPPER bleed valve. (so no break pedal, only pressure gaining by moving upwards the left calliper) Fill the rear fluid reservoir and tighten the cover with its diaphragm-plate.
Mount the cowling.
By pumping the pedal and lever beware of squirting brake fluid, so pump carefully
Greetz,
Yo.
[how to] make a radiator grill
in The Garage
Posted
Here a pix-workshop how to make your own protector/grill.
The gaze is for sale at any car shop..
Demount the middle fairing and fold the gaze around it and glue it with mounting-kit.
http://picasaweb.google.com/blackbirdyo/Wo...otectorRadiator