

Obby
-
Posts
1,940 -
Joined
-
Last visited
Content Type
Profiles
Forums
Gallery
Events
Posts posted by Obby
-
-
Seriously, If I was you, I would just check you water fluids, chain for kinks, brakes for excessive wear, oil and air filter, listen for a gumble ball rattle at 4k (CCT replacement), that about all I can think of off the top of my head :icon_think: .
-
Thanks Warchild for the excellent tutorial!

Hmmm, anyone have a tutorial for installing the Traxxion front suspension kit? :icon_pray:
Jim M
Yeah, Bring it to garage that works on track bikes for a living. Drop two-fidy on them. Pick it up after work and enjoy
. -
Thanks for the posts as usual folks. I feel more confident now. Just in case, I better get my bandaids ready again
 .
. -
Obby,
Which vendor has the best price/inventory on the Clear Alternatives?

Great looking XX. BTW :icon_thumbsup:
Oh, and put up some shelving in the garage, K?
Johns Bike Bits -aka John01XX on the board.
Thanks and John is the man for selling these. 15min. install. Excellent form/fit. No regrets to say the least.
BTW, All XX's IMO should have these in the front. I personally leave the rear alone, but that me.
-Obby
-
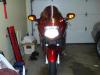
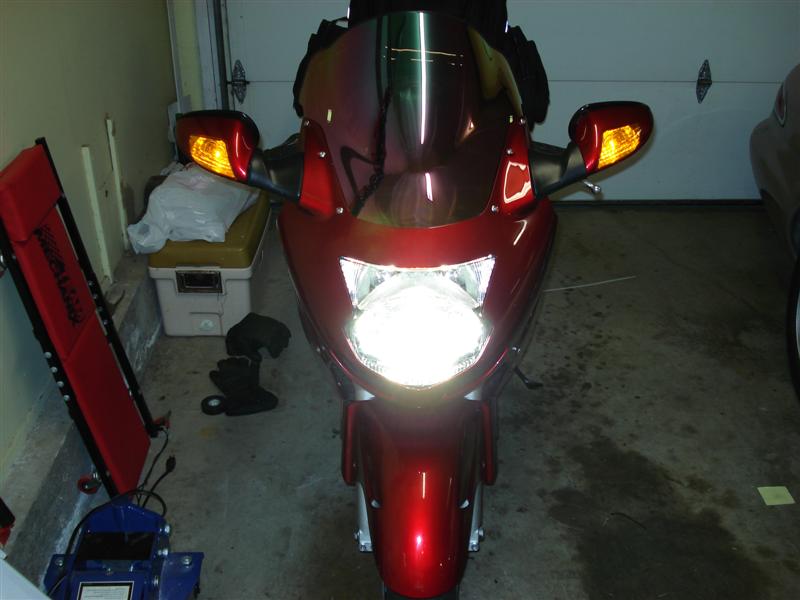
The top is lowbeam.
-
. Not much else to say.
I feel like somehow I gained HP too. The XX just takes off now. Another thing for example, on my usually commute, there are specific bumps in the road that I unknowingly was cringing over. I went over them on my way home after the install today, ready to cringe and bite my teeth, then nothing happened. The front fork just ate it up
 .
. I'm going for another ride, TTYL.
-Obby
-
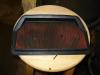
Don't you just love comming home after work and have a package waiting for you. I had those things install in less time than it took me to cook our chicken breast dinner
 .
.I use Sylvania Siler Stars for the lights. They have a irridium look which matches the screen nicely.
Much better look now IMO...
[attachmentid=1208]
[attachmentid=1209]
Now if I can only make the 2nd mortage that I took out to get all these farkles
.Plug...
Thanks JohnXX hooking me up! :icon_clap:
redbird is the only color I like the clears on.... :icon_clap:
Does that bike have HIDs? Damn thing is BRIGHT!!!
Just the high beam for now... My old ass back gave out during the installs.

-
I didn't like the tight bend on the hose where it exits the shock body when routing the line below the subframe so I loosened the lower and removed the upper subframe bolts and tilted the assembly just enough to slip the hose behind the upper mount. With no preload on the hose and a more direct route it made it easy to mount the GN2 can above the subframe handle on the left side.
I tie wrapped it to the top rail using the supplied rubber cradles and let the edge of the can below the fill valve rest on the aft leg of the handle after wrapping said handle with a length of self vulcanizing tape. Solid mount and you can adjust the compression by just removing the seat.
Hope this helps. Who did you purchase it from?
Greg
It was a part of the kit I bought in Warchilds Traxxion Group Buy. I probably saved near $100 on the shock alone.
I took the extra step, I had the hose go to the left as well but I removed the subframe bolts and routed the res to an underseat position. Super clean install and easy to get to.

You may find that the shock is too long and adds too much ride height with the adjuster all the way in. Prior to removing the old shock, with the bike on the centerstand, measure from a point on the swingarm to a point on the subframe. Then when you install the new shock you know how much height you gained. Too much makes the bike twitchy and the tire will not be off the ground on the centerstand. If need be, unscrew the bottom mount on the shock and grind a thread or two off so all the threads bottom out when screwed all the way in if you need to lower the rear.
Thanks, My Works rear shock on my '97 went right over the top of the subframe I always thought that was sloppy. I may have to do that initially as I don't have much time left once I receive the shock to work on it. Getting packed for TBME!
-
Don't you just love comming home after work and have a package waiting for you. I had those things install in less time than it took me to cook our chicken breast dinner
.I use Sylvania Siler Stars for the lights. They have a irridium look which matches the screen nicely.
Much better look now IMO...
[attachmentid=1208]
[attachmentid=1209]
Now if I can only make the 2nd mortage that I took out to get all these farkles
.Plug...
Thanks JohnXX hooking me up! :icon_clap:


-
I don't remember even having to tip the tank. I think I was able to get to both mounts without removing anything else. You may want to lengthen your shock about 1/4" before you install it. I've had an 8981 for about 3-1/2 years now and love it. Which model did you get?
Yep, the 8981 Two way adjustable...

1/4 inch? Is that like shimming the stocker 6mm? Does it help lighten the turning?
Thanks,
Steve
-
Just tilt the tank and loosen the top/bottom bolts? Is it that easy? About how long does the job take?
Thanks in advance,
Steve
-
Blue was never offered to the U.S market. If my memory serves (with alot of help here), in the U.S., starting in '97, it went like:
Black (fastest BTW)
Black
Black
Titanium
Red
Silver
Black (different clear coat)
Please correct me if I'm wrong...
-Obby
-
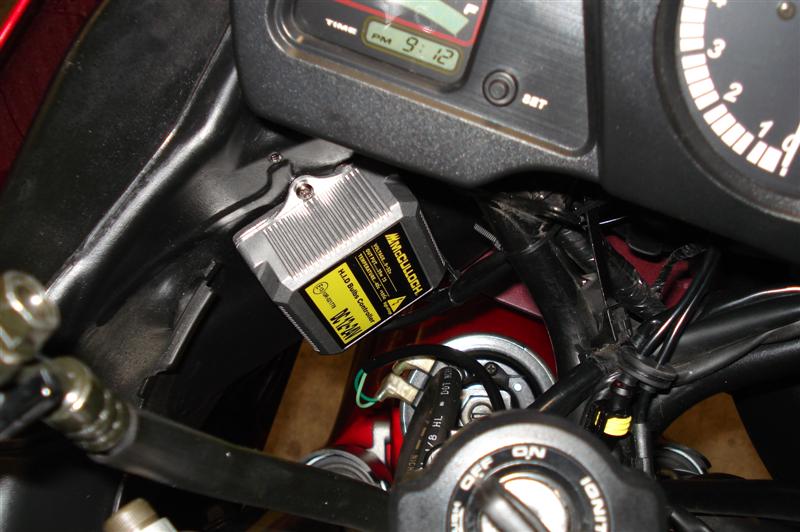
HID to Harness
Blk to Grn
Wht to Bl
Well Done, MileHi!
-
What the hell. I thought the '01 used PCII.....

I passed a killer deal on a PCIII when I had my redbird for that same reason. "Fuck me runnin!"
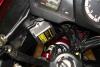
I don't know about all '01XX's. Mine has a round connector right near the fuel rail. Dusty at Power Commander told me that this is where to hook up the PCIIIUSB, but I didn't see it. I only saw the two rectangular wiring looms/connectors that are located farther back under the tank.
Don't buy anthing yet. Let me piss off a few hundred more dollars for you first.
Son of a 'you know what!' :icon_wall:
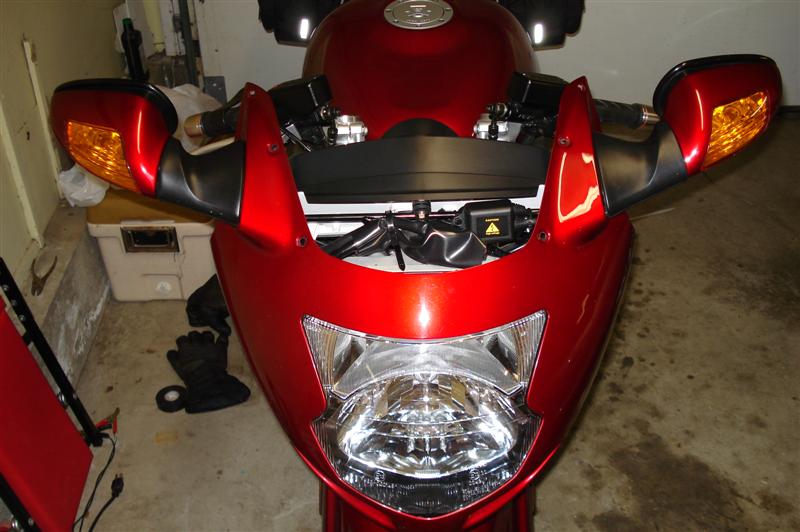
BTW folks, Yes I know the turn signals don't match. Clear Alternative have already been shipped. Can I piss off money or what.
Screw it, I work hard for it. Just keep me behind servers and workstations for now on. I just about killed myself getting that tank off, air filter in, and HID installed.
Where's the Tylenol!
Nice looking screen!
Thanks! The looks of my ZG are perhaps better in form with the XX, but the new screen is the sh't for blocking the wind and getting under at high speed runs. No head bobble at 150+... Uhhh, I mean +5 over :icon_shifty: .
-
If I remember correctly, there is no way in hell that screw under the mirror assembly will come out until you remove the two screws holding it to the upper fairing. That was my experience anyways.
My 2 cents.
-
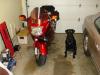
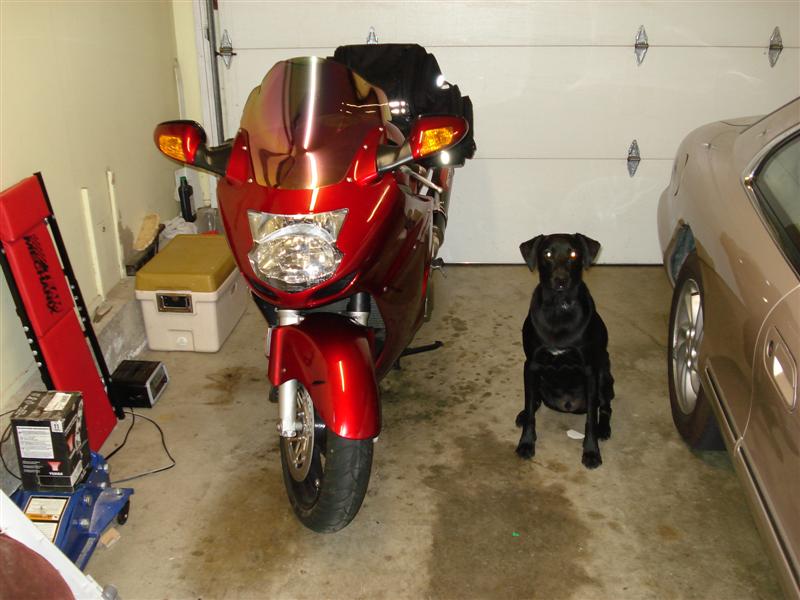
Yeah, he's a heck of a good dog. Lab mix from what the shelter told us when we picked him up at 10 weeks old. We still haven't found out what he's mixed with. He is a natural from day one at fetching. Brings it back without a fuss every single time. Hence the 'retreiver' name maybe :icon_think: . He even 'points' natually. I didn't even know what he was doing until I brought him to an 'all lab' dog park. One guys said, 'he points already, good trait' I was all smiles, "that-a-boy there Lucky!!!"
Dog are cool

-
As most of yous know, the FI birds' OEM header pairs 1&4 and 2&3, while the carbed birds' OEM header pairs 1&2 and 3&4 on the downpipes. Akropovic's 4-2-1 follows suit, with different configurations for carbed vs. FI birds. OTOH, Micron 4-2-1 headers use the original 1&2 and 3&4 pairing for both carbed birds and FI birds.
So, last I looked, the Power Commander site has a map for an Akro 4-2-1 for the PCIII, but no PCIII map for the Micron 4-2-1. Seems to me that there would be a difference in tuning between the Akro and Micron 4-2-1, due to the different cylinder pairings, but I could be wrong. Anyone know if there's another map that's a better fit for the Micron than the Akropovic, or have a custom map for the Micron piping? Only mod is the pipe, air filter is stock, bike is a 2003.
TIA
I would save up a little money a get it dyno'd with that setup. Micron's are sweet IMHO. I have dualies, but 4-2-1 should really give you some nice power and sound if you can get it tuned well. I love Micron's, it's my second set on my second bird. Nice little grumble idling and scream that the hoe's they are at WOT
 .
. -
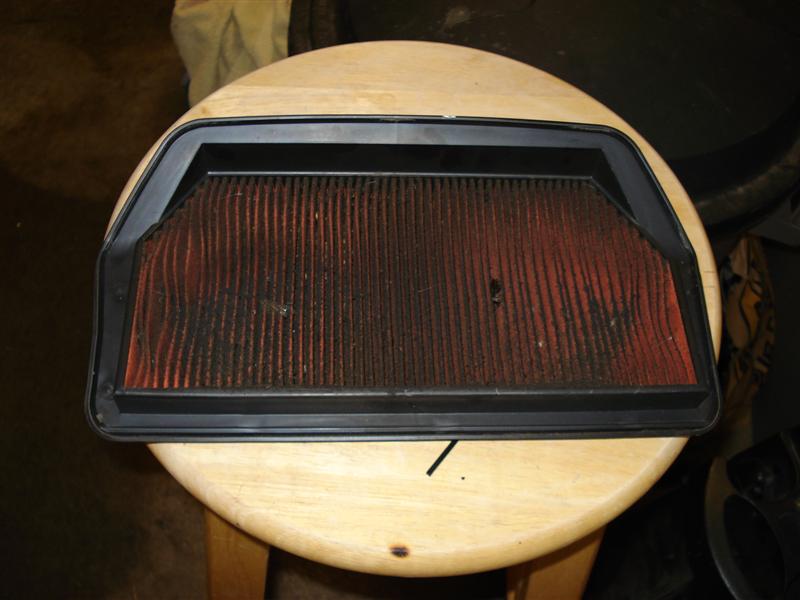
After pulling the tank completely off to install a K&N (what a pain the FI bird is compared to the carb'd model)
For future reference, it's not necessary to remove the tank to replace the air filter. Just prop up the front and swap it out, ten minute job, tops.
And yes, you're a dumbass.

Now, now... I like to do a thorough job when I do anything.
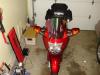
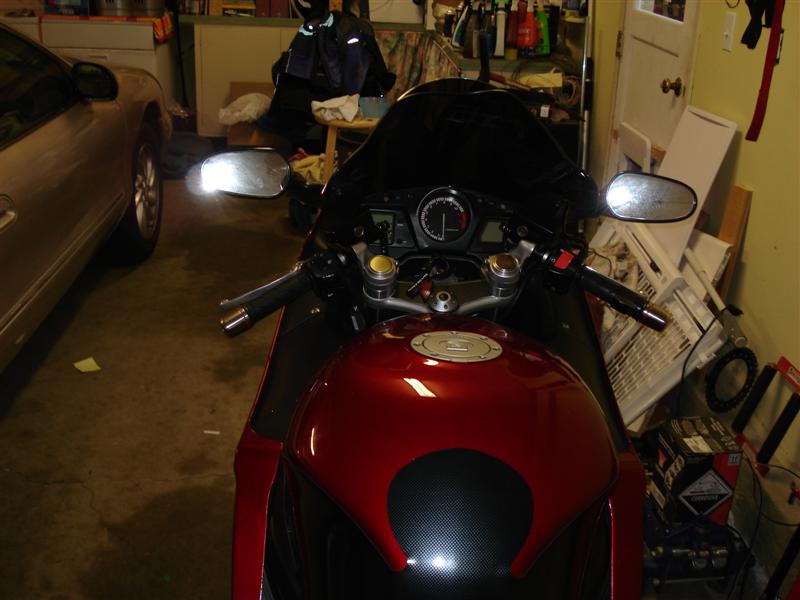
I had to pulled out the stock rubber seal, clean (and in my case vacuum the bottom of the box, tar rocks and stuff were in there?), and grease the seal before dropping in a K&N for the first time. Can not be done with my gorilla hands, without taking off the tank. Not to mention, the bike is new to me, I really needed to stip off everything once to see what I had bought. All is actually pretty good. All the water, fuel, vacuum and breather lines looked good. Knowbody screwed with anything far as I could tell. The throttle bodies were just filthy at the butterflies (if that is what they are called). I cleaned everything up, installed my HID (upper only... long story), changed the oil and filter again (only 2k on it, but f it
 ), and finished it off with a Aeroblade windscreen (good wind blockage btw).
 After a while my back started giving out, so I gave up on the rest
 . Now, my fingers are swollen, back is screwed and I retired to my lazyboy to ice my back while now.
 2001 Redbird is looking good though! She even pulled a sweet powerwheelie in 2nd for me on just throttle for the first time
. My blackbird did that all the time, but this one never would without clutching it up.Old Man now
Obby
Here's a few pics to keep my story interesting...
[attachmentid=1184]
[attachmentid=1185]
[attachmentid=1186]
[attachmentid=1188]
Do you think this was ready
.[attachmentid=1187]


-
After pulling the tank completely off to install a K&N (what a pain the FI bird is compared to the carb'd model), I notice the FI injection harness connector for the PCIIIUSB 113-411 WOULD fit! :icon_wall: .
Fuck me! I had a PC IIIUSB right in my hans, then sold it because I was looking at the wrong wiring loom/harness connetors under the tank and figured it was the wrong application.
Now I have to try to find another one for $150 bones, like that will ever happen again
 .
.Totally pissed with myself!
That's all
 .
.PS. Now I have to appologize to Rusy at PowerCommander as he was right all along. Damn it all!
-
You can shoot Andy an email. He'll let you know. I can tell the color is more white on mine. The 5300k one's were definately more bluish in color.
-
I added HIDs to both Hi & Lo beams ('99). I put an in-line illuminated (red) toggle switch in the Lo beam (factory) wiring and mounted it on the lower dash facia trim, just below the speedo (at about 11 o'clock as you look past the ignition switch). In the "Off" position (dark), the headlight is off (key on). I start the bike in that mode - somewhat surprisingly, staring has become much improved - almost instantly. After I let it warm up a bit, I toggle the switch "ON" (it illuminates) and the HID Lo beam fires up. My voltmeter registers no drop in voltage. I'll not likely forget to activate the Lo beam because the illuminated switch is right in my field of view anytime I glance at the dash. The Hi beam HID activates via the stock switch.
So far - no problems whatsoever...
When I turn my HID on it goes bright instantly then dulls for a few secs and gardually get to bright again, is this the way it is supposed to work ?
When new the HID need to go through a burn in phase. If you're charging system is good, you should have no problems after a couple of hours run through them.
-
I've had both the 5300k (on my '97) and the 4300K (on my '01).
Here's a few pic of my HID 4300K setup if that helps...
[attachmentid=1171]
[attachmentid=1172]
[attachmentid=1173]
[attachmentid=1174]
As for the connector's... Can't answer that, never used them, just plugged in the spades into the OEM connector's and taped them up.
Got HID?

-
I'll have it apart in the next week and check it out.
-
The last four digits of the DOT tire code on the sidewall show the year and week that the tire was manufactured. For instance, a tire stamped 3205 means the tire was made in the 32nd week of 2005.
My question is....its been so hot here, that in the afternoon when I check the tires I have in stock on my porch, they are already sticky.
Does each day count as a heat cycle?
That's a pretty cool fact.
So I guess I'll have another tire coffee table? :icon_wall:


Windscreen...too lazy to research
in The Garage
Posted
I recently put on an Airblade screen. It has better wind cover than the ZB DB for someone as tall as me (6'2").