
cecome
-
Posts
1,991 -
Joined
-
Last visited
-
Days Won
3
Content Type
Profiles
Forums
Gallery
Events
Posts posted by cecome
-
-
Hobi set me up, check with him!!
-
got mine from Jaws they did a great job!!
-
Can it be duplicated while in the garage? If not maybe as was mentioned the chain or sprockets. Just shooting from the hip here. Let us know.
-
I have a pair with about 10k miles on them from a 97...if you're interested LMK what you want to pay + shipping.
-
Sent the bird in for a full tune up and valve adjust @ 31k miles.
Valves (no adjust needed), plugs, timing, carb remove and clean, new fuel filters, petcock diaphragm leaking vacuum and replaced. That's all.
Did not realize how much it had fallen off until riding it. Lordy mama, she's so smooth and fast now, it's a real effort to keep her below 90. This bike is the tits again. Money well spent.
Hate to ask but what was the cost??
-
what is fair?? LMK with shipping to 91320 and you might have a buyer. It looks pretty good to me.
-
anybody running heli's with genmars on a 97??? wondering how much it would take to make it work.
-
Not sure if this will work...
-
I think I might be able to pull that off.
-
She looks properly shined. Nice work. Good luck on the sale. It is a deal for the right rider.
-
mine is toast. LMK if anyone has one to part with and how much with shipping to 91320. no ecu=no bike.
-
sorry I forgot to go that far...but thanks for pitching in.
-
where are you located I'm just north of LA county.
-
Paid 66 shipped to the USA. Had great communication and support. Took less than a week to get to the west coast. Toni was very helpful. Would not think twice about working with them in the future. Completely exceeded my expectations. And the mirror extenders are excellent as well.
-
 1
1
-
-
I know you are proud of your bike in the same way that I am of mine ...but maybe a wipe down before pics...Dave K would never go for this. http://images.craigslist.org/3E53Fa3He5I45...9a56a0c18f0.jpg
-
any one else got a pair...if these are gone....I'm in need and tired of the work it takes without them...PLS PM me and I'm a live buyer.
-
1) Put the bike on the center stand
2) Remove the front fender
3) Remove the handle bars/clip ons. Loosen the allen, wiggle them up and loose. Make a note of what lines run where, you will be thankfull when you're re-assembling everything.
3) Loosen (break free only!)the bolts on:
The front wheel (4 12 mm bolts, 1 22 mm big bolt.
Both brake calipers, including the ones for the LBS and the lines.
Using a 24 MM socket, loosen the fork caps.
4) (if you have a front end stand, that goes inside the steering stem, you can skip this step)
Put a block of wood on your jack, and roll the jack under the oil pan and jack up the front end until the front wheel is off the ground. The bike should be pretty stable. if it wobbles on the wood, re-position it and try again.
5) Remove the brake caliper bolts on the right side of the bike, and work the caliper loose.
6) remove the 22 mm nut holding the axel in place, and pull the axel out. Make a note of where the spacers in the wheel are, you will thank me later.
7) Remove the rest of the caliper bolts from the fork, loosen the 10 mm bolts where ever the brake lines mount to the fork tubes.
8) Once you have all the brake lines free, there's a 14 mm and an allen holding each fork tube in place. Loosend the fork tube, and it will drop right out.
9) Before you do ANYTHING ELSE, spray the fork tube down with Honda Polish (or equivalent) and clean up any bugs/dirt/etc that might be on the tube. This will help keep your seals from leaking.
10) I remove the allen bolt from the bottom of the tube when I do mine. I just makes emptying them so much easier, and certainly more thorough. I usually need to take the fork, and putting the base in my vise, I can usually just break it loose. I do each side. IF it will spin but not come free, I take it out of the vice and with it upside down (note, I have not removed the end caps yet!) I push down on it, and turn the allen. That usually works. As long as the end of the allen isn't boogered up, you can also try using a longer Allen with an impact wrench, and spin it out.
IF the end is boogered up, I just remove the fork top, since getting it out is going to be a giant pain.
11) With the allen out, when you turn the fork over, oil will start to leak, so put the end in a bucket ,and remove the top fork cap (you loosened it before you dropped them, but you may still need to put a wrench on it to get it to come free. Once you get the cap loose, the oil will flow pretty quick. Find the brass washer behind the allen bolt, sometimes it gets stuck up inside.
12) To pull the cartidge out, you will need a 14 mm wrench to loosen the nut under the fork cap. Loosen the nut, and the cap will come all the way off. You can then pull out the spacer and spring. Make a note of the order and orientation of the spring, so you can put it back together the same way. (as I remember, it's narrow end down)
13) Pull the cartidge out, and pump it a BUNCH of times. You will find that it takes quite a bit to get the oil out of it. I have been known to spray it down with brake cleaner to clean it up, too.
14) I usually clean up the spring and spacer as best as I can, using a shop towel and occasionally using some brake cleaner. In the end, you want to make sure everything's as clean as possible.
15) When cleaning inside the fork tube, it's usually a good idea to rinse it out a bit with oil too. You also want to clean the underside, where the allen bolt will seat with the brass washer. It's a good idea to plan on replacing the brass crush washer. I've reused them on a regular basis without incident, but I did have one incident where it leaked. As it turned out, I had not cleaned the underside well enough (Where the brass washer seats, and it left enough dirt on there that it leaked.
16) To re-assemble, first put the cartridge inside the fork tube. I usually put the spring and the spacer/washers in as well, without oil, and put the fork cap in place, too. Then I start the allen which holds the cartidge in (see above about the brass crush washer and getting the dirt out of there!) until it's tight. Pushing down on the fork tube, compressing the internal spring, is usually good enough to get it to snug down nice and tight. Your shop manual will have a torque spec, but it's been my experience that it's usually worth taking down to the vice and making sure it gets nice and tight.
Note: some people like to put permatex on the bolt for extra leak protection. Like I said, if you get the surfaces nice and clean, you should be OK, but it's your call.
17) Once the cartridge is back in, you take the fork cap off, and remove the spacer and spring, too.
There's 2 schools of thought as to how to fill the tubes with oil:
1) Measure with a graduated cylinder.
2) Over fill and use a Mity Vac to extract any extra.
Because the only way to know if you got it full is to measure how much oil's in there, I use the 'Over fill and Extract" method, as taught to me by Redbird. I don't remember the stock height (230 MM comes to mind, but I will check my manual when I get home and update the post. EDIT 142 MM, not 230!) But basically here's the process:
Fill the fork tube most of the way up with oil. Pump the inside cartridge up and down about 20 times. After the first few times, you'll find that it gets much tougher to move, as it's filling up with oil. Try to work it the full length of travel. After you're sure you got all the air bubbles out, you're done.
Tape a piece of wire with the tube on your Mity Vac (to keep the tube straight). Measure from the bottom of the tube up to the height you want it to be (so.. 142 mm, or 14.2 cm) and mark the tube. A smart guy bends the wire so it can hook on to the tube, but make the mark as accurate as possible.
Holding the fork upright, without the spring or spacer in there, with the tube all the way DOWN, (having a helper here makes it much easier) put the Mity Vac tube inside the fork tube down to your mark. Now suck out any extra fluid, holding the tube at the mark the whole way. When you start sucking air, you've got it to the proper level.
[uPDATE 4/23/2008: According to my service manual, for 99-03 XX's, that number is 142 MM, or 5.6 IN, not 230 as previously posted]
After that, it's pretty straight forward:
18) Put spring, washer and spacer in fork. Tip: Pull up on the inside cartridge first.
19) Attach cap to the cartridge top. Spin down to the to pof the 14 mm nut. note that the goal here is to get them even. so make sure the nut is at the same level (and tight!) on both sides.
20) Push the cap into the tube, and tighten. This can be somewhat tricky, and a helper is usually good here if you need someone to hold things. If you dont' get it super tight, that's fine, just get it snug.
21) Put the fork tube back in the bike. Raise it up until it's 1.5 inches (I will dig up my manual, as listed above, but that's what I remember) fromn the bottom of the fork cap to the top of the triple tree. Tighen down up at the top tree first (because it's easy to get to) but don't forget to tighten the 14 mm bolt on the lower tree, too.
When fishing up the forks through the trees, pay special attention to the position of the wires and brake/clutch lines, they should be where they were when you pulled the fork out.
22 ) Once the forks are back in the trees tighten down the caps one more time, now that you can torque them properly.
23) Replace Handlebars - Do not pump brake handle, though!!!
24) I usually take this time to spray the brake calipers with cleaner and push the buttons/pads back inside the caliper. Makes assembly easier, and you'll be amazed at how good your brakes feel for a while
25) Install brake line bolts in the forks, and put the front wheel on (check direction of spin) Snug the front axel bolt, but not the 4 pinch bolts.
26) Lower the bike off the jack. Torque the front wheel bolt.
27) Install the brake calipers. Note that while a properly torqued bolt shouldn't fall out, I would recommend using at a minimum blue loctite on the caliper bolts. I HAVE had them fall out.
28) Pump up the brakes. Make sure they are nice and working.
29) Using the brakes, bounce the bike on the new forks.
30) Tighten the pinch bolts on the fork tubes. (Yea, I know, it's silly, but that's how the manual says to do it)
31) Replace the fender.
As with any major change to the bike, before you go balls to the wall, take it easy for a bit on your first trial ride.
How long do you think it would take someone who has never made the attempt before? I plan on working with rideonXX and letting them hang overnight but maybe not pulling the carts themselves...also thought about throwing some cleaner in the night before the forks are pulled...any thoughts?
-
3 hundy gets me the puter and a handy?? how am I going to explain this on paper?
-
hobie set me up talk to him.
-
thanks man....I have a road trip in the near future and this will help. do you sell any valving kits??
-
any one know the OD and id of a washer that will work for adding a 1/4 to 1/2 inch for my font end???
-
forks are waaaaaaaay toooo loooooose
-
Bumpity bumpity! Thanks 97! Does this mean that once i sell my bike, Im not deserving of lurking with the cool bike owners? I really dont want to be a hooplehead with a bunch of new assholes that own suzukis. Surely theres posers here i can blend in with?
$3000
This thing has got to go before I move. I hear the hastle of craigslist calling already.
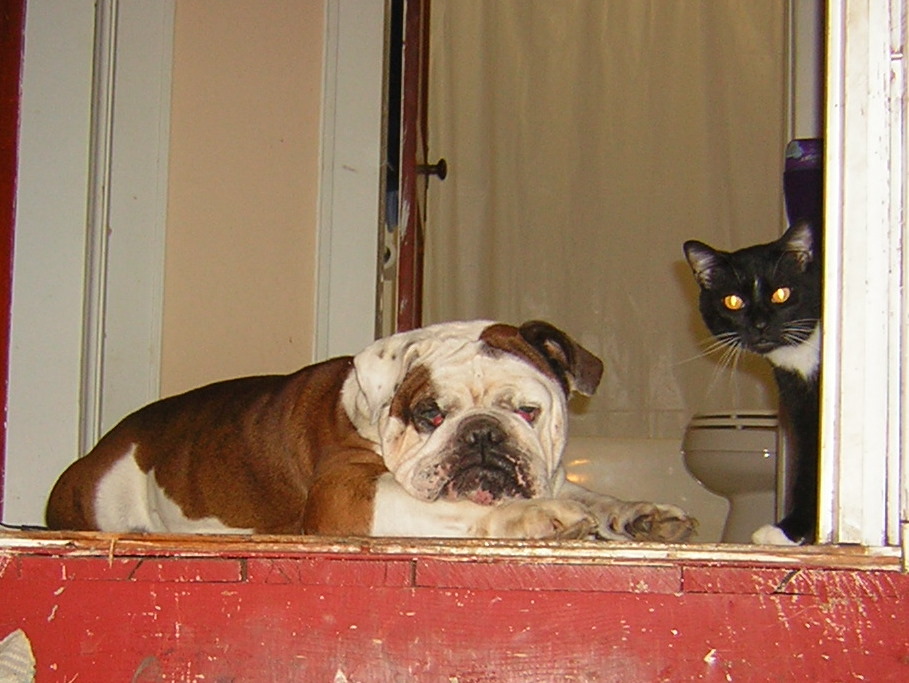
btw: My beast avatar is still alive and kickin. Near blind, stupid, awake 3 hrs a day and rotting from the inside! perfectly normal 10yr old bulldog.
If you might be willing to seperate the parts what about the synch tool shipped to 91320???
-
PM sent on motor.
I'll take the sliders please.
Looking for a 2nd Bird
in The Sales Floor -- For Sale/Wanted
Posted
Whould an fi be better with the altitudes there