blkbrdrydr
-
Posts
437 -
Joined
-
Last visited
Content Type
Profiles
Forums
Gallery
Events
Everything posted by blkbrdrydr
-
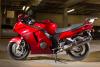
*SOLD* 2001 CBR1100XX For Sale - $4,000
blkbrdrydr replied to blkbrdrydr's topic in The Sales Floor -- For Sale/Wanted
Thanks for your note--picked up today. -
*SOLD* 2001 CBR1100XX For Sale - $4,000
blkbrdrydr replied to blkbrdrydr's topic in The Sales Floor -- For Sale/Wanted
Sale Pending! -
*SOLD* 2001 CBR1100XX For Sale - $4,000
blkbrdrydr replied to blkbrdrydr's topic in The Sales Floor -- For Sale/Wanted
Thanks for the bump--she's still for sale if you've got room... Thanks--and yep, I didn't price out the parts (hate those ads where people think $X,XXX IN MODS!!1! means their machine is worth $X,XXX + the cost of the bike), but there certainly is some added value here for the right buyer (or the ability to take off and sell unwanted parts). As to the suspension, it's roughly set up for a 200lb. rider. -
*SOLD* 2001 CBR1100XX For Sale - $4,000
blkbrdrydr replied to blkbrdrydr's topic in The Sales Floor -- For Sale/Wanted
Thanks for the bump--and the brackets! -
*SOLD* 2001 CBR1100XX For Sale - $4,000
blkbrdrydr replied to blkbrdrydr's topic in The Sales Floor -- For Sale/Wanted
It's for a ball and socket GPS mount. Thanks! -
*SOLD* 2001 CBR1100XX For Sale - $4,000
blkbrdrydr replied to blkbrdrydr's topic in The Sales Floor -- For Sale/Wanted
Good eye--this Bird also comes with mirror extenders and a carbon fiber stator cover. Additionally, "MRE VarioTouring Windscreen" should be "MRA"... -
*SOLD* 2001 CBR1100XX For Sale - $4,000
blkbrdrydr replied to blkbrdrydr's topic in The Sales Floor -- For Sale/Wanted
Thanks! -
*SOLD* 2001 CBR1100XX For Sale - $4,000
blkbrdrydr replied to blkbrdrydr's topic in The Sales Floor -- For Sale/Wanted
Thanks for the kind words--I can tell you from experience that this Bird would be totally ready for it; set the Throttlemeister, stop for gas in 200 miles, repeat as necessary. -
*SOLD* 2001 CBR1100XX For Sale - $4,000
blkbrdrydr replied to blkbrdrydr's topic in The Sales Floor -- For Sale/Wanted
Thanks for the bump! Have to say, I was half-tempted to title this "Touring Blackbird Starter-Kit"... -
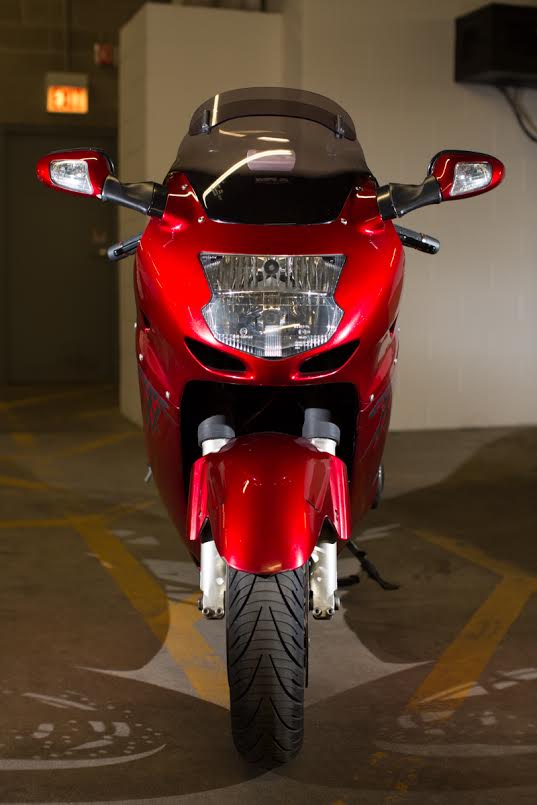
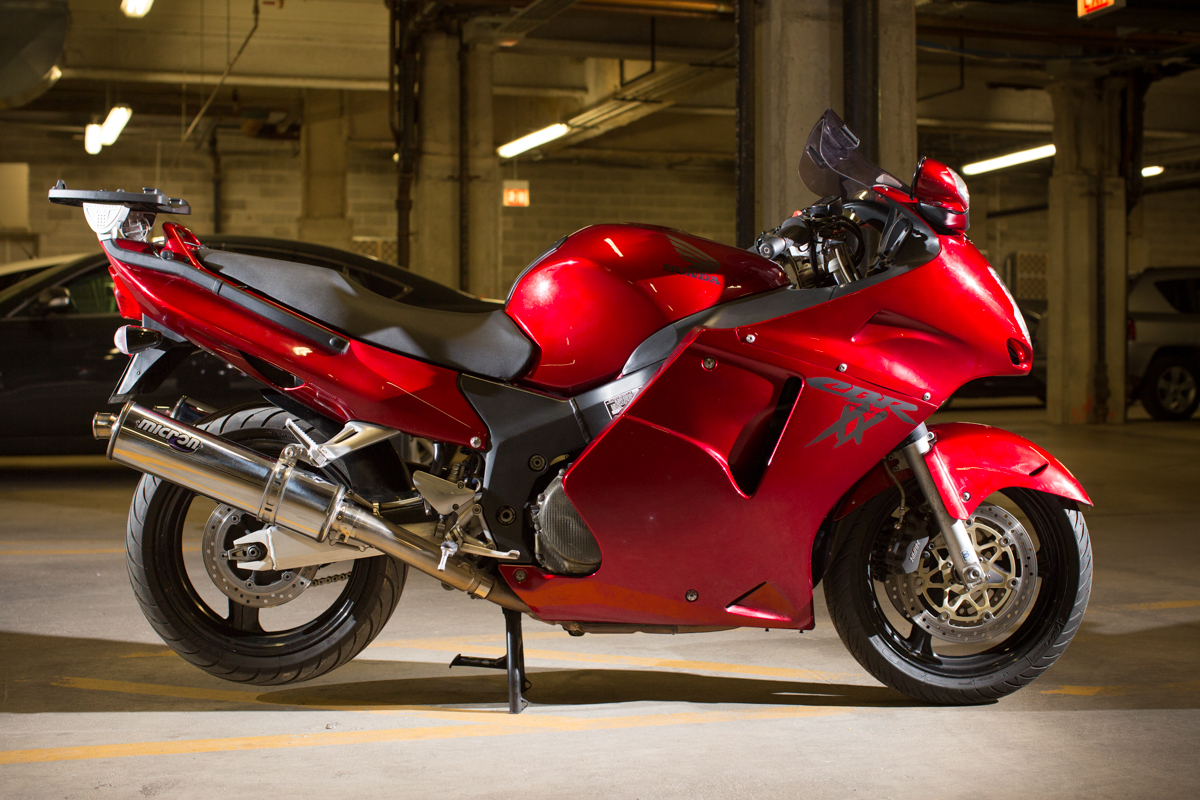
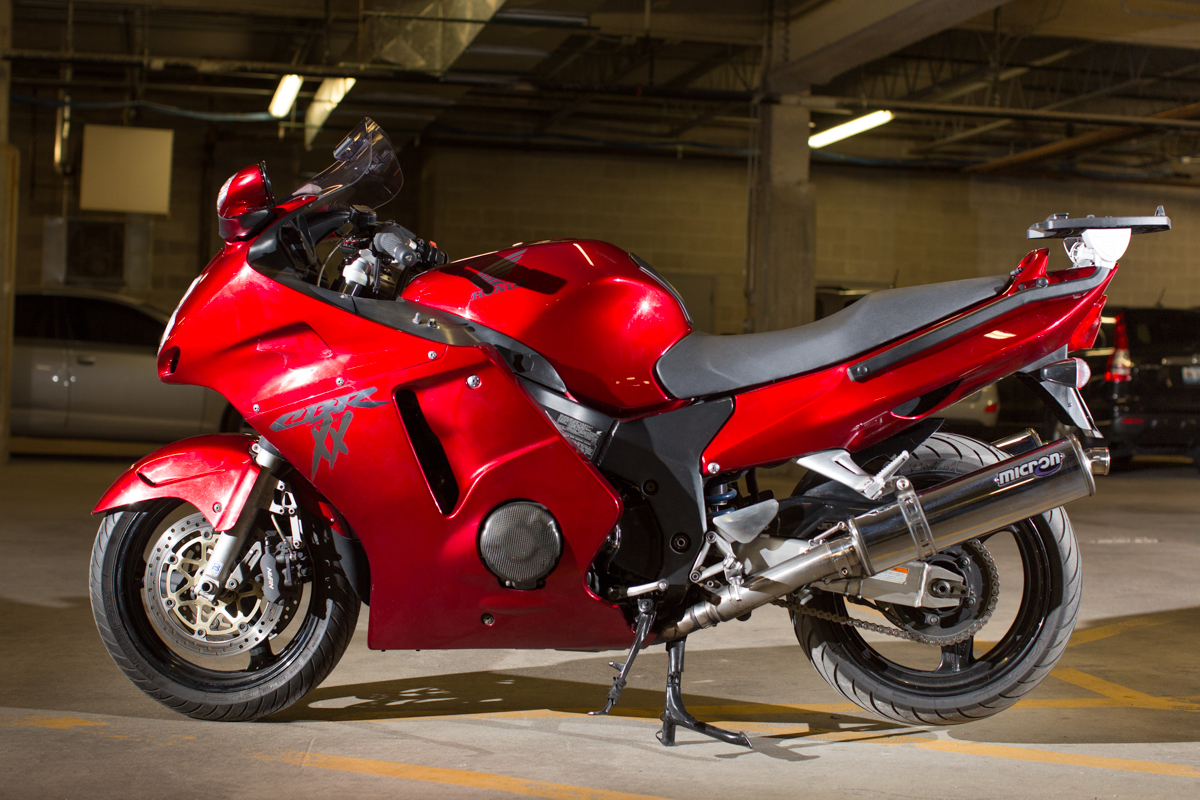
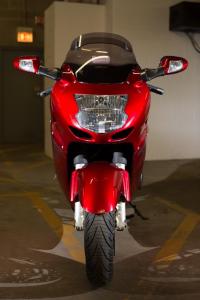
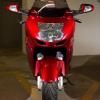
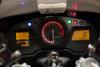
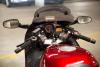
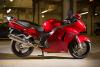
SOLD. Thanks for the kind words all! This Bird was purchased new in July of 2001, and spent the first twelve years of its life with my father who set it up to be an exceptional sport-tourer and meticulously maintained it as a second, or sometimes third, motorcycle. In the Spring of 2013, it then made the move out to Chicago to live with me, where I’ve since used it to get my first Iron Butt Association certificate and take a number of great rides around the Midwest. She's never been raced or abused, runs flawlessly, and is simply a great motorcycle. In a perfect world I’d keep it forever, but I only have the space and the budget for one motorcycle, and I’ve decided a Triumph Tiger 800XC is a just better fit for the city jaunts that make up the bulk of my riding. The Vitals · $4,000 with numerous long distance/sport touring add-ons included; · Clear title; · 68,xxx miles; · Garage kept, covered, and Battery Tender'd; · Meticulously maintained with full service record; Add-Ons (included in purchase price) · Penske 8983 Rear Shock · Micron Slip-Ons · Corbin Gunfighter & Lady (stock seat also included) · MRE VarioTouring Windscreen (stock windshield also included) · Pazzo Racing Short Levers (Black w/ Red Lever Adjuster) (stock levers also included) · Throttlemeister “Heavy” · Speed Bleeders (SB8125L) · Scottoiler (+ DID 110 Link Nickel Plated Chain (ZVM2 530)) · Pyramid Carbon Fiber Hugger + Fenda Extenda · Bike Johnny Clutch Cover · Delinked Brakes · VFR Interceptor Clip-ons · GenMar Risers · Dave’s Lowering Pegs · Datel Voltmeter · Clear Front and Back Turn Signals (CTS-0025-C Fronts / CTS-0005-C Rears) · Hondaline Tank Pad · Heat-troller + Wired for Heated Gear · Dual Star Heated Handgrips · Fork Gaiters · Tapered Steering Head Roller Bearings · Phillips 4300K HID Bulbs · Pre-Wired for Battery Tender Quick Connect · Air Horn · Honda Service Manual + OEM Replacement Air Cleaners + various OEM spare parts (e.g. gear shift rubber, pop rivets, etc.) Additional The Bird also currently has a Givi F248 Top Case Rack installed, which I'm willing to throw in. Depending on the purchaser's interest, my Givi E52 Maxia Top Case (w/ AdMore Lighting installed) may be sold for a reasonable additional price. Exterior Overall, the paint and plastic is in very good condition, and the Bird is cleaned after every ride. There are small scuffs on the right side of the front fender and the right bar-end from a tip-over in 2013—these are visible in the pictures, but I'm willing to provide close-ups upon request. Maintenance A full maintenance record has been kept, with mileage intervals, and service is up-to-date. Other than normal fluid and filter changes/inspection items, the more significant maintenance items are: · OEM Front and Rear Sprocket @ 34,500 Miles · Stator Replaced (Preventative Maintenance) @ 48,600 Miles · GP Suspension Front Fork Rebuild @ 57,800 Miles · Spark Plugs and Cam Chain Tensioner Replaced @ 61,900 Miles · Michelin Pilot Road 3 Tires (Front and Rear) @ 64,200 Miles · Yuasa YTZ12S @ 67,100 Miles · New Michelin Pilot Road 3 Rear Tire (took a nail to it a few weeks back) @ 67,950 I’m happy to answer any questions you might have—thanks for looking!

-
I had a set of Avon AV45/AV46 that lasted for over 10,000 miles. They were also incredible rain tires. Sadly, they're no longer available. I had a set of Avon AV55/AV56 Storms that I removed at 8,000 miles when I picked up a screw in the rear tire. I put on a set of Pirelli Angels that I'd taken off my FJR1300 a few years ago (when I installed Pilot Road 3's on that bike) I bought a set of Pilot Road 3s but hadn't mounted them until yesterday. My experience with two sets or Pilot Road 3's on my FJR1300 is that I can easily get 15,000+ miles. Over the years, I've had 2 sets of Bridgestones, Metzeler, 3 sets of Michelin Pilot Roads, 2 sets of Avons, Pirelli Angel ST and my absolute favorite was the discontinued Avon AV45/AV46 combination but I think that the Michelin Pilot Road 3 will work very well on the Blackbird.
-
Thanks for the answer and detailed explanation. I looked at all of the drawings in the shop manual and felt that this was probably a breather hose but wasn't able to find where the other end was.
-
No there isn't. The hose is also too short to reach anything where there could be an open connection point.
-
The pink towel was for contrast in the photo. DUH!
-
After owning my Blackbird for 11 years and for all the times that I've had the tank off you'd think that I'd know the answer to this question but... I'm not certain. I noticed that this brown hose was not connected to anything and I'm not certain if it's a breather hose or what. I think that it's one of two hoses that connect to the Wax Unit and according to the hose routing diagrams in the Service Manual, it appears as if this doesn't connect to anything but, can someone confirm that it's a breather hose? It's the brown colored hose that's running through the black side of the black and white hose clip. Thanks,
-
The Service Manual is referring to where to put liquid gasket sealant on the Ignition pulse generator cover gasket. I am the only owner of the bike and no one has touched the bike except me so it's more likely that the bolt was defective. The two of them were surprisingly difficult to remove and Honda seemed to have some sort of thread locker on the threads. More interesting is the fact that there are no torque values shown for those two bolts in the Service Manual but the size and location would suggest that they would only require 12 N-m or 9 lbf-ft of torque and... there's no suggestion for using thread locker on the bolts when they're reinstalled.
-
When I recently checked my valve clearances, 15 of the 16 were still within the required specifications and one intake valve was at .004". Originally, I planned on just leaving the single, slightly tight intake valve alone and just put the bike back together but work and other things interfered with my plans and the valve cover is still off. Of course, I've had this time to think about how much effort it might take to change that single shim so here's my questions for the group: 1. How in the hell do I get a well-stuck cam cover off? I've removed the 10 bolts according to the instructions in the Service Manual and I can't get it to release. I've also tightened the bolts in the correct pattern, torqued them correctly and tried a second and third time. So... what's the secret? 2. After taking the tension out of the CCT, can I just leave the cam chain on the cam sprockets and move the cam to the side in order to change the shim, rather than lifting it out and having to risk not getting it back in the exact, correct position? This seems to be the method that's commonly used with the FJR1300 but I've never read about anyone doing it with the Blackbird. 3. I also decided to install a new Ignition pulse generator cover gasket and would like to know what the Service Manual means when it says to use a liquid sealant like Threebond at the bolt threads with a coating width: 6.5 +/- 1 mm This was also really interesting, when I was loosening the two bolts that hold the cam chain, Guide B (the one that's over the top part of the sprockets), one of the heads twisted right off of the bolt. Fortunately, I was able to remove the remainder of the bolt that was still inside of the head but it really made me wonder why that bolt snapped off and what might have happened had that occurred while the motor was running. Holy Shit! Thanks
-
I flipped up the fuel tank and rested the back of the tank on the towel/padding that I put over the battery and had all the clearance that I would have had if I'd completely removed the tank. I drained the radiator because I was planning on changing the coolant anyway. Once it was empty, I dropped it, and the oil cooler down so that I could get that little wind tray out of the way. I suppose that it would be possible to get the valve cover off without removing that tray but I didn't bother trying to do it. It was just easier for me to remove the thing. I took the two bolts out of the bracket that holds the throttle cables and that also gave me all the room that I needed to lift the valve cover and to reinstall it when I was finished checking the clearances. After 61,903 miles, every valve was within specs except for one of the intake valves on Cylinder #4. That one is a .004" and I'm sure as hell not pulling the camshafts to shim an intake that's just a tiny bit tight. The gasket stayed perfectly attached to the valve cover so there was no drama reinstalling it. WHEW! To make sure that I got as much junk off of the valves and had them as clean as possible before checking the clearances, I injected a can of Sea Foam directly into the four Vacuum Joint Screws by replacing them with 5mm brass tubes that came with my old Motion Pro - SyncPRO Carb Tuner. When I give a Sea Foam enema to the FJR1300, the engine will die after sucking about 1/2 of the can. The Blackbird drank the entire can and never died. However, after shutting off the bike and letting it sit for about 15 minutes, the smoke was absolutely unbelievable. I called the local fire department and told them what I was going to be doing in the event that anyone in the neighborhood called 911 to report that a house was on fire. While the 5mm brass adapters are connected to the motor, I may do the Throttle Body/Starter Valve Synchronization to be sure that all four cylinders have similar intake vacuum pressure and are fairly well-matched to the #3 cylinder. It's funny that Yamaha has Throttle Body Synchronization as a regular maintenance item and Honda doesn't.
-
Thanks Tim If the clearances are okay, will I be able to get the valve cover reinstalled without removing the radiator? I can get the fuel tank off my FJR1300 with minimal effort. Since the XX doesn't have a fuel line with a quick-disconnect, I suspect that it's a lot more complicated procedure. Guess that's why I've never removed the tank over the last 11 years.
-
I'm going to tackle the only job on my bike that I've never done myself and check my valve clearances. Years ago, Carlos did a write up on changing spark plugs and showed how to flip up the fuel tank and lay the back of the tank on the towel/padding that you put over the battery in order to gain more than enough clearance to remove the air cleaner assembly. I've used his method for 10 years and have never needed to figure out how to remove the tank from the motorcycle. Since that trick provides more then enough room to remover the air cleaner... will it also provide me with all the room needed to check my valve clearances? Will I have to remove the oil cooler and move the radiator in order to get the valve cover back on from the front or can it go in from the back?
-
Several years ago, I purchased a Fab Products Radiator Guard. I never got around to mounting it on my 2001 and completely forgot about it until I started rearranging and cleaning up my well-cluttered garage. The guard is NEW, has never been mounted on a motorcycle and is currently available from Fab Products for £65.00 or $102.42. Photos are available at my eBay auction: Fab Products Radiator Guard
-
SOLD
-
I was given a sample set of Wera screwdrivers, and was pretty blown away by the quality. Some had laser etched tips for grip, and some had diamond impregnated tips. Talk about secure. They also had way more configurations, tip types and grips, than I had ever seen. www.wera.de is the site, I think. I found them at an off the wall Tool Town or such like, and now I grab them first. Did you mean Wiha.de?
-
Great suggestion. I'd forgotten that there are more sizes of shims for the Honda than there are for my Yamaha. I do tend to ride year-round but I can ride the FJR1300 while the Blackbird is apart, and visa versa.
-
Thanks Tim. For some reason, I was afraid that I was going to get that answer.